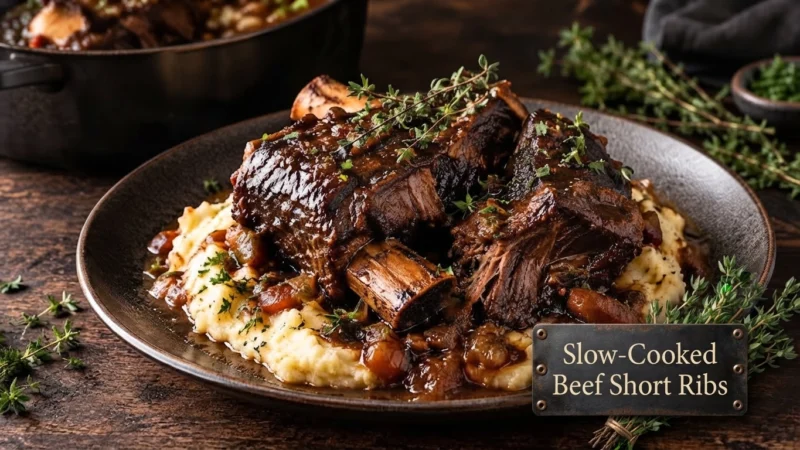
Slow-Cooked Beef Short Ribs
Slow-cooked beef short ribs are one of the best examples of what patience can do to a tough cut of beef. With the right method, inexpensive, richly marbled short ribs become exceptionally tender, deeply flavorful, and almost spoon-soft. The meat slowly absorbs the flavors of the cooking liquid while connective tissue breaks down into a rich, silky sauce.
This recipe is designed for beginners. You do not need advanced cooking skills, specialized equipment, or complicated techniques. What matters most is understanding a few simple principles: brown the beef properly, build flavor before adding the liquid, keep the ribs mostly covered during the slow cook, and cook them until they are truly tender rather than stopping when the clock says they should be finished.
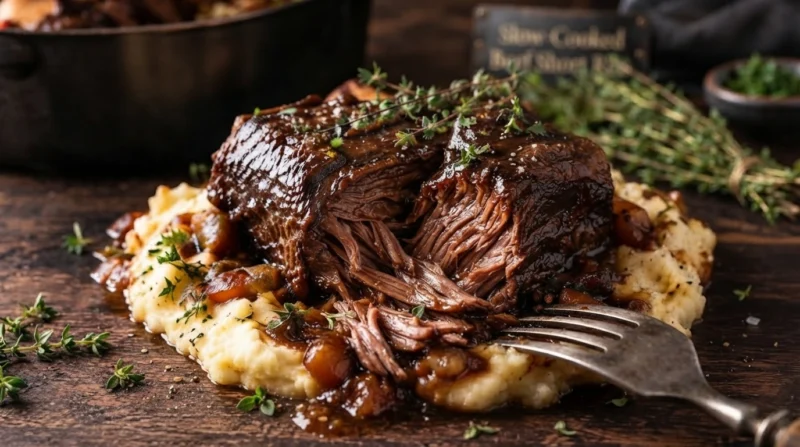
The result is classic slow-cooked beef short ribs with deeply browned meat, a rich savory sauce, tender vegetables, and a texture that practically falls away from the bone.
What Makes Slow-Cooked Beef Short Ribs So Good?
Beef short ribs contain a substantial amount of connective tissue and intramuscular fat. That makes them flavorful, but it also means they are not a cut that rewards quick cooking.
A steak can be cooked quickly over high heat because it is naturally tender. Short ribs are different. Their toughness is largely related to collagen, the connective tissue that surrounds muscle fibers.
Slow cooking gives that collagen time to gradually soften.
As the ribs cook gently in a moist environment, collagen transforms into gelatin. This gives the finished meat its characteristic silky, succulent texture. The fat within the ribs also melts gradually, contributing richness and flavor to the cooking liquid.
This is why properly cooked short ribs can be incredibly tender even though the raw meat feels firm and relatively tough.
The important lesson is simple:
Do not try to make short ribs tender by cooking them quickly. Give them enough time.
The exact cooking time can vary depending on the size and thickness of the ribs, the cooking temperature, the pot you use, and the individual piece of meat. The clock is useful as a guide, but tenderness is the final test.
The Best Cut of Beef Short Ribs for This Recipe
Short ribs can be sold in several different forms.
You may find:
- English-cut short ribs
- Flanken-cut short ribs
- Bone-in short ribs
- Boneless short ribs
For this recipe, bone-in English-cut beef short ribs are an excellent choice.
English-cut ribs are usually cut between the bones, leaving a thick piece of meat attached to each bone. They are particularly well suited to braising because the thick meat has enough structure to remain succulent during a long cooking process.
Flanken-cut ribs are sliced across the bones into thinner pieces. They are commonly used for grilling and other faster cooking methods and are not the first choice for this particular recipe.
Boneless short ribs can also work very well. If you use them, choose pieces with good marbling and enough thickness to withstand several hours of slow cooking.
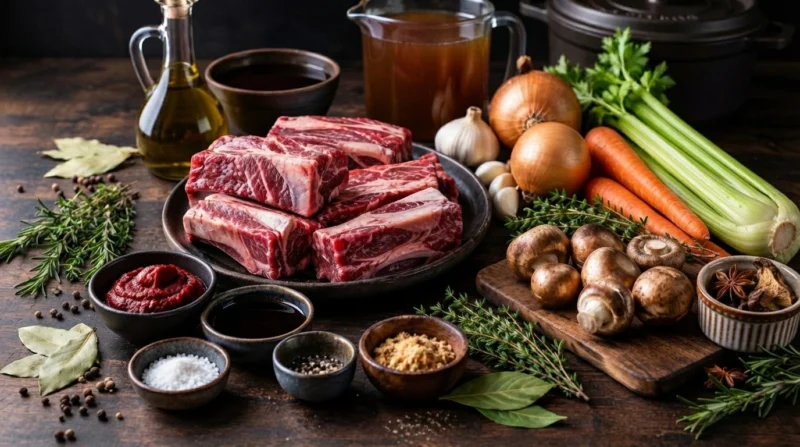
Ingredients
For the Beef Short Ribs
- 3½–4½ lb (1.6–2 kg) bone-in beef short ribs
- 2 tablespoons neutral cooking oil or olive oil
- 2 teaspoons kosher salt, plus more to taste
- 1 teaspoon freshly ground black pepper
For the Aromatic Vegetables
- 1 large yellow onion, diced
- 2 medium carrots, peeled and diced
- 2 celery stalks, diced
- 5–6 garlic cloves, finely chopped
- 2 tablespoons tomato paste
For the Braising Liquid
- 2 cups beef stock
- 1½ cups dry red wine
- 2 bay leaves
- 4–5 sprigs fresh thyme
- 2–3 sprigs fresh rosemary
- 1 tablespoon Worcestershire sauce
Optional Finishing Ingredients
- 1 tablespoon unsalted butter
- Fresh parsley, finely chopped
- Additional salt and black pepper to taste
https://yashkadesigns.com/chef-knife-home-kitchen-meat
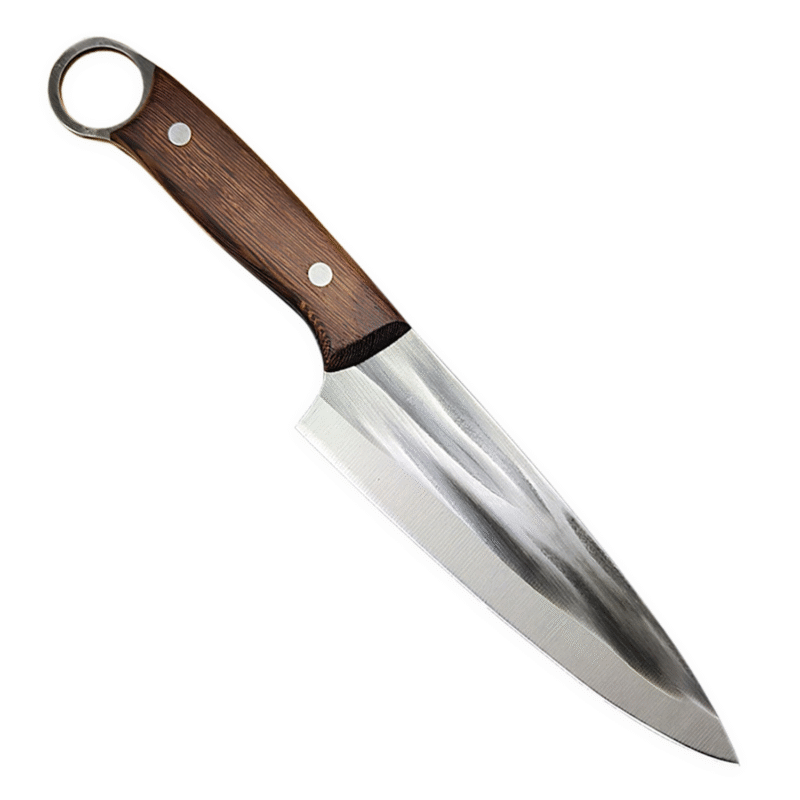
Equipment
You do not need a complicated collection of kitchen equipment.
Ideally, use:
- A heavy Dutch oven or oven-safe braising pot with a lid
- A sharp chef’s knife
- A cutting board
- Tongs
- Wooden spoon or heat-resistant spatula
- Measuring cups and spoons
- A ladle or large spoon
A heavy pot is especially useful because it distributes heat more evenly and holds heat well during the long cooking process.
If you have a Dutch oven, this is an excellent time to use it.
Before You Start: The Most Important Things to Know
Before putting the ribs in the oven, understand four basic principles.
1. Dry the meat
Moisture on the surface of the beef prevents good browning.
Pat the ribs thoroughly dry with paper towels before seasoning.
2. Do not overcrowd the pot
If you place too many ribs in the pot at once, they release moisture and begin to steam instead of brown.
Brown them in batches if necessary.
3. Browning is not the same as cooking the ribs through
You are not trying to cook the ribs completely during the searing stage.
The goal is to develop a deeply browned exterior and create flavorful browned bits on the bottom of the pot.
4. Do not judge tenderness too early
After two or three hours, the ribs may smell wonderful but still be tough.
That does not mean the recipe failed.
They may simply need more time.
Step 1: Prepare the Beef Short Ribs
Remove the short ribs from the refrigerator about 20–30 minutes before cooking.
You do not need to leave them sitting at room temperature for a long time. The main purpose is simply to take away some of the refrigerator chill while you prepare the other ingredients.
Pat every rib thoroughly dry with paper towels.
This step is more important than it may look.
Water on the surface of the meat must evaporate before the beef can brown effectively. If the ribs are wet, the surface temperature stays lower for longer and the meat can develop a gray exterior rather than the deep brown crust you want.
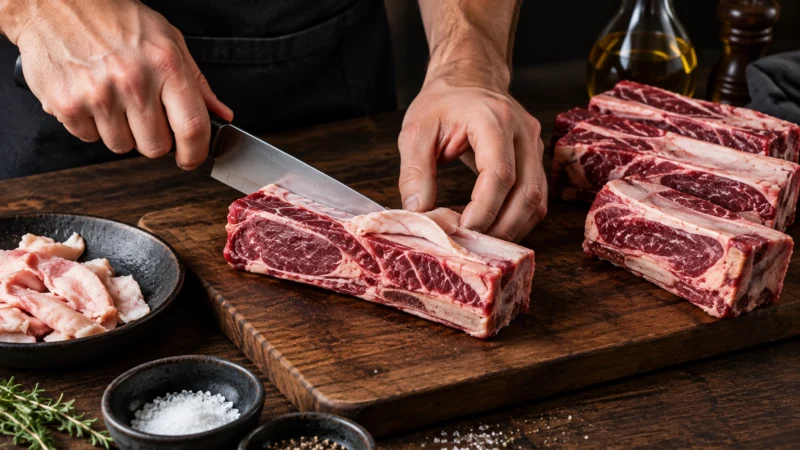
Trim away only excessive pieces of surface fat or loose connective tissue.
Do not remove all the fat.
Some fat is desirable because it contributes flavor and richness during the long cooking process.
Season the ribs generously with kosher salt and freshly ground black pepper.
Season all sides.
Step 2: Prepare the Vegetables
While the beef rests, prepare the vegetables.
Dice the onion, carrots, and celery into relatively small, even pieces.
They do not need to be perfectly uniform, but try to keep the pieces reasonably similar in size.
Finely chop the garlic.
The vegetables are not merely decoration. They form part of the flavor foundation of the braising liquid.
The onion provides sweetness and depth. Carrots contribute sweetness and aroma. Celery adds savory aromatic character. Garlic brings another layer of flavor.
Beginner knife tip
When cutting the vegetables, create a stable cutting surface first.
If an onion rolls around on the cutting board, cut it in half through the root end and place the flat side against the board.
For carrots and celery, trim the ends before cutting.
Keep your fingertips curled slightly inward when holding the vegetable. Your knuckles should guide the side of the knife while keeping your fingertips away from the blade.
A sharp knife is safer than a dull one because it requires less force and is less likely to slip.
Step 3: Heat the Pot
Place a heavy Dutch oven or braising pot over medium-high heat.
Add the oil.
Give the oil a little time to become hot, but do not allow it to smoke aggressively.
You want the pot hot enough to create strong browning when the beef touches the surface.
A simple test is to place one edge of a rib against the pot. You should hear an immediate, steady sizzle.
If there is little or no sizzling, the pot probably needs more heat.
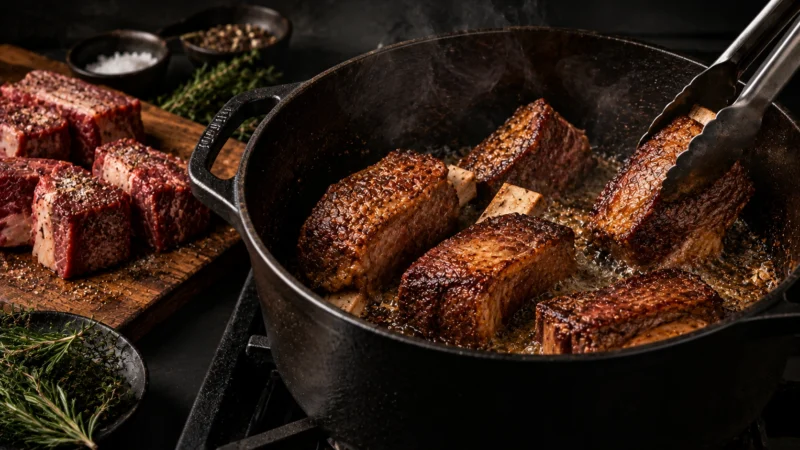
Step 4: Sear the Short Ribs
Place the short ribs into the hot pot.
Do not move them immediately.
This is one of the most common beginner mistakes.
Many cooks put meat into a pan and immediately start turning it. That makes it harder for a strong crust to develop.
Let the first side cook undisturbed for several minutes.
You are looking for a deep brown color.
The surface should move from pale red to brown and eventually develop a darker, caramelized crust.
Turn the ribs with tongs and brown another side.
Continue until several sides are well browned.
Depending on the size of the ribs and your pot, this may take approximately 8–12 minutes per batch.
Do not worry about cooking the center.
The ribs will cook slowly later.
What does good browning look like?
Good browning is not light beige.
You want a rich brown surface with darker edges.
However, black, bitter-looking surfaces indicate burning rather than desirable browning.
If the pot becomes excessively dark or begins producing acrid smoke, reduce the heat.
Step 5: Do Not Overcrowd the Pot
If your Dutch oven is not large enough to hold all the ribs comfortably in one layer, work in batches.
This takes longer, but it produces a better result.
When meat is crowded together, steam builds up.
Steam is useful later during braising, but not during the initial browning stage.
You want the surface of each rib to have enough contact with the hot pot to develop a strong crust.
Once the first batch is browned, transfer it to a plate.
Brown the remaining ribs.
Step 6: Build the Flavor Base
After removing all the ribs, look at the bottom of the pot.
You should see browned bits stuck to the surface.
These are extremely valuable.
They contain concentrated flavor developed during browning.
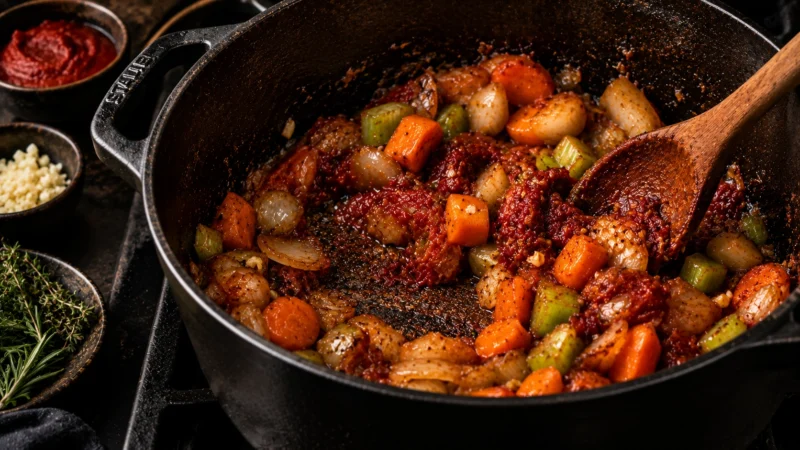
Add the diced onion, carrots, and celery to the pot.
If the pot looks completely dry, add a small splash of oil.
Cook the vegetables over medium heat for about 5–7 minutes.
Stir occasionally.
You want the onion to begin softening and the vegetables to pick up some of the browned flavor from the bottom of the pot.
Add the chopped garlic.
Cook for about 30–60 seconds.
Do not let the garlic burn.
Burned garlic becomes bitter quickly.
Step 7: Add the Tomato Paste
Add the tomato paste to the vegetables.
Stir it through the mixture.
Cook for approximately 1–2 minutes.
This step is often overlooked, but it makes a difference.
Tomato paste has a concentrated flavor. Briefly cooking it in the pot allows it to become deeper and less raw-tasting.
You should notice the color becoming somewhat darker and the aroma becoming richer.
Step 8: Deglaze the Pot
Now comes one of the most satisfying parts of braising.
Pour in the red wine.
Be careful because the liquid will immediately produce steam.
Use a wooden spoon to scrape the bottom of the pot.
Work patiently.
You want to loosen the browned bits that formed during searing.
This process is called deglazing.
The browned material on the bottom of the pot is often called fond. It is not burnt food when properly browned. It is concentrated flavor created through the cooking process.
Scrape the bottom until most of those flavorful bits have been incorporated into the liquid.
Let the wine simmer for several minutes.
You are not trying to evaporate every drop.
You simply want to reduce it somewhat and allow the sharp raw alcohol aroma to soften.
Step 9: Add the Beef Stock and Seasonings
Pour in the beef stock.
Add:
- Worcestershire sauce
- Bay leaves
- Thyme
- Rosemary
Stir gently.
Taste the liquid.
Do not add a large amount of salt at this stage.
The sauce will become more concentrated as it cooks, and the short ribs themselves are already seasoned.
You can adjust the salt near the end.
Step 10: Return the Beef to the Pot
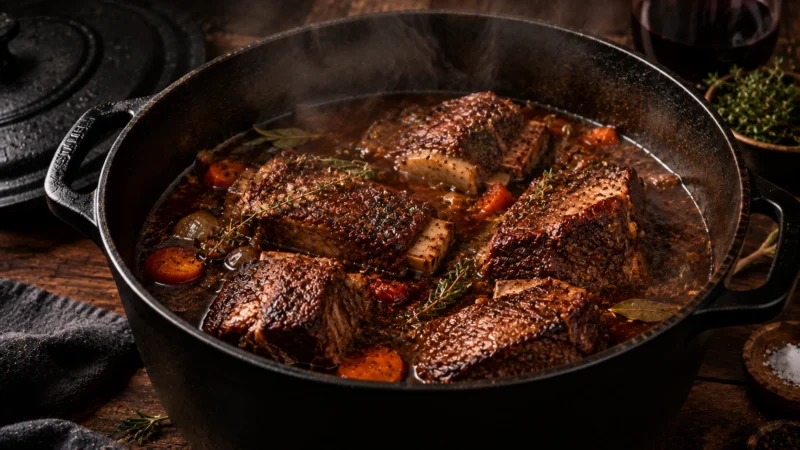
Place the browned short ribs back into the Dutch oven.
Arrange them so they sit comfortably in the liquid.
The liquid should come partway up the sides of the ribs.
The ribs do not need to be completely submerged.
This is an important distinction.
A braise is not the same thing as boiling meat in a large pot of liquid.
The exposed upper portion of the meat benefits from the moist, enclosed environment while the lower portion is surrounded by the flavorful liquid.
Step 11: Bring the Liquid to a Gentle Simmer
Increase the heat briefly if necessary.
Bring the liquid to a gentle simmer.
You are looking for small bubbles.
You do not want a violent boil.
Once the liquid begins simmering, turn off the stovetop heat.
Cover the pot tightly with its lid.
Step 12: Slow-Cook the Short Ribs in the Oven
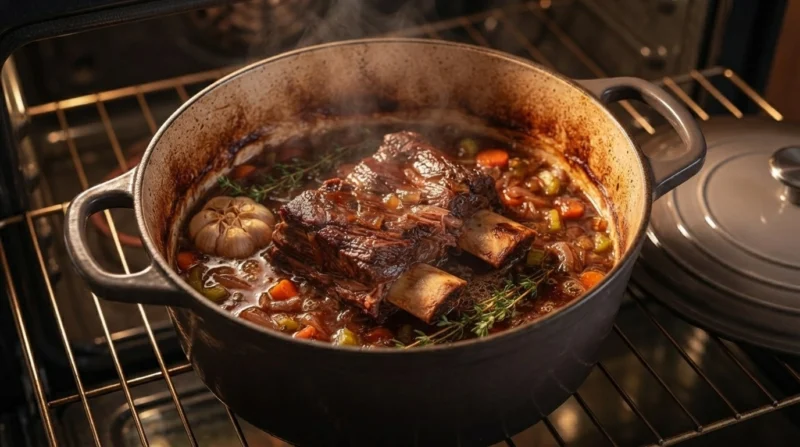
Transfer the covered Dutch oven to a preheated 325°F (165°C) oven.
Cook for approximately 3–4 hours.
However, do not treat this as an exact deadline.
The ribs are finished when they are truly tender.
During the first part of the cooking process, the meat will gradually soften as collagen breaks down.
Later, the texture changes more dramatically.
A properly cooked short rib should be easy to pierce with a fork.
A fork or thin knife should enter the meat with very little resistance.
The meat may also begin pulling away from the bone.
That is a useful visual sign, but it is not the only test.
The most important test
Insert a fork or thin skewer into the thickest part of the meat.
If you feel significant resistance, keep cooking.
If the utensil slides in easily and the meat feels soft and yielding, the ribs are ready.
Why Slow Cooking Works
Understanding what is happening in the pot makes the entire recipe easier.
Short ribs contain collagen.
When exposed to heat over time in a moist environment, collagen gradually converts into gelatin.
This gelatin gives the sauce body and contributes to the luxurious texture of the meat.
At the same time, the fat within the beef slowly renders.
The combination of gelatin, rendered fat, concentrated stock, wine, vegetables, and browned meat creates the characteristic richness of a good short-rib braise.
This is why rushing the process usually produces disappointing results.
A short rib that has been cooked for two hours may technically be cooked, but it may still be chewy.
Cooking longer gives the connective tissue more time to transform.
Step 13: Check the Ribs During Cooking
After about 2½–3 hours, you can carefully check the pot.
Open the lid briefly.
The ribs should be sitting in a rich, aromatic liquid.
The meat may have visibly shrunk from the bones.
Test one rib with a fork.
If it is still firm, replace the lid and continue cooking.
Do not repeatedly open the oven.
Every time you remove the lid, heat escapes and the cooking environment changes.
One check near the end is enough.
How to Know When Beef Short Ribs Are Done
This is more important than following a specific number of hours.
Your ribs are ready when:
- A fork slides easily into the meat
- The meat feels very soft
- The connective tissue has broken down
- The ribs are no longer chewy
- The meat is beginning to separate naturally from the bone
- The sauce has developed a rich, concentrated flavor
They are not necessarily ready just because:
- Three hours have passed
- The meat looks brown
- The sauce smells good
- The meat has reached a certain internal temperature
Temperature can be useful, but texture is the final judge for this style of cooking.
Step 14: Remove the Ribs
When the ribs are tender, carefully transfer them to a plate or shallow baking dish.
Use tongs and support the meat gently.
Very tender ribs can fall apart when moved.
Cover them loosely with foil while you finish the sauce.
Do not wrap them tightly.
You want to keep them warm without trapping excessive steam against the surface.
Step 15: Finish the Sauce
Now focus on the braising liquid.
Remove the bay leaves and herb stems.
At this point, you have two choices.
You can serve the sauce with the vegetables left in it for a rustic presentation.
Or you can strain the sauce for a smoother, more refined result.
For a classic restaurant-style finish, strain the liquid through a fine-mesh strainer.
Press gently on the vegetables with the back of a spoon to extract their flavorful liquid.
Discard the solids after straining unless you particularly enjoy them.
Step 16: Remove Excess Fat
Short ribs naturally produce a substantial amount of fat.
Some of that fat is desirable.
Too much can make the sauce feel greasy.
If there is a visible layer of fat on the surface, skim some of it away with a spoon.
Do not attempt to remove every last drop.
A small amount of fat contributes flavor and gives the sauce a silky mouthfeel.
If you have time, another excellent option is to cool the sauce.
As it chills, the fat solidifies on the surface and becomes easier to remove.
For a same-day meal, however, spoon-skimming is perfectly practical.
Step 17: Reduce the Sauce
Place the strained sauce in a saucepan or return it to the Dutch oven.
Bring it to a gentle simmer over medium heat.
Let it reduce until the flavor becomes concentrated and the liquid has enough body to lightly coat the back of a spoon.
Taste it.
This is the moment to adjust seasoning.
Add salt if necessary.
Add freshly ground black pepper if needed.
If the sauce tastes rich but slightly flat, it may simply need more salt.
If it tastes overly sharp, a little more reduction or a small amount of butter can help round it out.
Step 18: Add Butter for a Silky Finish
Once the sauce has reached the desired concentration, turn the heat down.
Add about 1 tablespoon of unsalted butter.
Swirl or whisk gently until the butter melts into the sauce.
This is a simple finishing technique that can make the sauce feel smoother and more luxurious.
Do not boil aggressively after adding the butter.
Step 19: Taste Before Serving
This step takes only a few seconds and is worth doing every time.
Taste the sauce with a clean spoon.
Ask yourself:
Does it taste salty enough?
If not, add a little salt.
Does it taste rich and savory?
If it tastes watery or weak, reduce it further.
Is the sauce too acidic?
A little more reduction and butter can help.
Does the beef flavor come through?
If not, continue reducing until the sauce becomes more concentrated.
Seasoning is not something you should determine entirely from a recipe card.
Every stock, wine, piece of beef, and cooking environment is slightly different.
Taste is the final checkpoint.
Step 20: Serve the Short Ribs
Place a short rib on each plate.
Spoon the sauce generously around and over the meat.
Finish with a small amount of chopped fresh parsley.
The ribs are excellent served with:
- Mashed potatoes
- Creamy polenta
- Egg noodles
- Roasted potatoes
- Buttered vegetables
- Root vegetable purée
- Crusty bread
For the classic comfort-food presentation, mashed potatoes are particularly good.
The potatoes absorb the rich sauce and provide a creamy contrast to the tender beef.
Check Our Guide Classic Beef Stroganoff Recipe — Tender Beef in a Rich Creamy Mushroom Sauce
What Should Perfect Short Ribs Feel Like?
The texture is the defining characteristic.
A properly cooked short rib should not feel like a steak.
It should be much softer.
When you press the meat gently with a fork, it should yield easily.
You should not have to saw through it.
When you pull a piece away, the meat should separate into tender fibers rather than resisting the knife.
The sauce should be rich and glossy without being excessively greasy.
The beef should taste deeply savory, while the wine, vegetables, herbs, and stock should support rather than overpower the meat.
Common Beginner Mistakes
Mistake 1: Not Drying the Beef
Wet beef does not brown efficiently.
Solution: Pat the ribs very dry before seasoning and searing.
Mistake 2: Using Too Much Heat During the Entire Recipe
High heat is useful for browning.
It is not ideal for the long cooking stage.
A violent boil can make the cooking environment harsher than necessary.
Solution: Brown over medium-high heat, then cook the ribs gently in the oven.
Mistake 3: Overcrowding the Pot
Too many ribs at once can cause steaming instead of browning.
Solution: Brown in batches.
Mistake 4: Turning the Beef Too Often
Constant movement prevents a good crust from developing.
Solution: Put the rib down, let it brown, then turn it.
Mistake 5: Burning the Fond
Browned bits are flavorful.
Black, bitter material is not.
Solution: Control the heat. If the bottom of the pot is becoming black, reduce the heat before adding the vegetables.
Mistake 6: Adding Too Much Liquid
The ribs do not need to swim in broth.
Solution: Add enough liquid to come partway up the sides of the meat.
Mistake 7: Checking Too Early and Assuming the Recipe Failed
This is extremely common.
At two hours, short ribs can still be tough.
Solution: Keep cooking until the meat is genuinely tender.
Mistake 8: Cooking Only by Time
Three hours is a guideline.
One batch of ribs may be tender at 3 hours while another requires closer to 4 hours.
Solution: Use the fork test.
Mistake 9: Not Reducing the Sauce
A braising liquid can taste good but still be too thin.
Solution: Remove the ribs and reduce the sauce separately.
Mistake 10: Removing All the Fat
Short ribs are naturally rich.
Removing every trace of fat can leave the sauce less satisfying.
Solution: Skim excess fat while retaining enough for flavor and texture.
Check Our Guide Classic Filet Mignon Recipe — Perfectly Seared and Tender
Troubleshooting Guide
My short ribs are still tough
Keep cooking.
This is usually the simplest solution.
If the meat is still resistant to a fork, the collagen has not broken down enough.
Cover the pot and continue cooking for another 30–45 minutes.
Check again.
The sauce is too thin
Remove the ribs and simmer the sauce uncovered.
As water evaporates, the sauce becomes more concentrated.
Do not immediately add flour just because the sauce looks thin.
Reduction is usually the better first approach for a braised beef sauce.
The sauce is too salty
If the sauce has become overly concentrated, add a small amount of unsalted beef stock or water.
Then simmer gently until the flavor is balanced.
Do not add more wine simply to dilute salt; it can introduce unwanted acidity.
The sauce tastes flat
First check the salt.
Many sauces taste “flat” because they simply need seasoning.
If the salt level is correct, continue reducing slightly.
You can also add a small amount of Worcestershire sauce for additional savory depth.
The sauce is greasy
Skim some of the fat from the surface.
If you have time, chill the sauce so the fat solidifies and can be removed more easily.
The beef tastes bland
The initial browning may have been insufficient, or the braising liquid may not have been reduced enough.
Next time, focus particularly on deep browning.
For the current batch, reduce the sauce and adjust seasoning before serving.
My vegetables have completely fallen apart
That is not necessarily a problem.
Their main purpose is to contribute flavor to the braising liquid.
If you want vegetables with a more defined texture, cook a fresh batch separately and serve them alongside the ribs.
Can You Make Short Ribs Ahead of Time?
Yes.
In fact, beef short ribs are one of the dishes that can become even better after resting.
The flavors have time to develop, and the sauce becomes easier to manage once chilled.
To prepare ahead:
- Cook the ribs until completely tender.
- Remove the meat from the cooking liquid.
- Strain the sauce if desired.
- Cool the ribs and sauce safely.
- Refrigerate them.
- Remove excess solidified fat from the sauce the next day.
- Reheat gently.
When reheating, use moderate heat.
You do not want to aggressively boil the ribs because the meat is already tender.
A gentle oven reheating method works particularly well.
How to Reheat Short Ribs Without Drying Them Out
Place the ribs in a covered oven-safe dish.
Add some of the sauce.
Cover tightly.
Reheat at approximately 300°F (150°C) until the meat is hot throughout.
The exact time depends on how much meat you are reheating.
The important principle is gentle reheating in a moist environment.
Avoid blasting the ribs at very high heat.
Can You Freeze Slow-Cooked Short Ribs?
Yes.
Short ribs freeze well when stored properly.
Cool the cooked meat and sauce before freezing.
For the best texture, store the ribs together with some of their sauce.
Use an airtight freezer-safe container.
When you are ready to eat them, thaw them in the refrigerator rather than leaving them at room temperature.
Reheat gently with some sauce.
Choosing Wine for the Braising Liquid
You do not need an expensive bottle of wine.
Choose a dry red wine with enough flavor to stand up to beef.
The wine contributes acidity, fruit character, and depth to the braising liquid.
Avoid very sweet wines for this preparation.
You also do not need to use the most expensive wine you can find.
A reasonably priced dry red wine that you would be comfortable drinking is more than sufficient.
Can You Make This Without Wine?
Yes.
If you prefer not to use wine, replace it with additional beef stock.
The flavor will be different because wine contributes acidity and complexity, but the short ribs can still be excellent.
You can also use a smaller amount of wine combined with additional stock if you want a less pronounced wine flavor.
Why Tomato Paste Is Used
Tomato paste is not intended to make this dish taste like tomato sauce.
Its purpose is to contribute concentrated savory depth, color, and a subtle layer of acidity.
Cooking it briefly before adding the liquid helps develop a richer flavor.
The finished sauce should taste like a beef braising sauce, not tomato soup.
Why the Vegetables Are Cut Small
Small pieces give the vegetables more surface area and allow them to release their flavor efficiently into the braising liquid.
They also cook down during the long braise.
If you are straining the sauce, the precise shape does not matter much.
If you plan to serve the vegetables with the ribs, cut them somewhat larger so they retain more structure.
Knife Technique for Preparing Short Ribs
Short ribs can be awkward because they are thick and contain bones.
Use a stable cutting board and a sharp chef’s knife.
If you need to trim loose pieces of fat or connective tissue, make controlled cuts rather than trying to force the knife through large sections.
Keep the non-cutting hand positioned safely.
Never attempt to hold a small piece of meat directly in front of the knife blade.
If the meat is slippery, pat it dry first.
A dry surface gives you better control.
And remember: the knife should do the work.
If you find yourself applying excessive force, stop and reposition the meat or sharpen the knife.
Check Our Ultimate American BBQ Meat Guide: How to Cut Chicken, Steak & Ribs + 8 Easy BBQ Recipes
Food Safety
Raw beef should be handled separately from ready-to-eat foods.
Use clean utensils and wash the cutting board and work surface after preparing the raw meat.
Do not place cooked ribs back onto the plate that held the raw beef unless the plate has been washed.
Refrigerate leftovers promptly.
When reheating leftovers, make sure they are heated thoroughly.
Because this recipe involves a long cooking process, maintaining good food-handling habits throughout preparation is still important.
What to Serve With Slow-Cooked Beef Short Ribs
The sauce is so rich that the best side dishes are often relatively simple.
Mashed Potatoes
Probably the classic choice.
Creamy potatoes provide an ideal base for the sauce.
Polenta
Soft polenta works beautifully with the gelatin-rich sauce.
Its mild flavor allows the beef to remain the focus.
Egg Noodles
For a particularly comforting meal, spoon the short ribs and sauce over wide egg noodles.
Roasted Root Vegetables
Carrots, parsnips, and other root vegetables complement the deep flavor of the beef.
Crusty Bread
A good loaf of bread is enough to turn the sauce into part of the meal.
Do not waste the braising sauce.
A Simple Serving Formula
If you are serving this for guests, keep the presentation uncomplicated.
Place a spoonful of mashed potatoes or polenta in the center of the plate.
Set one short rib on top.
Spoon the sauce over the meat and around the potatoes.
Finish with a small amount of parsley.
You want the beef to remain visually dominant.
The sauce should look glossy and rich rather than covering the entire plate.
Frequently Asked Questions
How long do beef short ribs take to become tender?
At approximately 325°F (165°C), bone-in short ribs commonly require around 3–4 hours, but the exact time varies.
Always judge the final stage by tenderness.
Should short ribs be completely covered with liquid?
No.
The liquid should generally come partway up the sides of the ribs.
The covered pot creates a moist cooking environment while the liquid braises the lower portion of the meat.
Do I have to sear the short ribs first?
For the best flavor, yes.
Searing develops browned flavors on the meat and creates fond in the pot.
It is one of the most valuable steps in the recipe.
Can I use boneless short ribs?
Yes.
Boneless short ribs can produce an excellent result.
Choose thick, well-marbled pieces and monitor them for tenderness.
Can I use a slow cooker?
Yes.
The same basic flavor-building steps still apply.
Brown the beef and vegetables first, then transfer everything to the slow cooker.
The exact cooking time depends on the appliance and settings, so use tenderness as the final test.
Can I make short ribs without a Dutch oven?
Yes.
Any heavy oven-safe pot with a tight-fitting lid can work.
The key is maintaining a gentle, moist cooking environment.
Why are my short ribs dry?
Short ribs are usually dry because of one of three problems:
- The meat was cooked too aggressively.
- There was insufficient moisture during cooking.
- The ribs were cooked far beyond the point of tenderness.
Fat content, cut size, and individual pieces of meat also affect the result.
If your ribs are tender but seem slightly dry, serving them with plenty of the reduced braising sauce can help.
The Most Important Lessons From This Recipe
If you are making short ribs for the first time, remember these principles:
Dry the meat before browning.
Brown the beef deeply, but do not burn the pot.
Do not overcrowd the pan.
Cook the vegetables before adding the liquid.
Deglaze the browned bits from the bottom of the pot.
Keep the ribs mostly covered by the cooking environment, not necessarily submerged in liquid.
Cook gently and patiently.
Do not rely only on the clock.
Test tenderness with a fork.
Reduce the sauce separately if necessary.
Taste before serving.
These principles are more important than memorizing an exact cooking time.
Slow-Cooked Beef Short Ribs Recipe Card
Ingredients
Beef
- 3½–4½ lb bone-in beef short ribs
- 2 tablespoons cooking oil
- 2 teaspoons kosher salt
- 1 teaspoon black pepper
Vegetables
- 1 large yellow onion
- 2 carrots
- 2 celery stalks
- 5–6 garlic cloves
- 2 tablespoons tomato paste
Braising liquid
- 2 cups beef stock
- 1½ cups dry red wine
- 2 bay leaves
- 4–5 sprigs thyme
- 2–3 sprigs rosemary
- 1 tablespoon Worcestershire sauce
Finishing
- 1 tablespoon unsalted butter
- Fresh parsley
- Salt and pepper to taste
Method
- Pat the short ribs thoroughly dry.
- Season all sides with salt and pepper.
- Heat oil in a heavy Dutch oven over medium-high heat.
- Sear the ribs deeply on several sides, working in batches if necessary.
- Remove the ribs and set aside.
- Add onion, carrots, and celery.
- Cook until the vegetables begin to soften.
- Add garlic and cook briefly.
- Stir in tomato paste and cook for 1–2 minutes.
- Add red wine and scrape the browned bits from the bottom.
- Simmer the wine for several minutes.
- Add beef stock, Worcestershire sauce, bay leaves, thyme, and rosemary.
- Return the short ribs to the pot.
- Bring the liquid to a gentle simmer.
- Cover the pot.
- Transfer to a 325°F (165°C) oven.
- Cook approximately 3–4 hours.
- Check the meat for tenderness.
- Continue cooking if necessary.
- Remove the tender ribs from the pot.
- Strain and skim the sauce if desired.
- Reduce the sauce until rich and concentrated.
- Finish with butter.
- Taste and adjust seasoning.
- Serve the ribs with the sauce and your preferred side dish.
Final Thoughts
Slow-cooked beef short ribs reward exactly the qualities that make good home cooking enjoyable: preparation, patience, and attention to texture.
The recipe does not require you to perform complicated techniques. Most of the work happens naturally inside the covered pot. Your job is to create a strong foundation through proper browning, build a flavorful braising liquid, and then give the beef enough time to transform.
The most important thing to remember is that tenderness is not determined by the clock alone.
If the ribs are still tough, they are not finished.
Give them more time.
Once the collagen has broken down and the meat becomes genuinely fork-tender, remove the ribs, concentrate the sauce, and taste it carefully before serving.
The final dish should be rich without being greasy, deeply savory without being overwhelmingly salty, and tender enough that you barely need a knife.
That is the real goal of a great slow-cooked beef short rib: not simply cooked beef, but beef transformed by time into something exceptionally tender, flavorful, and comforting.
https://www.foodnetwork.com/recipes/braised-beef-short-rib-20435616