Fresh Pasta at Home
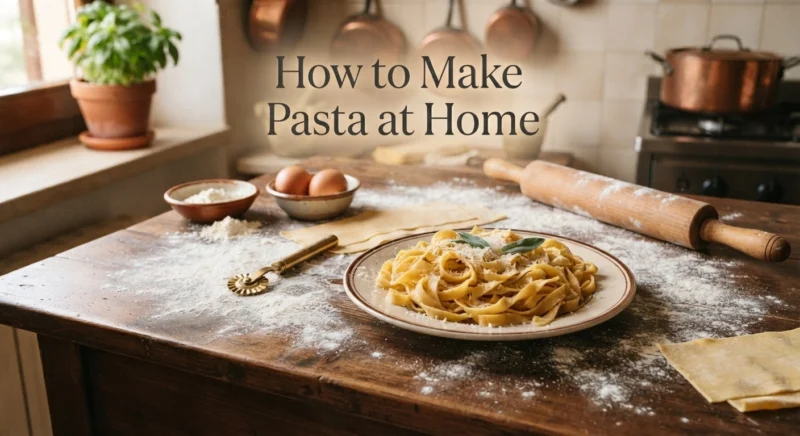
Nothing compares to the taste and texture of Fresh Pasta at Home. While dried pasta is convenient, homemade pasta offers a richer flavor, delicate texture, and an authentic Italian cooking experience that transforms even simple dishes into restaurant-quality meals.
Making Fresh Pasta at Home may seem intimidating at first, but it is surprisingly straightforward. With just a few basic ingredients, the right techniques, and a sharp kitchen knife, you can create silky pasta that pairs perfectly with your favorite sauces.
This comprehensive guide covers everything you need to know—from mixing and kneading dough to rolling, cutting tagliatelle and fettuccine, and preparing ingredients like garlic, onions, herbs, mushrooms, chicken, beef, and pork. You’ll also learn which knives work best at every stage of the process.
Whether you’re making creamy Alfredo, classic Carbonara, rich Bolognese, or a simple garlic butter pasta, learning Fresh Pasta at Home is one of the most rewarding culinary skills you can master.
Why Make Fresh Pasta at Home?
Many people wonder whether making homemade pasta is worth the extra effort. Once you’ve tried it, the answer becomes obvious.
Fresh pasta offers:
- Superior texture
- Richer flavor
- Faster cooking time
- Complete control over ingredients
- Endless customization
- Better sauce absorption
Unlike dried pasta, fresh pasta has a soft, delicate bite that perfectly complements creamy sauces, meat ragùs, mushroom sauces, pesto, and butter-based dishes.
Preparing Fresh Pasta at Home also allows you to avoid unnecessary preservatives while experimenting with different flours, herbs, spinach, squid ink, or even beetroot-infused dough.
For many home cooks, making pasta becomes a relaxing weekend tradition rather than simply preparing dinner.
Essential Ingredients for Fresh Pasta Dough
One of the beautiful aspects of Italian cooking is its simplicity.
Traditional Fresh Pasta at Home requires only a handful of ingredients.
Flour
The flour determines much of your pasta’s texture.
Popular choices include:
Tipo “00” Flour
The traditional Italian choice.
Benefits:
- Extremely fine texture
- Silky dough
- Smooth rolling
- Soft finished pasta
Ideal for:
- Tagliatelle
- Fettuccine
- Ravioli
- Lasagna sheets
Semolina Flour
Made from durum wheat.
Advantages include:
- Higher protein
- Firmer bite
- Excellent durability
- Rustic texture
Many cooks combine semolina with 00 flour for the best balance of tenderness and elasticity.
All-Purpose Flour
If specialty flours aren’t available, regular all-purpose flour works surprisingly well.
It produces slightly softer pasta but remains excellent for beginners learning Fresh Pasta at Home.
Eggs
Traditional fresh pasta relies on whole eggs.
Fresh eggs contribute:
- Rich flavor
- Beautiful golden color
- Elastic dough
- Smooth texture
Room-temperature eggs blend more easily into the flour.
Salt
A small amount of salt enhances flavor throughout the dough.
Some Italian recipes skip adding salt to the dough entirely, relying instead on well-salted boiling water.
Both methods work well.
Olive Oil (Optional)
Some recipes include a teaspoon of olive oil.
Benefits include:
- Slightly softer dough
- Easier kneading
- Improved elasticity
Although traditional Italian recipes often omit it, many home cooks appreciate the added flexibility.
Water
Good dough usually requires very little additional water.
Humidity, flour type, and egg size determine whether any water is necessary.
Always add water gradually.
Basic Fresh Pasta Dough Recipe
Makes approximately 4 servings.
Ingredients:
- 300 g Tipo 00 flour
- 3 large eggs
- ½ teaspoon salt
- 1 teaspoon olive oil (optional)
Equipment You’ll Need
Preparing Fresh Pasta at Home doesn’t require expensive equipment.
Helpful tools include:
- Large mixing bowl
- Wooden work surface
- Rolling pin or pasta machine
- Bench scraper
- Plastic wrap
- Chef knife
- Cutting board
- Kitchen scale
A sharp chef knife is especially useful because it handles far more than simply cutting pasta.
You’ll use it for:
- Garlic
- Herbs
- Onions
- Mushrooms
- Chicken
- Beef
- Pork
One quality knife can complete nearly every preparation task in this guide.
Best Knives for Fresh Pasta Preparation
Different kitchen tasks benefit from different knife designs.
https://yashkadesigns.com/damascus-chef-knife-3
Chef Knife
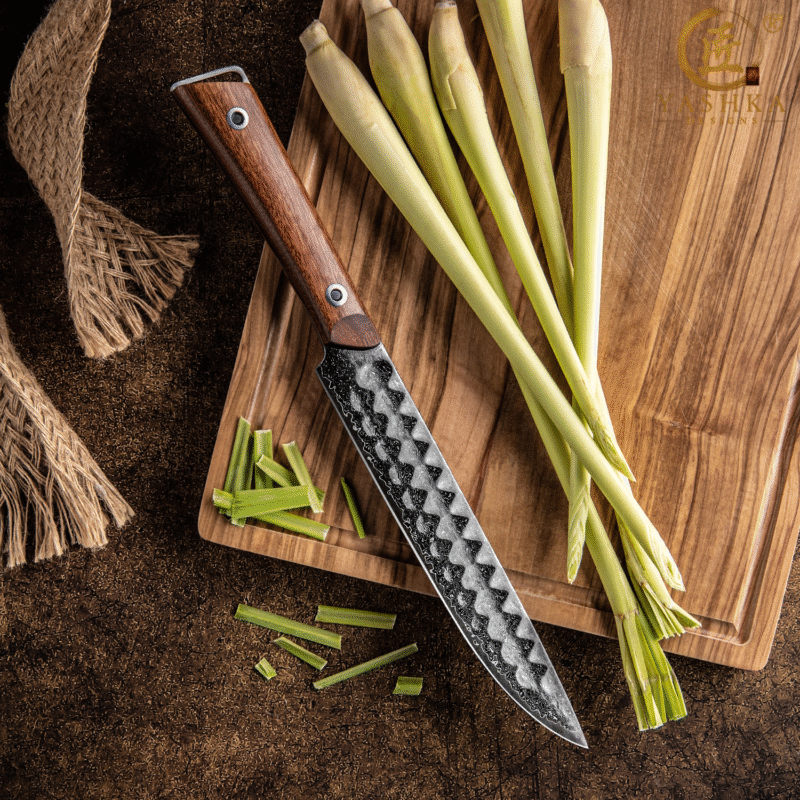
The most versatile option.
Ideal for:
- Chopping onions
- Slicing meat
- Cutting herbs
- Preparing mushrooms
- Portioning chicken
- General food preparation
An 8-inch chef knife offers excellent balance between control and efficiency.
https://yashkadesigns.com/japanese-damascus-santoku-knife
Santoku Knife
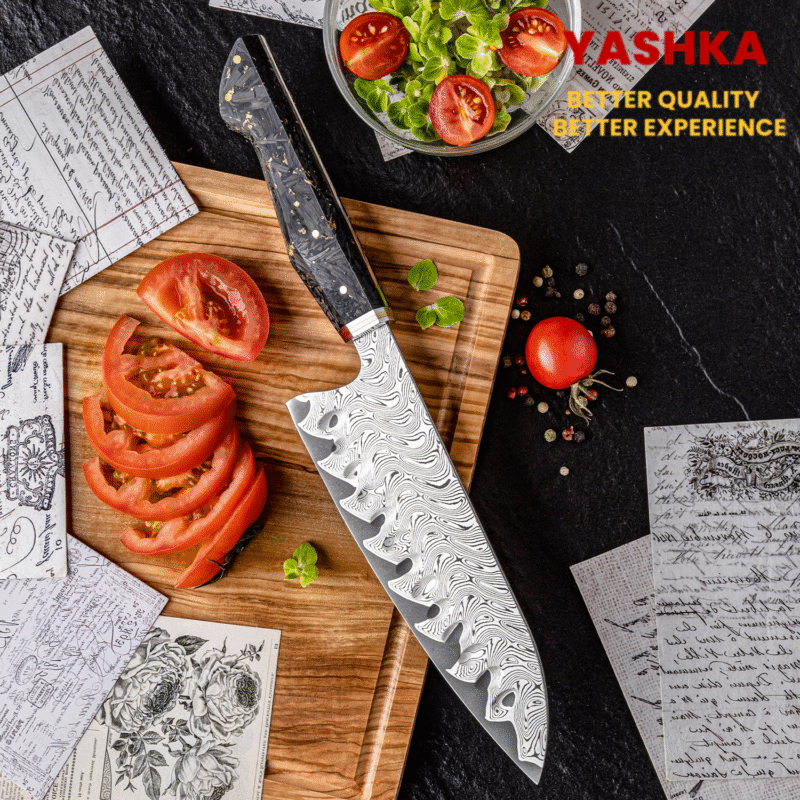
Excellent for vegetables.
Ideal for:
- Garlic
- Herbs
- Mushrooms
- Shallots
- Fine slicing
Its flatter edge encourages efficient push-cutting.
https://yashkadesigns.com/damascus-paring-knife
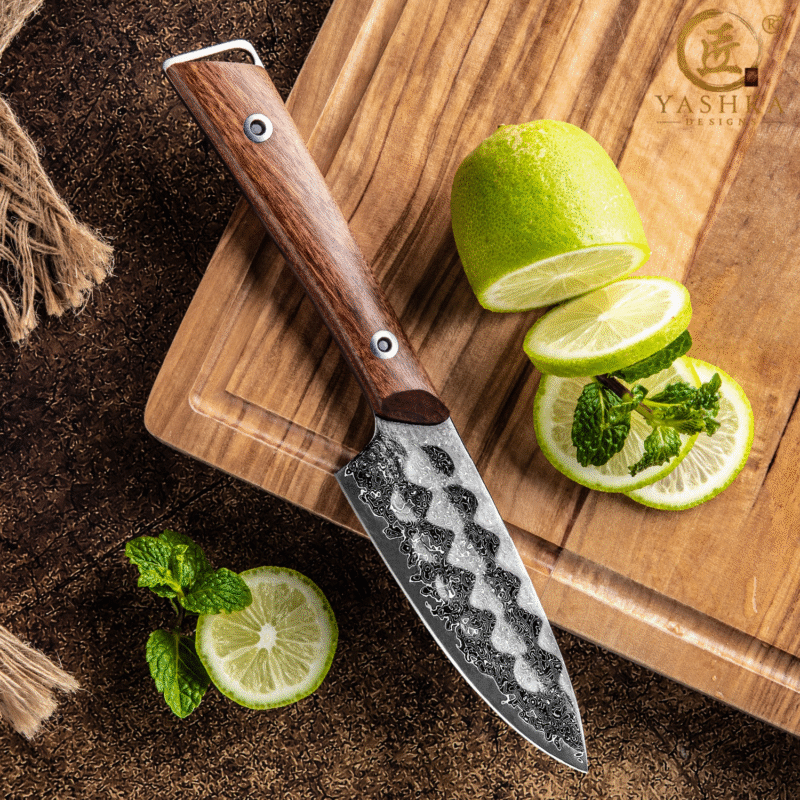
Paring Knife
Perfect for small precision jobs.
Use it for:
- Trimming mushrooms
- Peeling garlic
- Removing blemishes
- Small vegetables
Bench Scraper
Although not technically a knife, a bench scraper becomes indispensable when making Fresh Pasta at Home.
It helps:
- Gather dough
- Divide portions
- Clean the work surface
- Lift sticky dough
Step 1: Measure Ingredients Accurately
Professional baking—and pasta making—always begins with accurate measurements.
A kitchen scale produces much more consistent results than measuring cups.
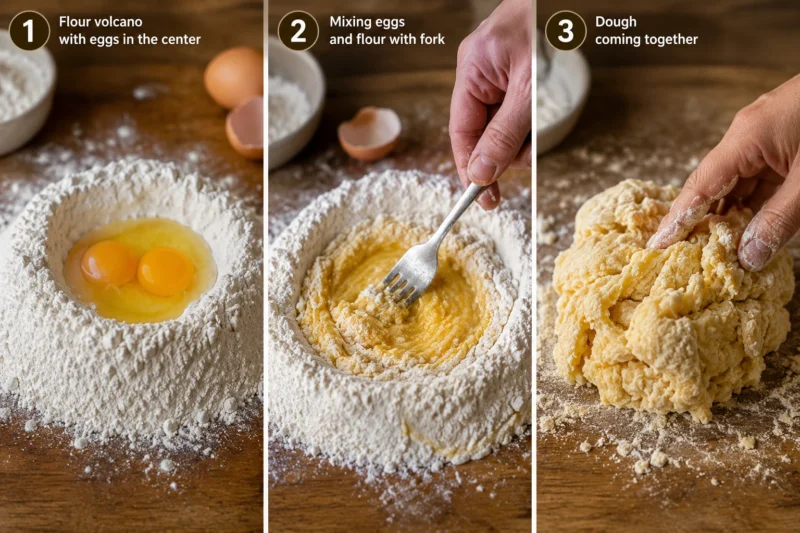
Place the flour into a large bowl or directly onto a clean work surface.
Create a wide well in the center.
This traditional Italian “volcano” method keeps the eggs contained while mixing.
Step 2: Add the Eggs
Crack the eggs into the center of the flour well.
Add:
- Salt
- Olive oil (optional)
Using a fork, gently whisk the eggs together without breaking the flour walls.
Slowly begin pulling flour into the eggs.
Continue until a thick paste begins forming.
Eventually, the flour walls collapse naturally.
At this point, switch from the fork to your hands.
Step 3: Form the Dough
Gather the mixture into a rough ball.
Don’t worry if it appears shaggy or uneven.
This is completely normal.
Press the dough together firmly using the palms of your hands.
If it seems:
Too dry:
- Add a teaspoon of water.
Too sticky:
- Dust lightly with flour.
Avoid adding too much flour, which can make pasta dense.
Step 4: Kneading the Dough
Kneading develops gluten, giving pasta its strength and elasticity.
Place the dough on a lightly floured work surface.
Push it away with the heel of your hand.
Fold it back over.
Rotate.
Repeat.
Continue for approximately 8–10 minutes.
The dough gradually changes from rough and crumbly into:
- Smooth
- Elastic
- Silky
- Slightly firm
Properly kneaded dough springs back when gently pressed with a fingertip.
This is one of the most important steps in making excellent Fresh Pasta at Home.
Common Dough Problems
Dough Too Dry
Possible causes:
- Small eggs
- Dry flour
- Low humidity
Solution:
Add water one teaspoon at a time.
Dough Too Sticky
Possible causes:
- Large eggs
- Humid kitchen
- Too much water
Solution:
Dust lightly with flour while kneading.
Dough Tears Easily
Usually indicates insufficient kneading.
Continue kneading another 3–5 minutes.
Dough Feels Tough
Too much flour was added.
Next time, use slightly less flour and knead longer instead.
Step 5: Rest the Dough
Many beginners skip this step.
Don’t.
Resting allows the gluten to relax, making rolling dramatically easier.
Wrap the dough tightly in plastic wrap.
Allow it to rest for:
- 30–60 minutes at room temperature
Or refrigerate for several hours if preparing in advance.
When you unwrap it, you’ll immediately notice that the dough feels smoother, softer, and much easier to work with.
Proper resting is one of the secrets to achieving truly exceptional Fresh Pasta at Home.
Step 6: Divide the Dough
After the dough has rested for at least 30 minutes, unwrap it and place it on a lightly floured work surface.
Instead of rolling the entire ball at once, divide it into four equal portions.
Working with smaller pieces makes it much easier to create even sheets and prevents the dough from drying out.
Keep the remaining dough covered with plastic wrap or a clean kitchen towel while working.
This simple habit makes preparing Fresh Pasta at Home much easier, especially for beginners.
Preparing Your Work Surface
Before rolling, lightly dust your countertop with flour.
Avoid using too much flour because:
- The dough may become dry.
- Extra flour can affect the final texture.
- Too much flour burns during cooking.
Your goal is to prevent sticking—not coat the dough.
Step 7: Rolling the Pasta Dough
One of the most satisfying parts of making Fresh Pasta at Home is transforming a small dough ball into long, silky sheets.
There are two common methods:
- Rolling pin
- Pasta machine
Both produce excellent results.
Method 1: Using a Rolling Pin
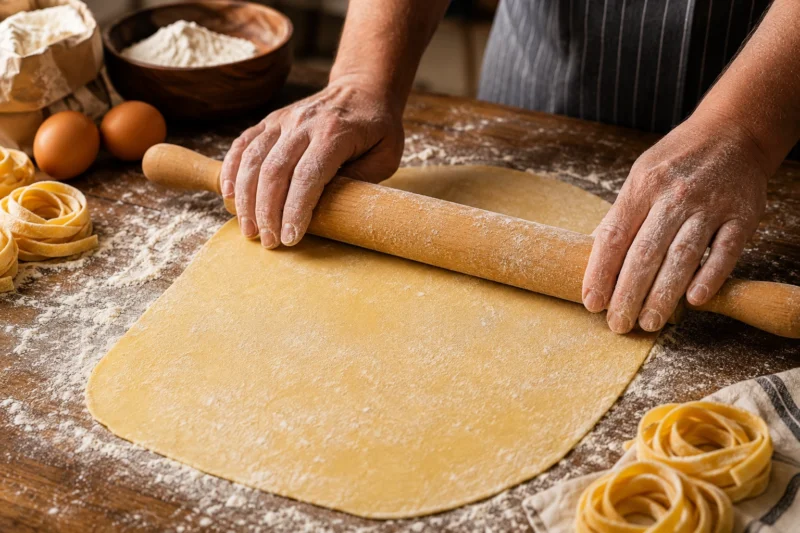
Traditional Italian families have used wooden rolling pins for generations.
Begin by flattening the dough into a thick oval.
Roll from the center outward.
Rotate the dough 90 degrees every few passes.
Continue rolling evenly until the sheet becomes thin and smooth.
Aim for approximately:
- 1–1.5 mm for tagliatelle
- 1 mm for fettuccine
- Slightly thinner for ravioli
The dough should almost become translucent without tearing.
Tips for Rolling by Hand
Keep the dough moving.
Lift it occasionally.
Dust underneath lightly if necessary.
Avoid pressing too hard.
Let the rolling pin do the work gradually.
Patience produces smoother pasta.
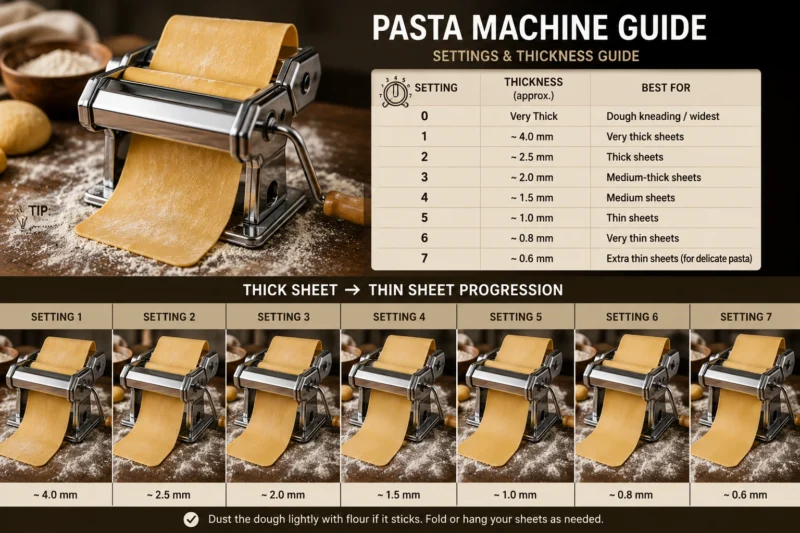
Method 2: Using a Pasta Machine
A pasta machine creates remarkably consistent sheets.
Flatten the dough enough to fit the widest setting.
Run it through.
Fold the sheet into thirds.
Rotate 90 degrees.
Pass through again.
Repeat this process three or four times.
This conditions the gluten and creates a smooth texture.
Then begin reducing the thickness one setting at a time.
Never skip several settings at once.
Doing so may tear the dough.
Recommended Thickness
For common pasta shapes:
Tagliatelle:
Approximately 1.2 mm
Fettuccine:
Approximately 1 mm
Lasagna:
Approximately 1 mm
Ravioli:
0.8–1 mm
Angel Hair:
Very thin (requires more experience)
Choosing the correct thickness greatly improves your Fresh Pasta at Home results.
How to Tell if the Dough Is Ready
Good pasta sheets should be:
- Smooth
- Flexible
- Even thickness
- Soft
- Not sticky
Hold the sheet toward the light.
You should begin seeing a slight shadow through it without it becoming transparent.
Avoid Over-Flouring
Many beginners continuously dust the dough.
Too much flour causes:
- Dry pasta
- Cracks
- Poor sauce adhesion
Instead, flour only when necessary.
Brush excess flour away before cutting.
Step 8: Cutting Tagliatelle
Tagliatelle is one of the easiest pasta shapes to make.
Traditional width:
Approximately 6–8 mm.
After rolling the sheet:
Lightly dust both sides with flour.
Allow it to dry for about 10 minutes.
Do not let it become brittle.
Roll the sheet loosely into a cylinder.
Using a sharp chef knife, slice evenly across the roll.
Once cut, gently lift the strands and shake them open.
You’ll have beautiful ribbons of fresh tagliatelle.
Making tagliatelle is often the moment when Fresh Pasta at Home truly starts to feel rewarding.
https://yashkadesigns.com/chef-knife-8-inch-professional-kitchen
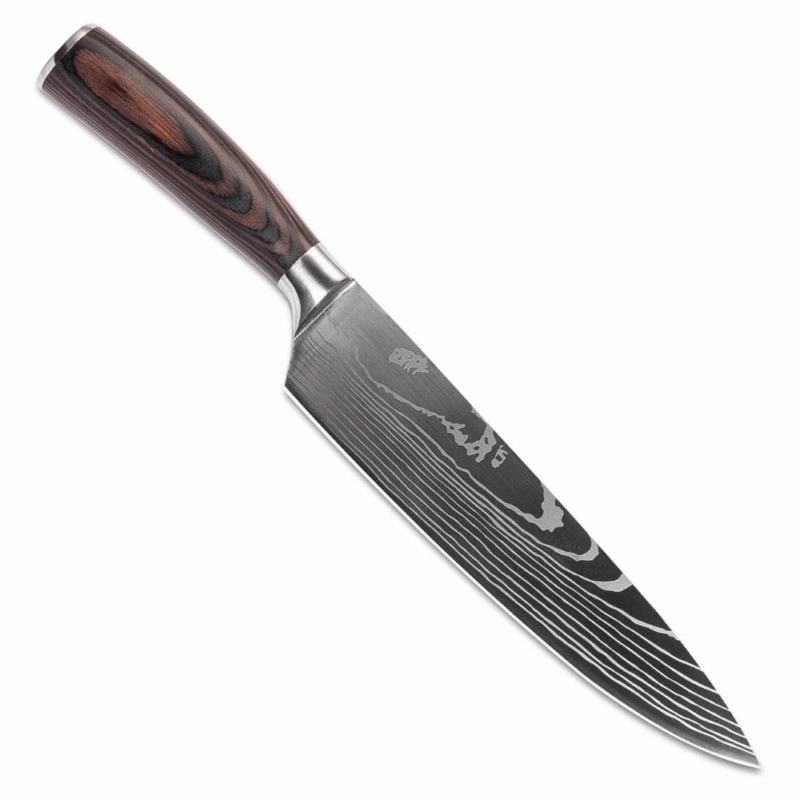
Best Knife for Cutting Tagliatelle
A sharp chef knife works perfectly.
Look for:
- Razor-sharp edge
- Comfortable handle
- Good balance
- Thin blade
Avoid dull knives.
A dull blade compresses the dough instead of slicing it cleanly.
Step 9: Cutting Fettuccine
Fettuccine is slightly wider than tagliatelle.
Typical width:
About 6–10 mm.
The cutting method is identical.
Roll the sheet loosely.
Slice evenly using long, smooth strokes.
Separate the ribbons immediately.
Dust lightly with flour.
Form loose nests.
These nests make cooking and storing much easier.
Knife Technique
Keep the knife vertical.
Use controlled downward slicing motions.
Avoid sawing.
Let the sharp edge glide naturally through the dough.
Clean cuts create smoother pasta that cooks more evenly.
Creating Uniform Pasta
Uniform pasta cooks consistently.
Use a ruler for your first few batches.
After some practice, you’ll naturally recognize the correct width.
Professional chefs focus on consistency rather than speed.
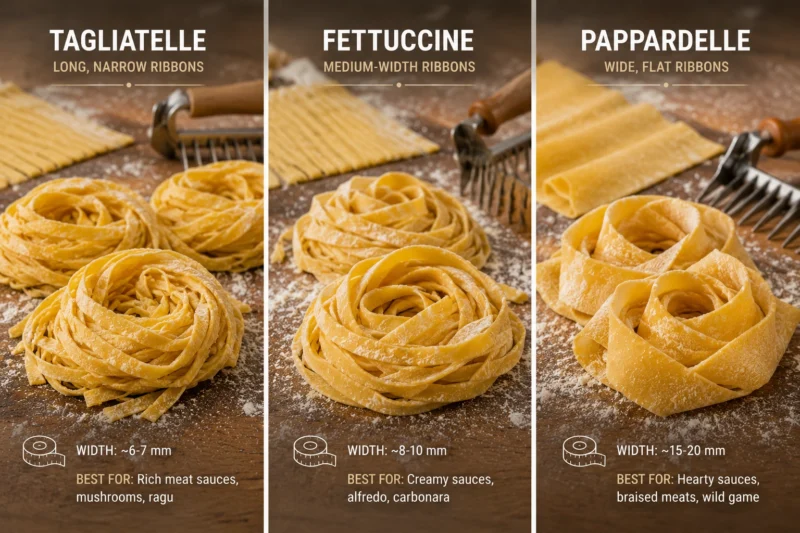
Fresh Pasta Shapes You Can Make
Once you’ve mastered rolling, you can easily create:
- Tagliatelle
- Fettuccine
- Pappardelle
- Lasagna sheets
- Ravioli
- Tortellini
- Maltagliati
Learning these shapes expands your Fresh Pasta at Home skills dramatically.
Drying Fresh Pasta
Fresh pasta doesn’t need to dry completely.
For immediate cooking:
Allow it to rest 15–20 minutes.
For later use:
Dry for approximately one hour.
The strands should no longer feel sticky.
Avoid excessive drying unless storing long-term.
How to Store Fresh Pasta
Refrigerator
Fresh pasta keeps well for:
1–2 days.
Store it inside an airtight container.
Dust lightly with flour before refrigerating.
Freezer
Fresh pasta freezes beautifully.
Arrange nests on a baking tray.
Freeze until firm.
Transfer to freezer bags.
Frozen pasta remains excellent for approximately two months.
Cook directly from frozen.
Do not thaw first.
Cooking Fresh Pasta
One major advantage of Fresh Pasta at Home is its quick cooking time.
Bring a large pot of generously salted water to a rolling boil.
Fresh pasta usually cooks in:
- 2–3 minutes
- Occasionally up to 4 minutes for thicker shapes
Taste frequently.
Fresh pasta should remain slightly firm in the center.
Save Pasta Water
Never discard all the cooking water.
Reserve one cup.
The starch helps:
- Thicken sauces
- Improve texture
- Help sauces cling to pasta
- Create silky emulsions
Professional chefs almost always use pasta water.
Common Rolling Mistakes
Dough Tears
Possible causes:
- Too dry
- Insufficient resting
- Rolled too quickly
Solution:
Allow the dough to rest another 15 minutes.
Dough Shrinks Back
The gluten remains too tight.
Rest another 20 minutes.
Uneven Thickness
Usually caused by applying uneven pressure.
Rotate the dough frequently.
Roll from the center outward.
Sticky Dough
Use only a light dusting of flour.
Excess flour creates dry pasta.
Ragged Pasta Edges
Usually indicates:
- Dull knife
- Torn dough
- Uneven rolling
A sharp chef knife solves most of these issues.
Why Sharp Knives Matter
Making Fresh Pasta at Home isn’t only about the dough.
A high-quality knife improves nearly every stage of preparation.
Benefits include:
- Cleaner pasta cuts
- Faster vegetable preparation
- Better meat slicing
- Safer cutting
- More enjoyable cooking
A premium chef knife quickly becomes your most-used kitchen tool.
Check Our Guide The Ultimate Guide to Caring for a Damascus Steel Knife
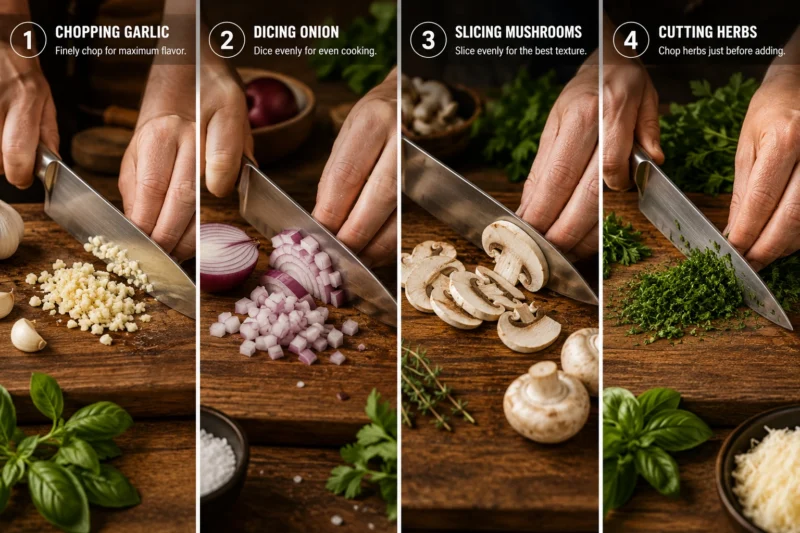
Preparing for the Next Steps
With your pasta complete, it’s time to prepare the ingredients that will transform fresh noodles into unforgettable meals.
Proper knife skills make every recipe easier, safer, and more enjoyable.
In the next section, you’ll learn how to prepare:
- Garlic
- Onions
- Fresh herbs
- Mushrooms
- Chicken
- Beef
- Pork
You’ll also discover which knife works best for each ingredient and how professional chefs maximize efficiency while maintaining precise cuts.
Preparing Ingredients for Pasta Like a Professional Chef
One of the biggest differences between restaurant-quality pasta and an average homemade meal isn’t just the pasta itself—it’s how the ingredients are prepared.
Even if you’ve mastered Fresh Pasta at Home, unevenly cut vegetables or improperly sliced meat can affect cooking time, texture, and presentation.
Professional chefs spend years developing knife skills because consistent cuts mean:
- Even cooking
- Better flavor distribution
- Beautiful presentation
- Faster preparation
- Safer cutting
In this section, you’ll learn how to prepare the most common pasta ingredients while choosing the best knife for every task.
The Best Knife for Pasta Preparation
If you own only one quality kitchen knife, make it an 8-inch chef knife.
A chef knife handles nearly every ingredient used in pasta recipes.
It excels at:
- Garlic
- Onion
- Herbs
- Mushrooms
- Chicken
- Beef
- Pork
- Tomatoes
- Carrots
- Celery
Its curved edge also allows an efficient rocking motion that speeds up chopping.
For smaller precision tasks like trimming mushrooms or peeling garlic, a paring knife is also useful, but the chef knife remains the true workhorse.
Check Our Guide The Ultimate Guide to Vegetable Preparation
How to Prepare Garlic for Pasta
Garlic is one of the defining flavors of Italian cuisine.
Whether you’re making Alfredo, Aglio e Olio, Mushroom Pasta, or Bolognese, properly prepared garlic makes a noticeable difference.
Choosing Fresh Garlic
Look for bulbs that are:
- Firm
- Heavy
- Dry
- Free from mold
- Tight-skinned
Avoid bulbs that feel soft or have green sprouts.
Peeling Garlic
Separate one clove.
Place it on the cutting board.
Lay the flat side of your chef knife over the clove.
Press firmly with the heel of your hand.
The skin loosens immediately and peels away easily.
This classic technique saves time and minimizes waste.
Slicing Garlic
Thin slices create delicate garlic flavor.
Hold the clove securely.
Slice across the clove using smooth forward motions.
Uniform slices cook evenly without burning.
Thin garlic slices are ideal for:
- Garlic butter pasta
- Shrimp pasta
- Olive oil sauces
- Aglio e Olio
Mincing Garlic
For stronger garlic flavor:
Slice first.
Gather the slices.
Rock the chef knife repeatedly through the pile.
Continue until the pieces become very fine.
Professional chefs often sprinkle a little salt over minced garlic.
The salt helps keep the garlic together while chopping.
Common Garlic Mistakes
Avoid:
- Burning garlic
- Crushing excessively
- Cutting uneven pieces
- Cooking over very high heat
Burned garlic becomes bitter within seconds.
Always add garlic after onions have softened unless the recipe specifically says otherwise.
How to Slice Onion for Pasta
Onions provide sweetness and depth to countless pasta sauces.
Proper slicing creates even cooking and balanced flavor.
Choosing the Right Onion
Yellow onions
Best for:
- Bolognese
- Meat sauces
- Mushroom sauces
- Tomato sauces
White onions
Ideal for:
- Cream sauces
- Seafood pasta
- Light sauces
Red onions
Best served raw or lightly cooked.
They’re less common in traditional Italian pasta recipes.
Step 1: Trim the Onion
Using a sharp chef knife:
Remove the stem.
Leave the root intact.
The root helps hold the onion together during slicing.
Step 2: Peel
Remove the papery skin.
Discard the outer layer if damaged.
Step 3: Cut in Half
Slice through the root.
Place the flat side on the cutting board.
This provides stability.
Step 4: Dice the Onion
Make several horizontal cuts.
Then vertical cuts.
Finally slice across.
The onion naturally falls into evenly sized cubes.
For pasta sauces, small dice work best.
Uniform onions soften evenly and practically disappear into the sauce.
Thinly Sliced Onions
Some recipes benefit from thin slices instead of diced onion.
Examples include:
- Mushroom pasta
- Chicken Alfredo
- Cream sauces
Use long smooth strokes rather than short sawing motions.
Knife Safety While Cutting Onions
Use the claw grip.
Curl your fingertips inward.
Guide the blade with your knuckles.
This professional technique dramatically reduces the chance of accidental cuts.
How to Chop Fresh Herbs
Fresh herbs transform pasta from ordinary to exceptional.
Common herbs include:
- Basil
- Parsley
- Thyme
- Rosemary
- Sage
- Oregano
Fresh herbs should almost always be added near the end of cooking.
Preparing Parsley
Wash thoroughly.
Dry completely.
Remove thick stems.
Gather leaves into a tight pile.
Using a rocking motion, finely chop.
Avoid repeatedly smashing the herbs.
Clean cuts preserve their bright color.
Preparing Basil
Stack several leaves.
Roll them tightly into a small cylinder.
Slice across the roll into thin ribbons.
This technique is called chiffonade.
Perfect for:
- Caprese pasta
- Tomato sauces
- Pesto garnish
Preparing Rosemary
Strip the leaves from the woody stem.
Gather together.
Finely mince.
Rosemary is strong, so use sparingly.
Preparing Thyme
Simply pull the stem backward through your fingers.
Most leaves fall away naturally.
Discard the stems.
Check Our Guide Best Japanese Kitchen Knife for Vegetables
Common Herb Mistakes
Avoid:
- Chopping herbs too early
- Wet herbs
- Using dull knives
- Over-processing
Fresh herbs quickly lose aroma after chopping.
Prepare them just before cooking whenever possible.
How to Prepare Mushrooms for Pasta
Mushrooms pair beautifully with cream sauces, garlic butter, Parmesan, and fresh pasta.
Popular choices include:
- Cremini
- Button mushrooms
- Portobello
- Shiitake
- Oyster mushrooms
Cleaning Mushrooms
Never soak mushrooms.
Instead:
Use a damp paper towel.
Or a soft brush.
Remove visible dirt gently.
Mushrooms absorb water quickly, making them less suitable for browning.
Trimming Mushrooms
Trim only the dry end of the stem.
Most stems are perfectly edible.
Large woody stems can be removed.
Slicing Mushrooms
Place mushroom cap flat-side down.
Slice evenly.
Approximately:
3–5 mm thick.
Uniform slices brown consistently.
Quartering Mushrooms
Small mushrooms can simply be cut:
Half.
Then half again.
This creates hearty pieces perfect for rustic pasta dishes.
Sautéing Mushrooms Properly
One mistake many beginners make is overcrowding the pan.
Instead:
Cook mushrooms in batches.
Allow moisture to evaporate.
Wait until they become golden brown.
Only then add butter, garlic, or herbs.
This develops a much richer flavor.
Best Knife for Mushrooms
A sharp chef knife provides:
- Clean slices
- Better control
- Less crushing
Avoid serrated knives.
They tear rather than slice.
Preparing Tomatoes for Pasta
Fresh tomatoes are common in many pasta dishes.
For diced tomatoes:
Remove the stem.
Slice into wedges.
Cut into strips.
Dice evenly.
For peeled tomatoes:
Score a small “X” on the bottom.
Blanch for 30 seconds.
Transfer to ice water.
The skins peel off effortlessly.
Preparing Parmesan Cheese
Freshly grated Parmesan melts far better than pre-shredded cheese.
Use a microplane or fine grater.
Grate only what you need immediately before serving.
Fresh Parmesan enhances almost every Fresh Pasta at Home recipe with superior flavor and texture.
Organize Before Cooking
Professional chefs use the French technique known as mise en place, which means “everything in its place.”
Before heating the pan, prepare and organize:
- Garlic
- Onion
- Herbs
- Mushrooms
- Cheese
- Olive oil
- Butter
- Meat
- Pasta
Having everything ready allows you to focus entirely on cooking, prevents overcooking delicate ingredients, and makes preparing Fresh Pasta at Home far more enjoyable.
How to Prepare Chicken for Pasta
Chicken is one of the most versatile proteins for pasta dishes. Whether you’re making Chicken Alfredo, Garlic Parmesan Pasta, Mushroom Chicken Pasta, or Lemon Herb Pasta, properly preparing the chicken ensures juicy, tender bites that cook evenly.
If you’ve mastered Fresh Pasta at Home, learning how to prepare chicken correctly is the next step toward restaurant-quality meals.
Check Our Guide The Ultimate American BBQ Meat Guide: How to Cut Chicken, Steak & Ribs
Choose the Right Cut
The two most common options are:
Chicken Breast
Best for:
- Alfredo
- Cream sauces
- Lemon pasta
- Garlic butter pasta
Advantages:
- Lean
- Tender
- Quick cooking
Chicken Thighs
Perfect for:
- Tomato sauces
- Mushroom pasta
- Rustic pasta dishes
Advantages:
- More flavor
- Higher fat content
- Difficult to overcook
Trim the Chicken
Place the chicken on a separate cutting board reserved for raw meat.
Using a sharp chef knife:
- Remove excess fat
- Trim loose skin
- Remove cartilage if necessary
- Pat dry with paper towels
Dry chicken browns much better than wet chicken.
Slice Chicken for Pasta
Uniform pieces cook evenly.
For most pasta recipes:
Slice into strips approximately:
• ½ inch (1–1.5 cm) wide
Or cube into:
• ¾ inch (2 cm) pieces
Always cut against the grain.
This shortens the muscle fibers and produces more tender bites.
Cooking Chicken
Heat olive oil over medium-high heat.
Cook chicken until:
- Golden outside
- Internal temperature reaches 165°F (74°C)
Avoid overcrowding the pan.
Crowding creates steam instead of browning.
Allow the chicken to rest for several minutes before adding it to the pasta.
Best Knife for Chicken
A sharp chef knife is ideal.
Benefits include:
- Clean slices
- Better control
- Faster preparation
- Reduced tearing
How to Prepare Beef for Pasta
Beef creates hearty pasta dishes full of rich flavor.
Popular choices include:
- Sirloin
- Ribeye
- Strip steak
- Flank steak
- Ground beef
- Chuck roast
Different recipes require different cuts.
Beef for Cream Sauces
Choose tender cuts like:
- Sirloin
- Ribeye
Slice thinly across the grain.
Quickly sear over high heat.
The beef remains tender while developing a flavorful crust.
Beef for Bolognese
Traditional Bolognese often combines:
- Ground beef
- Ground pork
Some recipes also include veal.
Brown the meat thoroughly before adding vegetables and tomatoes.
Proper browning develops deep flavor.
Slicing Beef Correctly
One of the most important knife skills is cutting against the grain.
The grain refers to the direction of the muscle fibers.
Cutting across them makes every bite significantly more tender.
Using Fresh Pasta at Home with properly sliced beef creates a remarkable improvement in texture.
Trimming Beef
Remove:
- Silver skin
- Thick connective tissue
- Excess fat
Leave small amounts of fat for flavor.
Silver skin should always be removed because it remains chewy after cooking.
Best Knife for Beef
An 8-inch chef knife handles most trimming.
For large cuts:
A slicing knife also works well.
Keep the blade razor sharp.
Sharp knives are safer than dull ones because they require less force.
How to Prepare Pork for Pasta
Pork appears in many classic Italian recipes.
Popular choices include:
- Pork loin
- Pork tenderloin
- Pork shoulder
- Pancetta
- Italian sausage
Each offers unique flavor.
Check Our Guide How to Cut and Chop Pork
Pork Tenderloin
Trim away:
- Silver skin
- Tough connective tissue
Slice medallions.
Or cut into thin strips.
Cook quickly over medium-high heat.
Tenderloin should remain juicy.
Pork Loin
Excellent for:
- Cream sauces
- Mushroom pasta
- Herb sauces
Slice thinly across the grain.
Avoid overcooking.
Pork Shoulder
Ideal for:
- Slow-cooked ragù
- Rich tomato sauces
After several hours of cooking, the meat becomes tender enough to shred with a fork.
Pancetta
A traditional Italian favorite.
Dice into small cubes.
Cook slowly.
Allow the fat to render.
The crispy pancetta becomes the flavor base for:
- Carbonara
- Cream sauces
- Pea pasta
- Garlic pasta
Italian Sausage
Remove the casing.
Brown thoroughly.
Break into small pieces with a wooden spoon.
Excellent for:
- Tomato pasta
- Spicy sauces
- Rustic pasta dishes
Food Safety During Meat Preparation
Always follow safe food-handling practices.
Use:
- Separate cutting boards
- Clean towels
- Sharp knives
Wash your hands after handling raw meat.
Sanitize cutting boards before preparing vegetables.
Never place cooked meat back onto the same plate used for raw meat.
Knife Care During Pasta Preparation
Making Fresh Pasta at Home involves frequent knife use.
Proper care keeps your knife performing like new.
Keep Your Knife Sharp
A sharp knife:
- Cuts cleaner
- Requires less force
- Improves safety
- Preserves ingredient texture
Hone regularly and sharpen when needed.
Use the Right Cutting Board
The best cutting boards are:
- Wood
- End-grain wood
- Soft plastic
Avoid:
- Glass
- Marble
- Ceramic
- Granite
Hard surfaces dull knives quickly.
Hand Wash Only
Quality kitchen knives should never be placed in the dishwasher.
Instead:
- Wash immediately after use
- Dry thoroughly
- Store safely
Wooden handles especially benefit from occasional treatment with food-safe mineral oil.
Common Mistakes When Making Fresh Pasta at Home
Even experienced cooks occasionally make mistakes.
Fortunately, most are easy to avoid.
Adding Too Much Flour
Excess flour produces dry, dense pasta.
Add flour only when necessary.
Skipping the Resting Time
Resting relaxes the gluten.
Without it, dough becomes difficult to roll.
Rolling Too Thick
Thick pasta feels heavy.
Aim for consistent thickness throughout the sheet.
Overcooking Fresh Pasta
Fresh pasta cooks quickly.
Usually:
2–3 minutes.
Taste frequently.
Burning Garlic
Garlic cooks much faster than onions.
Add it only after onions have softened unless the recipe specifies otherwise.
Crowding the Pan
Whether cooking mushrooms or meat, overcrowding traps moisture and prevents browning.
Cook in batches if necessary.
Using a Dull Knife
A dull knife crushes rather than slices.
This affects both appearance and cooking quality.
Frequently Asked Questions
Is Fresh Pasta Better Than Dried Pasta?
Neither is universally better.
Fresh pasta is softer and ideal for cream sauces, butter sauces, and delicate fillings.
Dried pasta holds up exceptionally well to hearty tomato sauces and long cooking times.
Can I Freeze Homemade Pasta?
Yes.
Freeze individual nests on a baking sheet before transferring them to freezer bags.
Cook directly from frozen.
How Long Does Fresh Pasta Last?
Fresh pasta keeps:
- 1–2 days in the refrigerator
- Up to 2 months in the freezer
Which Flour Is Best?
Tipo “00” flour produces the smoothest traditional pasta.
Many cooks combine it with semolina for additional texture.
Do I Need a Pasta Machine?
No.
Generations of Italian cooks have successfully made Fresh Pasta at Home using only a rolling pin.
A pasta machine simply makes the process faster and more consistent.
What Knife Is Best for Pasta Preparation?
An 8-inch chef knife is the most versatile choice.
It handles:
- Dough
- Garlic
- Onions
- Herbs
- Mushrooms
- Chicken
- Beef
- Pork
One quality chef knife can perform nearly every cutting task in this guide.
Final Thoughts
Learning how to make Fresh Pasta at Home is about much more than mixing flour and eggs. It’s a complete cooking skill that combines proper dough preparation, careful rolling, precise cutting, thoughtful ingredient preparation, and confident knife work.
From silky tagliatelle and fettuccine to perfectly minced garlic, evenly diced onions, fresh herbs, tender mushrooms, and expertly prepared chicken, beef, and pork, every step contributes to the final dish. Paying attention to these details is what transforms a simple pasta dinner into an unforgettable meal.
A sharp chef knife, quality ingredients, and a little patience are all you need to create authentic homemade pasta that rivals your favorite Italian restaurant. As you continue practicing, you’ll become faster, more confident, and more creative, experimenting with new sauces, fillings, and seasonal ingredients.
Mastering Fresh Pasta at Home also provides a strong foundation for countless classic recipes, from creamy Alfredo and rich Bolognese to fresh pesto, Carbonara, mushroom pasta, and simple garlic butter sauces. Once you’ve learned these techniques, you’ll discover that homemade pasta isn’t difficult—it’s enjoyable, rewarding, and well worth the effort.
Whether you’re cooking for your family, entertaining guests, or simply enjoying a quiet evening in the kitchen, the skills you’ve learned in this guide will help you prepare delicious homemade pasta with confidence for years to come.