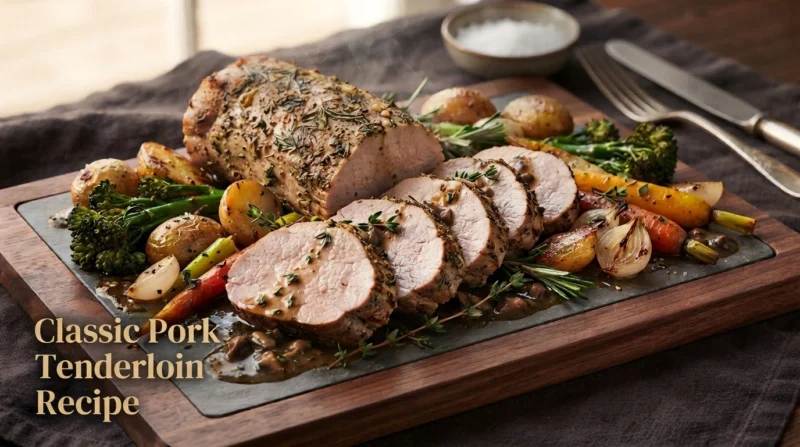
Classic Pork Tenderloin Recipe
Pork tenderloin is one of the easiest cuts of pork to cook well—and one of the easiest to overcook.
It is naturally lean, exceptionally tender, and cooks much faster than a pork loin roast or a large pork shoulder. When prepared correctly, pork tenderloin should have a beautifully browned exterior and a center that is juicy, tender, and full of flavor.
The key is understanding the difference between pork tenderloin and pork loin, controlling the cooking temperature, and learning how to recognize when the meat is actually done rather than simply cooking it for a fixed amount of time.
This classic pork tenderloin recipe uses a simple seasoning mixture, a hot pan for browning, and an oven to finish the meat gently. The result is a flavorful roast that works equally well for an ordinary family dinner or a more formal meal.
You do not need complicated ingredients or advanced cooking skills. You simply need to understand what is happening at each stage.
Why This Classic Pork Tenderloin Recipe Works
There are many ways to cook pork tenderloin. It can be grilled, roasted, pan-seared, stuffed, sliced into medallions, or cooked with a sauce.
For a classic preparation, however, simplicity is an advantage.
The tenderloin itself is already a naturally tender cut. It does not need a long marinade or hours of cooking to become soft.
Instead, this recipe focuses on four things:
- Removing the silver skin correctly
- Seasoning the meat thoroughly
- Creating a deeply browned exterior
- Cooking the center without drying it out
The high-heat searing step develops flavor through browning. The oven then finishes the pork more evenly than trying to keep the entire cooking process on the stovetop.
Finally, resting allows the meat to stabilize before slicing.
The result is pork that is browned on the outside and moist inside.
What Is Pork Tenderloin?
Before beginning, it is important to understand exactly what cut you are buying.
Pork tenderloin is a long, narrow muscle that runs along the backbone of the pig. It is relatively small compared with many other pork cuts and is naturally very tender because this muscle does not perform much heavy work.
A typical pork tenderloin weighs approximately 1 to 1½ pounds, although sizes vary.
It is:
- Lean
- Tender
- Mild in flavor
- Quick-cooking
- Suitable for roasting
- Excellent for grilling
- Easy to slice
Because it contains relatively little fat, however, pork tenderloin can become dry if cooked too far.
That is why temperature control is more important than simply following a cooking time.
Check Our Guide Best Pork Recipes: 15 Easy & Delicious Pork Recipes
Pork Tenderloin vs. Pork Loin
These two cuts are often confused because their names sound almost identical.
They are not the same thing.
Pork tenderloin is a small, narrow, elongated cut.
Pork loin is a much larger and wider roast.
Pork loin can weigh several pounds and is usually cooked as a larger roast. Pork tenderloin is much smaller and cooks considerably faster.
They should not automatically be substituted for one another in recipes.
If you are making this recipe, make sure the package actually says pork tenderloin.
Ingredients
For approximately 4 servings:
For the pork
- 1½ pounds pork tenderloin
- 1½ tablespoons olive oil
- 1½ teaspoons kosher salt
- 1 teaspoon freshly ground black pepper
- 1 teaspoon garlic powder
- 1 teaspoon paprika
- ½ teaspoon dried thyme
- ½ teaspoon dried rosemary
- ½ teaspoon onion powder
For searing
- 1 tablespoon olive oil or another neutral high-heat cooking oil
Optional finishing ingredients
- 1 tablespoon unsalted butter
- 2 garlic cloves, lightly crushed
- 1 small sprig fresh rosemary
- 2–3 sprigs fresh thyme
The herbs and butter are optional. The pork is delicious without them.
They simply add another layer of aroma during the final stage of cooking.
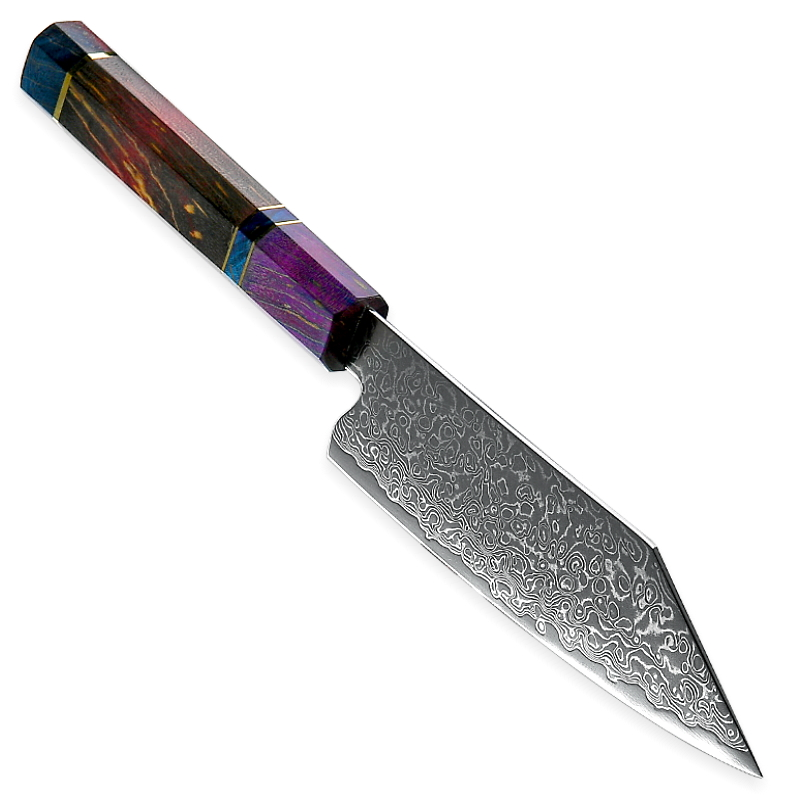
https://yashkadesigns.com/chef-kitchen-knife
Equipment
You do not need specialized equipment.
A basic setup is enough:
- Large oven-safe skillet
- Tongs
- Small bowl
- Cutting board
- Sharp chef’s knife
- Paper towels
- Instant-read meat thermometer
The meat thermometer is strongly recommended.
A thermometer is much more reliable than judging doneness by cooking time or by cutting the meat open repeatedly.
Step 1: Take the Pork Out of the Refrigerator
Remove the pork tenderloin from its packaging.
Place it on a clean plate or cutting board.
You do not need to leave it sitting at room temperature for a long period. A short time while you prepare the ingredients is enough.
The idea that meat must always sit at room temperature for an hour before cooking is not necessary for this recipe.
More important is making sure the outside of the tenderloin is reasonably dry.
Step 2: Dry the Pork Thoroughly
Use paper towels to pat the entire tenderloin dry.
This small step makes a surprisingly large difference.
Moisture on the surface must evaporate before the meat can brown properly.
If the surface is wet, the pan initially spends energy evaporating water rather than creating the intense browning you want.
A dry surface gives you a much better sear.
Do not rub the meat aggressively. Simply press the paper towels against it until the surface is dry.
Step 3: Remove the Silver Skin
Look closely at the tenderloin.
You may see a shiny, tough, silvery membrane running along part of the surface.
This is called silver skin.
Unlike fat, silver skin does not melt into the meat during cooking. It remains tough and chewy.
It is therefore worth removing.
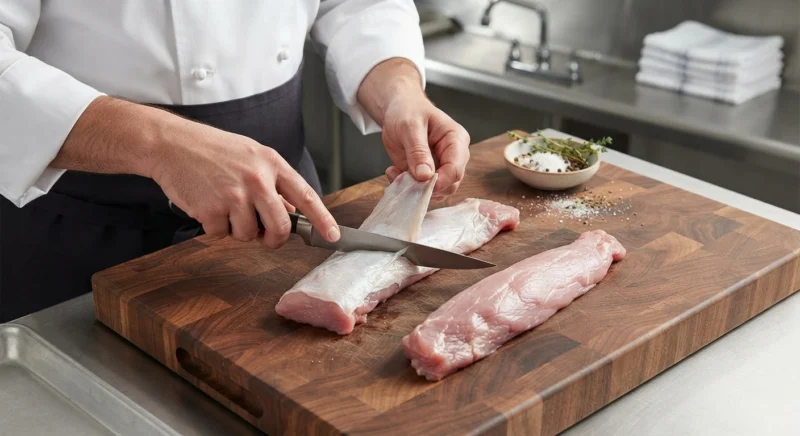
How to remove silver skin
Place the tenderloin on the cutting board.
Use a small sharp knife or boning knife.
Slide the blade underneath the membrane near one end.
Once you have created a small flap, pull the silver skin upward with your other hand.
Keep the knife almost flat against the meat and carefully cut underneath the membrane.
Your goal is to remove the membrane while wasting as little meat as possible.
Do not simply cut deeply into the tenderloin.
If some very thin areas remain, that is fine. The important thing is to remove the obvious tough membrane.
Step 4: Look for Uneven Thickness
Pork tenderloin is naturally tapered.
One end is usually noticeably thinner than the other.
This creates a cooking challenge.
The thin end can become fully cooked before the thick center reaches the desired temperature.
There are several ways to deal with this.
For this recipe, the simplest method is to tuck the thin end underneath itself so that the tenderloin has a more even thickness.
You can also tie the tenderloin with kitchen twine.
If the tenderloin is particularly uneven, folding the thin tail underneath is helpful.
This allows the meat to cook more evenly.
Step 5: Season the Pork
Combine:
- Salt
- Black pepper
- Garlic powder
- Paprika
- Thyme
- Rosemary
- Onion powder
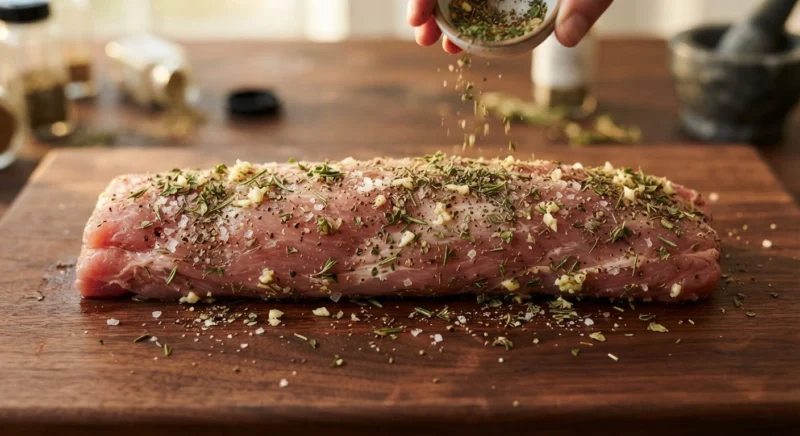
Rub the pork with the olive oil and then apply the seasoning mixture evenly over the entire surface.
Do not season only the top.
Rotate the tenderloin and season all sides.
Because the tenderloin is relatively thick, seasoning only one surface results in a bland center.
The seasoning should form a light, even coating.
Why Seasoning All Sides Matters
When you slice the finished pork, each piece contains meat from the center as well as the outer surface.
If only the top was seasoned, most of the interior will taste relatively plain.
Even seasoning creates a much more balanced result.
Salt is particularly important because it enhances the natural flavor of the pork rather than simply making it taste salty.
Step 6: Preheat the Oven
Preheat the oven to 400°F (200°C).
Let the oven become fully hot before you start cooking.
This matters because the tenderloin will spend only a relatively short time in the oven.
A properly preheated oven provides predictable cooking.
Step 7: Heat the Skillet
Place an oven-safe skillet over medium-high heat.
Add approximately 1 tablespoon of cooking oil.
Allow the oil to become hot but not smoking heavily.
You want the pan hot enough to create immediate browning when the pork touches the surface.
If the pan is too cool, the pork will slowly cook and release moisture rather than developing a good crust.
If the pan is excessively hot, the spices and exterior can burn before the center cooks.
Medium-high heat is usually the right starting point.
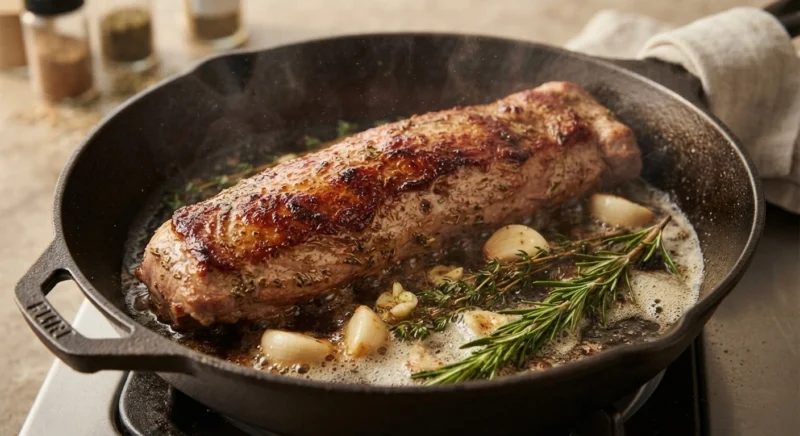
Step 8: Sear the Pork Tenderloin
Place the tenderloin into the hot skillet.
You should hear an immediate, energetic sizzle.
If there is almost no sound, the pan may not be hot enough.
Leave the pork undisturbed for approximately 2–3 minutes.
Do not constantly move it around.
The meat needs direct contact with the hot pan to develop browning.
Once the first side is deeply golden brown, turn the tenderloin using tongs.
Brown another side.
Continue rotating until most of the exterior has developed a rich golden-brown color.
This usually takes approximately 6–8 minutes total.
Why Searing Matters
Searing does not “seal in the juices.”
That is a common cooking myth.
The primary reason for searing is flavor and color.
High heat causes complex browning reactions on the surface of the meat. These reactions create the roasted, savory flavors we associate with beautifully cooked meat.
The browned exterior also gives the tenderloin a much more appetizing appearance.
So think of searing as a flavor-building step, not a method for preventing moisture loss.
Step 9: Add Butter and Herbs
If you are using the optional finishing ingredients, reduce the heat slightly.
Add:
- 1 tablespoon butter
- 2 crushed garlic cloves
- Fresh rosemary
- Fresh thyme
As the butter melts, spoon some of it over the pork.
This creates an aromatic coating.
Be careful not to burn the butter or garlic.
You only need a short amount of time here.
If the garlic begins turning very dark or the butter smells burnt, remove the pan from the heat.
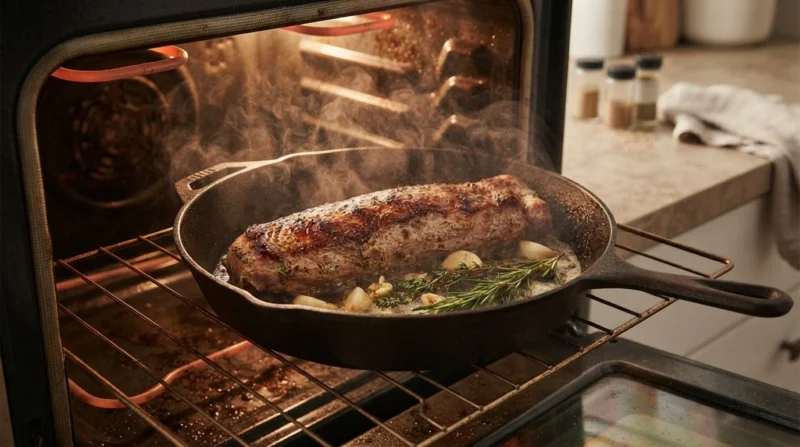
Step 10: Transfer the Skillet to the Oven
Once the tenderloin is well browned, transfer the entire oven-safe skillet into the preheated oven.
Roast at 400°F (200°C).
The cooking time will depend on the size and thickness of the tenderloin.
As a general guide, a 1–1½-pound tenderloin may require approximately 12–20 minutes in the oven after searing.
But do not treat this number as an exact instruction.
Temperature is more important than time.
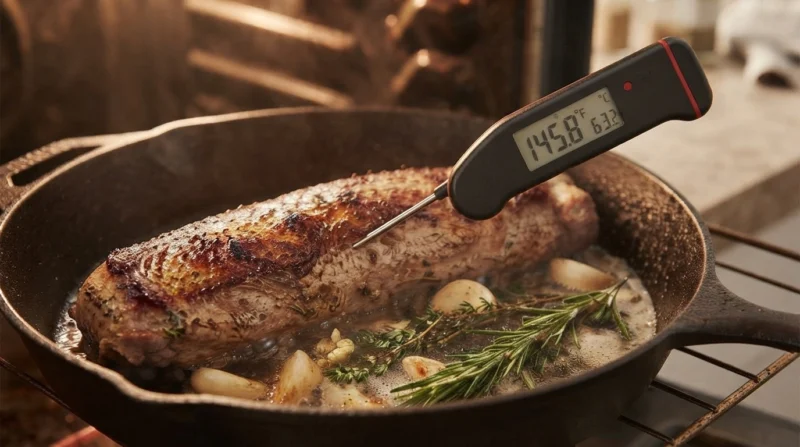
The Most Important Part: Check the Internal Temperature
Insert an instant-read thermometer into the thickest part of the tenderloin.
Avoid touching the pan.
You want the thermometer tip in the center of the meat.
For whole-muscle pork, a final internal temperature of 145°F (63°C) followed by a short rest is a widely accepted safe target.
Because the pork continues cooking slightly after it leaves the oven, you can remove it when it is approaching that temperature.
The exact carryover cooking will depend on the size of the tenderloin, cooking temperature, pan, and other factors.
The thermometer removes much of the guesswork.
Why You Should Not Cook Pork Until It Is Completely White
Many people grew up believing pork must be cooked until it is completely white and dry.
That is not necessary.
A properly cooked pork tenderloin can have a faint blush of pink in the center.
Color alone is not a reliable indicator of doneness.
Temperature is much more useful.
If you cook a lean tenderloin until there is absolutely no trace of moisture or pinkness, you may end up with dry meat.
The goal is safe and properly cooked, not excessively cooked.
Step 11: Remove the Pork From the Oven
Once the pork reaches the appropriate temperature, carefully remove the skillet from the oven.
Remember that the handle will be extremely hot.
A simple but useful kitchen habit is to place a towel or heat-resistant cover over the skillet handle immediately after removing it from the oven.
This serves as a visual reminder that the handle is hot.
Do not accidentally grab it with your bare hand.
Step 12: Rest the Pork
Transfer the tenderloin to a clean cutting board.
Let it rest for approximately 5–10 minutes.
Do not immediately slice it.
Resting gives the meat time to settle after cooking.
During this period, the temperature can continue to rise slightly and the juices redistribute.
If you slice immediately, more liquid can run onto the cutting board.
That does not mean every drop of juice magically returns to the center during resting. Rather, resting makes the finished meat easier to slice cleanly and helps reduce excessive moisture loss.
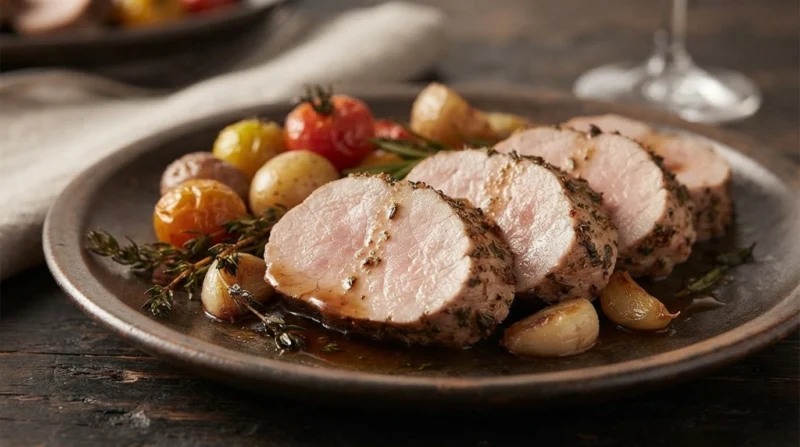
Step 13: Slice the Pork Tenderloin
Use a sharp chef’s knife.
Cut the tenderloin crosswise into slices approximately ½–¾ inch thick.
Try to make consistent slices.
A sharp knife is particularly important here.
A dull knife tends to crush the meat rather than making a clean cut.
Use a smooth slicing motion instead of repeatedly sawing aggressively through the pork.
What Properly Cooked Pork Tenderloin Should Look Like
When you cut into the tenderloin, you are looking for:
- A browned exterior
- A moist interior
- Tender texture
- Even cooking
- Possible faint pink coloration
- No raw, translucent center
The pork should not feel rubbery.
It should be firm but yielding.
If the meat is dry, chalky, or difficult to chew, it was likely cooked too far.
How to Tell if Pork Tenderloin Is Done Without a Thermometer
A thermometer is the best option, but experienced cooks sometimes use other observations.
When gently pressed with tongs, properly cooked pork should feel firm but still have some resilience.
The center should not feel extremely soft and raw.
However, this method requires experience.
For beginners, a thermometer is much more reliable.
Cooking time varies too much between tenderloins to depend on a clock alone.
Common Mistake #1: Buying Pork Loin Instead of Pork Tenderloin
This is one of the most common mistakes.
The two cuts are different.
A pork loin roast is much larger and requires different cooking times and methods.
Always check the package.
If you are standing in front of the meat counter, look for the long, narrow tenderloin rather than a large roast.
Common Mistake #2: Not Removing Silver Skin
If you leave a thick layer of silver skin attached, it can remain unpleasantly chewy after cooking.
Take a few minutes to remove it.
The difference is noticeable when eating.
Common Mistake #3: Starting With a Wet Tenderloin
A wet surface will not brown efficiently.
Pat the pork dry before seasoning.
This is especially important if the tenderloin has been stored in packaging containing liquid.
Common Mistake #4: Using Too Much Oil
You only need enough oil to coat the cooking surface.
Too much oil does not improve the sear.
It can instead make the pan greasy and interfere with the dry, intense contact needed for good browning.
Common Mistake #5: Moving the Pork Constantly
Once the tenderloin hits the pan, let it brown.
Constantly turning and sliding the meat prevents the surface from developing a good crust.
Give each side time to contact the pan.
Common Mistake #6: Cooking Only by Time
“Cook for 20 minutes” sounds simple.
Unfortunately, meat does not work that way.
Two tenderloins can have different weights, thicknesses, starting temperatures, and shapes.
One may be ready several minutes before another.
Use cooking time as a guideline, not as proof of doneness.
Common Mistake #7: Cutting Into the Pork Repeatedly
If you repeatedly cut into the tenderloin to check it, you lose valuable juices and make it harder to judge the final result.
A thermometer is much better.
Insert it once or twice into the thickest portion.
Common Mistake #8: Skipping the Resting Period
The pork has just experienced intense heat.
Give it several minutes before slicing.
This also makes the cutting process easier and cleaner.
Common Mistake #9: Using a Dull Knife
Tender meat deserves a sharp knife.
A dull blade requires more pressure and tends to crush the meat.
A sharp chef’s knife creates clean slices with much less effort.
How to Get a Better Crust
If you want a darker, more restaurant-style crust, there are several things you can do.
First, make sure the meat is dry.
Second, make sure the pan is hot.
Third, do not overcrowd the pan.
Fourth, allow the meat to remain in contact with the pan long enough to brown.
Finally, avoid excessive moisture from marinades immediately before searing.
A simple dry seasoning is ideal for this preparation.
Should You Marinate Pork Tenderloin?
You can, but you do not have to.
Pork tenderloin is naturally tender, so marinating is primarily about flavor rather than tenderization.
For a classic recipe, a dry seasoning blend keeps the process simple.
If you want a different flavor profile, you can marinate the tenderloin for several hours in a mixture containing ingredients such as:
- Olive oil
- Garlic
- Herbs
- Mustard
- Lemon
- Apple juice
- Soy sauce
However, very wet marinades can make searing more difficult.
If you marinate the pork, pat it dry before placing it into the hot skillet.
Classic Pan Sauce Option
The browned bits left in the skillet contain a lot of flavor.
Instead of washing the skillet immediately, use those browned bits to create a quick sauce.
After removing the pork, place the skillet over medium heat.
Add approximately ½ cup of chicken stock.
Use a wooden spoon to loosen the browned pieces from the bottom.
This process is called deglazing.
Let the liquid simmer until slightly reduced.
Add a small amount of butter and taste for seasoning.
You can finish the sauce with:
- Fresh thyme
- Black pepper
- Dijon mustard
- A small splash of apple cider vinegar
The result is a simple pan sauce that complements the pork without overwhelming it.
Creamy Mustard Sauce Variation
For a richer version, make a mustard cream sauce.
After deglazing the pan, add:
- ½ cup chicken stock
- 1 tablespoon Dijon mustard
- ½ cup heavy cream
Simmer gently until slightly thickened.
Taste before adding more salt because the mustard and stock may already contain enough seasoning.
Serve the sauce alongside the sliced pork.
Do not drown the pork in sauce.
A small amount is enough.
Apple and Herb Variation
Pork pairs naturally with apples.
For an autumn-inspired variation, sauté thin apple slices in the same skillet after removing the pork.
Add a little butter and fresh thyme.
When the apples become tender but still hold their shape, add a small amount of chicken stock.
You can also add a splash of apple cider.
Reduce until lightly concentrated.
Serve the apples beside the pork.
The natural sweetness of the apples balances the savory pork beautifully.
Garlic Butter Pork Tenderloin
If you love garlic butter, this recipe can be adapted easily.
After searing the pork, reduce the heat.
Add:
- 1–2 tablespoons butter
- 2–3 garlic cloves
- Fresh thyme
- Fresh rosemary
Tilt the pan slightly and spoon the melted butter over the pork.
The butter picks up the browned flavors from the pan and carries the garlic and herbs across the surface of the meat.
Be careful not to burn the garlic.
Garlic can become bitter surprisingly quickly when exposed to high heat.
What to Serve With Pork Tenderloin
Pork tenderloin is versatile and works with many side dishes.
Classic choices include:
Mashed Potatoes
Creamy mashed potatoes are an excellent pairing because they absorb the pan sauce.
Roasted Potatoes
Crispy roasted potatoes provide a pleasant contrast to the tender pork.
Green Beans
Fresh green beans add color and freshness.
Roasted Carrots
Their natural sweetness works particularly well with pork.
Brussels Sprouts
Roasted Brussels sprouts provide a deeper, slightly bitter flavor that balances the mild meat.
Apple Slaw
A crisp apple-based slaw adds acidity and freshness.
Rice
Simple rice is especially useful if you are serving the pork with a flavorful sauce.
Roasted Root Vegetables
Carrots, parsnips, onions, and sweet potatoes create a hearty meal.
A Simple Complete Dinner
For an easy family dinner, serve the pork with:
- Classic pork tenderloin
- Mashed potatoes
- Roasted green beans
- Pan sauce
This combination requires no complicated preparation.
The pork provides the protein, the potatoes provide a creamy base, the vegetables provide freshness, and the sauce ties everything together.
How Much Pork Tenderloin Per Person?
A reasonable starting point is approximately 6–8 ounces of raw pork tenderloin per person, depending on appetites and the number of side dishes.
For four people, a 1½-pound tenderloin is often sufficient.
If you are serving a large number of side dishes, you may need less meat per person.
If the pork is the main focus of the meal and you have hungry guests, plan for more.
Can You Prepare Pork Tenderloin Ahead of Time?
You can prepare the pork several hours in advance by trimming and seasoning it.
Keep it refrigerated until you are ready to cook.
However, do not leave raw pork sitting at room temperature for an extended period.
For the best texture, cook it relatively close to serving time.
The finished pork can also be refrigerated and used later.
How to Reheat Pork Tenderloin Without Drying It Out
Because tenderloin is lean, reheating requires some care.
The microwave can easily overcook it.
A better method is to slice the pork and warm it gently in a covered skillet with a small amount of sauce or stock.
Use low heat.
You are not trying to cook it again.
You are simply warming it.
If you have leftover pan sauce, this is an excellent opportunity to use it.
Storing Leftover Pork Tenderloin
Allow leftovers to cool appropriately and refrigerate them in a sealed container.
For the best quality, use refrigerated leftovers within a few days.
Store the pork separately from very wet ingredients when possible.
If you already have sauce, storing the pork with a small amount of sauce can help prevent the slices from drying out.
Can Pork Tenderloin Be Frozen?
Yes.
Cooked pork tenderloin can be frozen.
For better texture after thawing:
- Cool the pork.
- Slice it if desired.
- Wrap it tightly.
- Place it in an airtight freezer container or freezer bag.
- Label it with the date.
When ready to use, thaw it safely in the refrigerator.
Reheat gently rather than aggressively.
A Note About Salt
Salt deserves more attention than it usually receives.
If you add too little salt, the pork may taste flat even though the seasoning mixture contains several other ingredients.
If you add too much, the natural flavor of the pork disappears.
The quantity in this recipe provides a balanced starting point, but salt levels can vary depending on the type of salt used.
Kosher salt, fine table salt, and other salts have different crystal sizes.
A teaspoon of one type may contain considerably more salt than a teaspoon of another.
For that reason, learn to recognize the total seasoning rather than blindly treating different salts as interchangeable by volume.
Why Black Pepper Should Be Freshly Ground
Freshly ground black pepper has a much stronger aroma than old pre-ground pepper.
It contributes both heat and fragrance.
For a simple pork tenderloin recipe, freshly ground black pepper is enough to give the meat a noticeable savory character without overpowering it.
You do not need an excessive amount.
Should You Use Paprika?
Paprika is not essential, but it provides three useful things:
- Mild sweetness
- Warm spice
- Color
It helps create the attractive reddish-brown exterior of the pork.
For a more traditional herb-focused version, you can reduce or omit it.
For a slightly smoky version, smoked paprika can be substituted.
Use smoked paprika carefully because its flavor is stronger.
Fresh Herbs vs. Dried Herbs
Both work.
Dried herbs are convenient and concentrated.
Fresh herbs provide a brighter aroma.
A good approach is to use dried herbs in the seasoning mixture and fresh herbs during the butter-basting stage.
This gives you the convenience of a dry rub with the aroma of fresh herbs.
How to Prevent the Thin End From Drying Out
The tapered shape of tenderloin is one of its biggest challenges.
If the thin end is much smaller than the center, it can overcook.
Tucking the thin end underneath itself helps.
You can also tie the tenderloin with kitchen twine.
Another useful technique is to position the thicker portion toward the hotter part of the pan and monitor the temperature carefully.
The thermometer should be inserted into the thickest part because that is the slowest-cooking section.
What If the Pork Is Browning Too Quickly?
If the exterior becomes very dark before the center is ready, reduce the heat.
You can also move the skillet into the oven earlier.
The purpose of searing is to create a flavorful crust.
You do not need to continue browning indefinitely.
Dark brown is desirable.
Black and bitter is not.
What If the Pork Is Not Browning?
There are several possible reasons.
The meat is wet
Pat it dry.
The pan is not hot enough
Allow the skillet to heat properly.
The pan is overcrowded
Too much moisture can accumulate.
You keep moving the meat
Allow it to remain in contact with the pan.
There is too much marinade
Excess liquid interferes with browning.
Correct these issues and the crust should improve.
What If the Pork Is Dry?
The most common reason is overcooking.
Pork tenderloin is lean and has little fat to protect it from excessive heat.
If the center temperature climbs significantly beyond the desired range, the meat can become dry.
The solution is simple:
Start checking the temperature earlier.
Do not wait until the recipe’s estimated cooking time is over.
What If the Center Is Undercooked?
Do not panic.
Simply return the tenderloin to the oven or skillet and continue cooking gently.
Check the temperature again after several minutes.
Cooking is not a race.
The goal is to reach the correct internal temperature without unnecessarily overcooking the exterior.
Why the Resting Time Is Short
Large beef roasts may rest for 15–30 minutes.
Pork tenderloin is much smaller.
A rest of approximately 5–10 minutes is generally enough.
If you let a small tenderloin sit for a very long period, it can cool considerably.
The goal is simply to give the meat a short recovery period before slicing.
Knife Technique for Slicing Pork Tenderloin
This is a good recipe for practicing basic knife technique.
Place the rested tenderloin on a stable cutting board.
Hold the meat steady with your non-cutting hand, keeping your fingers curled safely away from the blade.
Use a sharp chef’s knife.
Slice across the tenderloin with controlled, smooth movements.
Do not press straight downward with excessive force.
A sharp knife should do most of the work.
Consistent slices also make the finished dish look more professional.
Knife Safety Reminder
Always use a stable cutting board.
If your cutting board slides on the counter, place a damp kitchen towel underneath it.
Keep your guiding hand in a claw-like position with fingertips curled inward.
Never try to catch a falling knife.
If you drop a knife, step back and let it fall.
And always keep the knife blade facing away from your body when carrying it.
Good knife technique is not just about cutting faster.
It is about controlling the blade.
Classic Pork Tenderloin Recipe: Quick Summary
Here is the complete process in condensed form.
- Preheat the oven to 400°F (200°C).
- Pat the pork tenderloin dry.
- Remove the silver skin.
- Tuck the thin end underneath or tie the tenderloin.
- Coat with olive oil.
- Season with salt, pepper, garlic powder, paprika, thyme, rosemary, and onion powder.
- Heat an oven-safe skillet over medium-high heat.
- Add a small amount of oil.
- Sear the pork on all sides until well browned.
- Add butter and optional garlic and fresh herbs.
- Transfer the skillet to the oven.
- Roast until the thickest part approaches the desired internal temperature.
- Remove from the oven.
- Rest for 5–10 minutes.
- Slice crosswise.
- Serve with your favorite side dishes or pan sauce.
Frequently Asked Questions
Is pork tenderloin the same as pork loin?
No. Pork tenderloin is a smaller, narrow muscle and cooks much faster. Pork loin is a larger roast and requires a different cooking approach.
Can I cook pork tenderloin without searing it?
Yes. You can roast it directly in the oven. However, searing first gives the exterior significantly more flavor and color.
Can I grill pork tenderloin?
Absolutely. Pork tenderloin is excellent on the grill. The same basic principle applies: brown the exterior and monitor the internal temperature carefully.
Can I use fresh garlic instead of garlic powder?
Yes. Fresh garlic can be used, particularly during the butter-basting stage. Avoid burning it.
Can I use dried rosemary?
Yes. Dried rosemary works well in the seasoning mixture. Crush it slightly between your fingers before adding it to release more aroma.
Why is my pork slightly pink?
Color alone does not determine doneness. Properly cooked pork can retain some pink color. Use an accurate thermometer to determine doneness.
Should I cover pork tenderloin while roasting?
Usually not for this recipe. Leaving it uncovered allows the browned exterior to remain exposed to the oven’s dry heat.
Can I make the recipe without butter?
Yes. Butter is optional. The pork will still be flavorful with olive oil and the seasoning mixture.
Can I use a cast-iron skillet?
Yes. Cast iron is excellent for searing and can go directly from the stovetop to the oven if the skillet is oven-safe.
What temperature should pork tenderloin reach?
For whole-muscle pork, 145°F (63°C) followed by a short rest is a commonly recommended safe endpoint. Always use a thermometer rather than relying only on color or cooking time.
The Most Important Lessons
If this is your first time cooking pork tenderloin, remember these five principles:
1. Dry the meat
A dry surface browns much better.
2. Remove the silver skin
It is tough and does not become tender through normal cooking.
3. Brown the outside
Searing creates flavor and gives the pork an attractive crust.
4. Use a thermometer
Cooking time is only an estimate.
5. Do not overcook it
Pork tenderloin is lean, so excessive cooking quickly turns a naturally tender cut into dry meat.
Final Thoughts
A classic pork tenderloin does not need complicated ingredients or elaborate techniques.
The quality of the final dish comes mostly from good fundamentals.
Start with a properly trimmed tenderloin. Dry it thoroughly. Season it evenly. Use a hot skillet to develop a deep golden-brown crust, then finish the pork gently in the oven.
Most importantly, monitor the internal temperature instead of relying entirely on a timer.
Once the pork is cooked, give it a short rest before slicing it with a sharp knife.
The result should be tender, juicy pork with a flavorful browned exterior and a simple, satisfying character.
This is one of those recipes worth learning because the technique can be adapted endlessly. Once you understand how to cook a basic pork tenderloin correctly, you can change the seasoning, add a pan sauce, pair it with apples, serve it with roasted vegetables, or turn it into an elegant dinner without changing the fundamental cooking method.
The best version is not necessarily the one with the most ingredients.
It is the one where the pork itself remains the star.