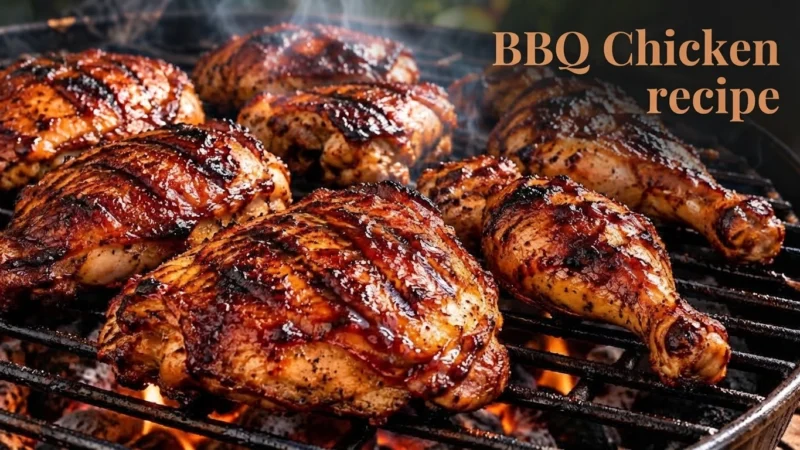
Classic BBQ Chicken Recipe
Few dishes say summer cooking quite like classic BBQ chicken. The smell of chicken sizzling over a hot grill, the sound of the fat hitting the grates, and the glossy layer of barbecue sauce slowly caramelizing on the outside can make an ordinary dinner feel like a backyard celebration.
But BBQ chicken is also one of those dishes that looks easier than it really is.
The ingredients are simple. The technique is not.
The biggest challenge is cooking the chicken all the way through while keeping the meat juicy, developing deeply browned skin, and adding enough barbecue sauce to create a beautiful sticky glaze without burning it. If the grill is too hot, the sauce can burn before the chicken is cooked. If the heat is too low, the skin can become soft and pale. If the chicken is turned too often, you can lose control of the browning. And if you rely only on appearance to judge doneness, you can easily end up with either undercooked chicken or dry meat.
This classic BBQ chicken recipe solves those problems by using a controlled two-stage cooking method.
First, the chicken cooks over moderate indirect heat until it is almost completely cooked. Then it moves over direct heat for the final browning and barbecue-sauce glaze.
The result is chicken with juicy meat, properly cooked skin, smoky grilled flavor, and a glossy BBQ coating that is caramelized rather than burned.
You can make this recipe with chicken thighs, drumsticks, leg quarters, or a combination of bone-in, skin-on pieces. The method is particularly forgiving with dark meat, which remains juicy and develops excellent flavor on the grill.
The goal is not simply to cook chicken.
The goal is to make BBQ chicken that is juicy inside, browned outside, and covered with a deeply caramelized barbecue glaze.
What Makes Great BBQ Chicken?
Before getting into the ingredients and method, it helps to understand what you are trying to achieve.
Excellent BBQ chicken has several characteristics:
- The meat is fully cooked and juicy.
- The skin is browned and rendered rather than rubbery.
- The barbecue sauce is glossy and caramelized.
- The outside has a balanced combination of sweet, smoky, salty, and slightly spicy flavors.
- The chicken has some grilled character without tasting burnt.
- The meat remains moist after resting.
- The sauce sticks to the chicken instead of sliding off.
The most important principle is heat control.
Barbecue sauce often contains sugar. Sugar tastes wonderful when caramelized, but it can burn quickly over strong direct heat. That is why putting sauce on the chicken at the beginning of grilling is usually a mistake.
Instead, cook the chicken first.
Brown it.
Then sauce it.
Then finish it over controlled heat.
That simple change makes a huge difference.
Check Our Ultimate American BBQ Meat Guide: How to Cut Chicken, Steak & Ribs + 8 Easy BBQ Recipes
Classic BBQ Chicken Recipe at a Glance
Servings: 4–6
Prep time: 20–30 minutes
Marinating/resting time: 30 minutes to overnight
Cooking time: approximately 40–55 minutes
Total time: about 1½ hours, depending on the chicken pieces and grill
Cooking method: Grill
Difficulty: Moderate
Ingredients
For the chicken:
- 3½–4½ pounds bone-in, skin-on chicken pieces
- 1 tablespoon olive oil
- 2 teaspoons kosher salt
- 1½ teaspoons smoked paprika
- 1 teaspoon sweet paprika
- 1 teaspoon garlic powder
- 1 teaspoon onion powder
- 1 teaspoon freshly ground black pepper
- ½ teaspoon chili powder
- ½ teaspoon dried oregano
- ¼ teaspoon cayenne pepper, optional
For finishing:
- 1½–2 cups barbecue sauce
- 1 tablespoon apple cider vinegar, optional
- 1 tablespoon honey or maple syrup, optional
For the grill:
- Charcoal or gas grill
- Neutral oil for the grates if needed
Choosing the Right Chicken
You can make BBQ chicken from almost any chicken pieces, but not all pieces behave exactly the same way.
For this recipe, I recommend bone-in, skin-on chicken.
The bone adds flavor and helps the meat cook more gently, while the skin protects the surface of the chicken and gives you something wonderful to brown and crisp on the grill.
Chicken Thighs
Bone-in chicken thighs are one of the best choices for BBQ chicken.
They contain more fat and connective tissue than breast meat, which means they are naturally forgiving. Even if they spend a few extra minutes on the grill, they usually remain juicy.
For beginners, thighs are an excellent starting point.
Drumsticks
Drumsticks are also ideal.
They are inexpensive, flavorful, easy to handle, and naturally suited to grilling.
Because they have a relatively small diameter, they cook more quickly than large leg quarters.
Chicken Leg Quarters
Leg quarters contain both the thigh and drumstick.
They are flavorful and economical, but they take longer to cook.
They are particularly good when you are feeding several people because each piece provides a substantial portion.
Bone-In Chicken Breasts
You can use them, but they require more attention.
Chicken breast is much leaner than dark meat. Once it becomes overcooked, it can turn dry and stringy.
If you use bone-in breasts, consider choosing smaller pieces and monitor their internal temperature carefully.
Boneless Chicken
Boneless thighs can also work very well.
They cook quickly and are difficult to dry out compared with breast meat.
However, they do not provide quite the same traditional BBQ appearance as bone-in pieces with skin.
Check Our Guide Crispy Chicken Cutlets Recipe: Golden, Crunchy, and Juicy
Why Skin-On Chicken Is Better for Classic BBQ
The skin is not just decoration.
It performs several important jobs during grilling.
First, it protects the meat from direct heat.
Second, the fat underneath the skin gradually renders as the chicken cooks.
Third, the skin provides a surface that can become beautifully browned and caramelized.
Finally, it gives the barbecue sauce something to cling to.
That said, skin can also cause problems.
Chicken skin contains fat, and fat dripping onto hot charcoal can create flare-ups.
So your job is not to eliminate every flame.
Your job is to control them.
Preparing the Chicken
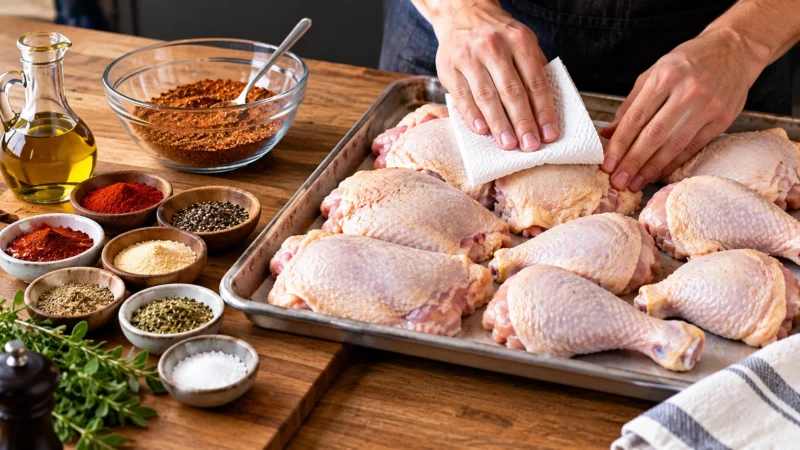
Take the chicken out of the refrigerator and place the pieces on a clean tray.
Pat them thoroughly dry with paper towels.
This step is more important than it sounds.
Wet chicken tends to steam before it browns. Dry chicken begins developing color much more efficiently.
You do not need to wash raw chicken.
Washing poultry can spread contaminated droplets around the kitchen without making the chicken safer. Proper cooking is what makes the chicken safe to eat.
After drying the chicken, inspect each piece.
Trim away any large loose pieces of excess skin or hanging fat, but do not remove the main layer of skin.
You want enough skin to protect the meat and create a good grilled surface.
Should You Leave the Chicken Whole?
If you are using drumsticks or thighs, there is usually no need to cut them.
If you are using very large leg quarters, you can leave them whole.
If you are using whole chicken breasts, consider dividing them into smaller portions so they cook more evenly.
A useful rule is:
Try to make the pieces reasonably similar in size.
You do not want a tiny drumstick sitting next to a huge breast and expect both to finish at exactly the same time.
They won’t.
The Dry Rub
A dry rub gives the chicken its first layer of flavor before the BBQ sauce is added.
The sauce provides sweetness, acidity, smoke, and richness.
The rub provides seasoning directly against the chicken.
That combination creates much more depth than sauce alone.
For this recipe, combine:
- 2 teaspoons kosher salt
- 1½ teaspoons smoked paprika
- 1 teaspoon sweet paprika
- 1 teaspoon garlic powder
- 1 teaspoon onion powder
- 1 teaspoon black pepper
- ½ teaspoon chili powder
- ½ teaspoon dried oregano
- ¼ teaspoon cayenne, if desired
Mix everything thoroughly.
You want the salt and spices evenly distributed.
Why Use Two Types of Paprika?
Smoked paprika and sweet paprika perform slightly different jobs.
Smoked paprika contributes a gentle smoky character.
Sweet paprika contributes color and a mild pepper flavor.
Using both creates a more balanced result than relying entirely on smoked paprika.
Remember that the grill itself will provide real smoke and char.
You do not need to make the chicken taste like liquid smoke.
Applying the Rub
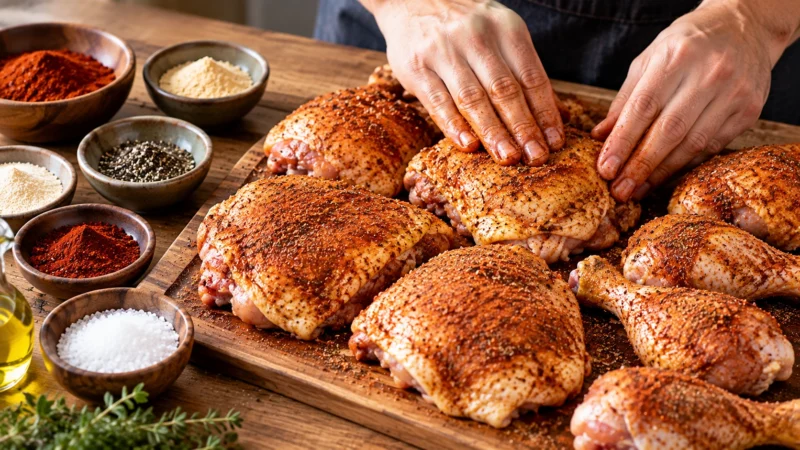
Lightly coat the chicken with olive oil.
You do not need much.
The oil helps the seasoning adhere to the skin and assists browning.
Sprinkle the rub evenly over all sides of the chicken.
Do not simply dump the entire mixture onto one side.
Season the skin side generously, then turn the chicken and season the underside.
Use your fingers to gently distribute the seasoning.
Do not aggressively massage the chicken.
You are simply trying to create an even coating.
How Long Should the Chicken Rest?
If you are in a hurry, you can grill the chicken after about 20–30 minutes.
However, allowing the seasoned chicken to rest for several hours in the refrigerator can improve the seasoning.
You can prepare the chicken the night before and leave it covered in the refrigerator.
This gives the salt more time to work into the meat.
Before grilling, take the chicken out of the refrigerator while you prepare the grill.
Do not leave raw chicken sitting at room temperature for a long period.
The goal is simply to take the chill off slightly while the grill comes to temperature, not to leave poultry on the counter for an hour.
Choosing Your BBQ Sauce
The sauce is one of the defining characteristics of BBQ chicken.
You can use your favorite bottled barbecue sauce or a homemade sauce.
For a classic profile, look for a sauce that balances:
- sweetness
- acidity
- salt
- tomato
- smoke
- mild spice
Very sweet sauces can caramelize beautifully, but they are also easier to burn.
If your sauce is extremely thick and sweet, thin it slightly with a tablespoon of apple cider vinegar.
The vinegar does two useful things.
It makes the sauce easier to brush onto the chicken in thin layers, and it adds acidity that balances the sweetness.
Don’t Put the Sauce on Too Early
This is one of the most important lessons in BBQ chicken.
Do not coat raw chicken heavily with barbecue sauce before putting it over a very hot grill.
Why?
Because most BBQ sauces contain sugar.
Sugar burns.
The chicken may still be raw inside while the outside sauce is already black.
Instead, build the sauce gradually near the end of cooking.
Think of BBQ sauce as a finishing glaze, not the primary cooking medium.
Preparing the Grill
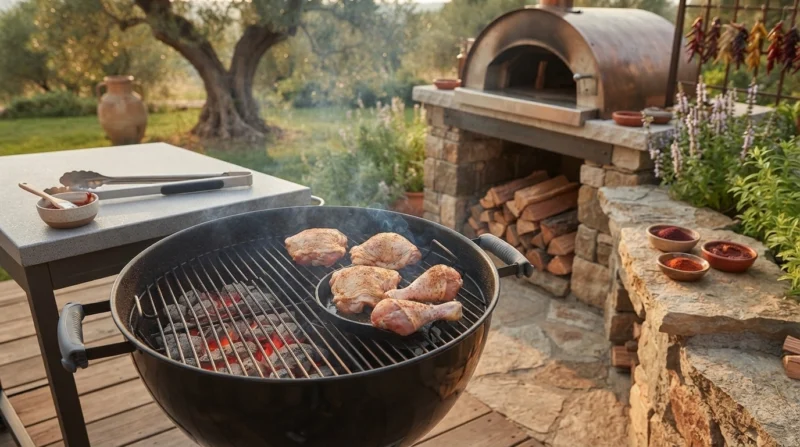
The grill should have two heat zones.
This is extremely useful.
You want:
Direct heat
The area directly above the burners or charcoal.
This is where you brown the chicken and caramelize the sauce.
Indirect heat
The cooler area away from the main heat source.
This is where the chicken cooks more gently.
With a gas grill, turn on the burners on one side and leave the other side off.
With charcoal, arrange the coals on one side of the grill.
This creates a hot zone and a cooler zone.
Why Two-Zone Grilling Works
Imagine placing a thick chicken thigh directly over very hot charcoal from the beginning.
The skin may become dark quickly.
Fat will drip.
Flames may rise.
You will move the chicken around.
The outside may look almost finished while the center is still undercooked.
That creates unnecessary stress.
With two-zone cooking, you have much more control.
The chicken can cook gradually over indirect heat.
Then you can move it directly over the heat when you are ready to brown the skin.
This is much easier to manage.
How Hot Should the Grill Be?
Aim for a grill temperature of approximately 375–425°F (190–220°C) for the overall cooking environment.
You do not need to obsess over a single number.
What matters more is having a moderate indirect zone and a hotter direct zone.
If your grill has a lid thermometer, use it as a general guide.
The thermometer tells you the approximate air temperature inside the grill.
It does not tell you the temperature of the chicken.
Those are two different measurements.
Cleaning the Grill Grates
Once the grill is hot, clean the grates thoroughly.
Use a grill brush designed for your grill.
Then, if necessary, lightly oil the grates using a folded paper towel held with long tongs.
Never pour oil directly onto a hot grill.
You want a thin film, not a pool of oil.
Clean grates help prevent the chicken skin from tearing when you turn the pieces.
Starting the Chicken
Place the chicken pieces skin-side up on the indirect side of the grill.
Close the lid.
Let the grill do the work.
This is the point where patience becomes important.
Do not immediately start turning the chicken every two minutes.
Give it time to cook.
Why Start Skin-Side Up?
The initial indirect cooking stage is not primarily about getting perfect grill marks.
It is about cooking the chicken gently.
Starting skin-side up helps prevent the skin from sticking aggressively to the grates before the chicken has had a chance to firm up.
Later, when the chicken moves to direct heat, you can focus on browning the skin.
The First Cooking Stage
Close the grill and cook the chicken for approximately 20–30 minutes, depending on the size of the pieces.
Turn the pieces once or twice during this stage if necessary.
The exact time will vary.
A small drumstick and a large leg quarter do not cook at the same speed.
This is why a thermometer is more useful than a clock.
The chicken is ready for the finishing stage when it is substantially cooked through but still needs browning and glazing.
Using a Thermometer Correctly
A food thermometer is the most reliable way to determine whether chicken has reached a safe temperature.
USDA guidance recommends cooking all poultry to a minimum internal temperature of 165°F (73.9°C) measured with a food thermometer.
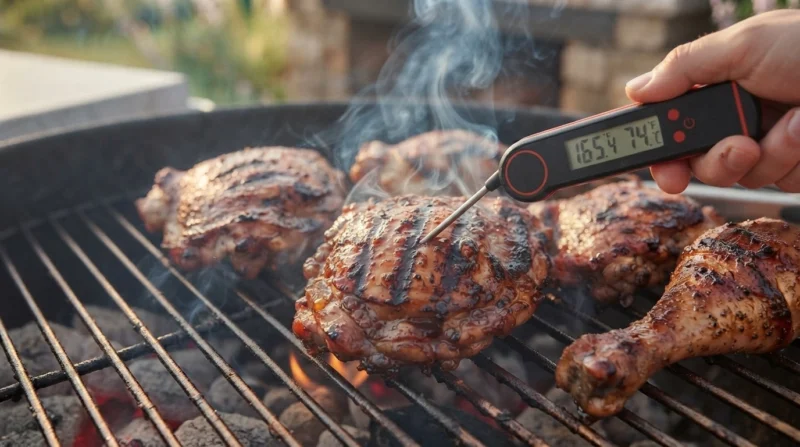
Insert the thermometer into the thickest part of the meat without touching the bone.
For a chicken thigh, aim for the thickest section.
For a breast, insert the probe into the center of the thickest portion.
For a drumstick, take the reading in the meatiest part.
If you touch bone, the reading can be misleading.
Safety Temperature vs. BBQ Texture
There is an important distinction here.
165°F is the food-safety minimum for poultry.
It does not automatically tell you whether the chicken has the texture you personally prefer.
Dark meat such as thighs and drumsticks often becomes more tender as it cooks beyond the minimum safety temperature because connective tissue gradually breaks down.
That is why excellent BBQ chicken thighs can have a higher internal temperature than the minimum.
Breast meat is different.
It contains less connective tissue and can become dry if cooked excessively.
So do not use one target temperature for every piece as though they were identical.
When to Move the Chicken to Direct Heat
Once the chicken is approaching the safe internal temperature and the meat is substantially cooked, move the pieces toward the direct-heat side.
This is where the appearance begins to change dramatically.
The skin starts to brown.
The fat begins to render.
The edges become darker.
The grill begins creating the characteristic BBQ aroma.
Watch carefully.
You are now entering the stage where chicken can go from beautifully browned to burned surprisingly quickly.
The First Layer of BBQ Sauce
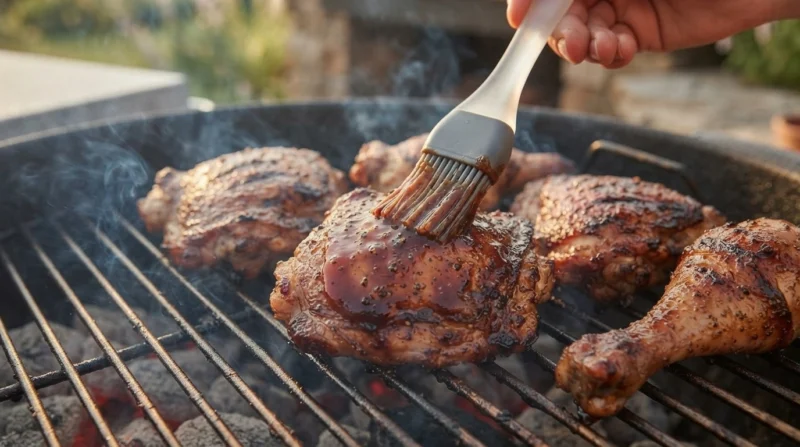
Brush a thin layer of barbecue sauce over the chicken.
Do not completely bury the chicken in sauce.
A thin layer gives you more control.
Close the lid for a minute or two.
Then turn the chicken and brush the other side.
Repeat as necessary.
You are building layers.
Think of it like painting.
One thick coat is more likely to burn.
Several thin coats produce a better glaze.
Why Thin Layers Work Better
A thin layer heats quickly.
The sugars begin to caramelize.
The sauce becomes glossy.
Then you add another thin layer.
That second layer bonds with the first.
The result is a deeper, more complex glaze.
If you apply half a cup of sauce at once, the surface can remain wet while the outside edges burn.
Thin layers give you much better control.
Controlling Flare-Ups
Flare-ups happen because fat drips from the chicken onto the heat source.
They are normal.
A brief flame is not necessarily a problem.
A sustained flame that is licking aggressively around the chicken is a problem.
If a flare-up becomes strong:
- Move the chicken to the indirect side.
- Close the lid.
- Allow the flames to settle.
- Return the chicken to direct heat when the grill is under control.
Do not panic.
Do not spray water into a gas grill.
And do not leave the chicken directly over a large flame simply because you want more char.
Controlled caramelization tastes good.
Burned sauce tastes bitter.
Turning the Chicken
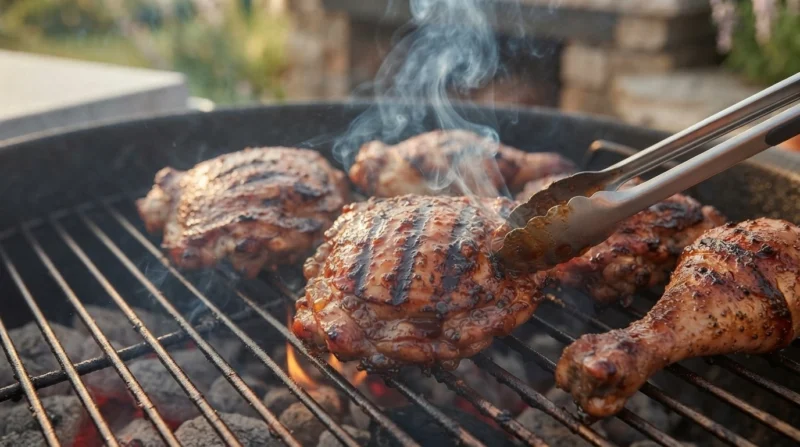
During the final stage, turn the chicken every few minutes.
You are looking for:
- deep golden-brown skin
- darker grill marks
- glossy sauce
- caramelized edges
- no black, bitter crust
The chicken should look sticky and shiny rather than wet.
That visual change tells you the sauce is setting.
How to Know When the Sauce Is Ready
There are several visual clues.
The sauce should become darker.
It should look glossy.
It should cling to the chicken instead of running off.
The edges may become slightly darker and sticky.
When you lift a piece with tongs, the sauce should stay attached.
If the surface still looks like freshly applied liquid sauce, give it another short period over moderate heat.
But watch carefully.
The difference between caramelized and burned can be less than a minute over a very hot grill.
Don’t Press the Chicken
Avoid pressing the chicken down with a spatula or tongs.
You might think pressing helps create grill marks.
It does not improve the cooking.
Instead, pressing can squeeze juices out of the meat.
Let the grill and heat do their work.
If you want better grill marks, place the chicken on a clean, hot section of the grate and leave it undisturbed long enough for the surface to brown.
How Many Times Should You Turn It?
There is no magic number.
During indirect cooking, one or two turns may be enough.
During the final direct-heat and glazing stage, you may turn it more frequently.
The key is to turn the chicken for a reason:
- to brown another side
- to prevent burning
- to apply another sauce layer
- to move it away from a flare-up
Don’t turn it simply because you feel you should.
Checking the Chicken Before Removing It
Check the thickest pieces with your thermometer.
Every piece does not necessarily have to be identical in temperature at exactly the same moment.
Small pieces may finish first.
Remove them when they are properly cooked.
Larger pieces may need additional time.
This is another reason to avoid relying only on a recipe’s stated cooking time.
Cooking time is a guide.
Internal temperature is your safety check.
Resting the Chicken
When the chicken is cooked and beautifully glazed, transfer it to a clean platter.
Allow it to rest for approximately 5–10 minutes before serving.
Resting gives the juices a chance to redistribute.
It also allows the sauce to settle slightly.
You do not need to cover the chicken tightly with foil.
Tight covering can trap steam and soften the beautifully browned skin you worked to create.
https://yashkadesigns.com/140-mm-blade-chef-kitchen-knife
Cutting and Serving BBQ Chicken
If you are serving thighs or drumsticks, you can serve them whole.
For leg quarters, you can leave them intact or separate the thigh from the drumstick.
This is where a sharp kitchen knife becomes particularly useful.
A dull knife can force you to saw through the joint.
A sharp knife allows you to locate the natural joint and cut through it cleanly.
Do not try to chop through the bone with a regular chef’s knife.
Instead, find the joint and separate the pieces through the softer connection.
A Simple Knife Technique for Chicken
Place the cooked leg quarter on a stable cutting board.
Use the tip of your knife to locate the joint between the thigh and drumstick.
Move the leg gently until you feel where the joint naturally opens.
Cut through the joint.
You should not need significant force.
If you encounter hard resistance, you are probably cutting into bone rather than the joint.
This is a useful general principle when breaking down cooked poultry:
Find the joint instead of fighting the bone.
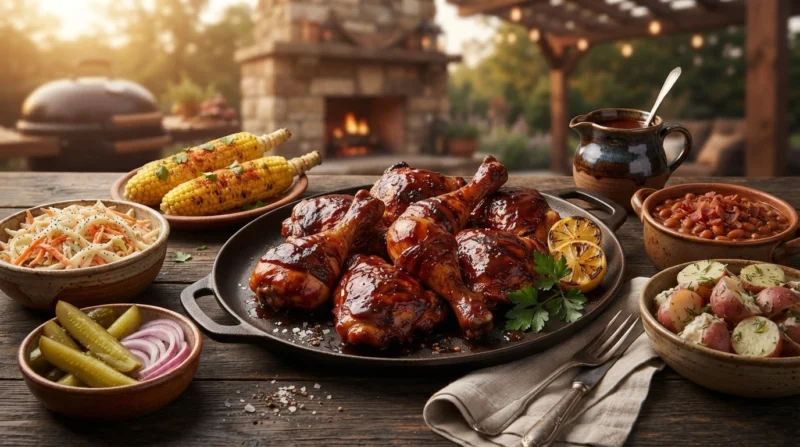
Classic BBQ Chicken Serving Ideas
BBQ chicken works with almost anything associated with summer grilling.
Classic options include:
- creamy coleslaw
- grilled corn
- baked beans
- potato salad
- macaroni salad
- grilled vegetables
- cucumber salad
- green salad
- roasted potatoes
- cornbread
- pickles
- sliced tomatoes
You do not need to serve everything.
Choose one creamy side, one vegetable, and perhaps something starchy.
For example:
BBQ chicken + coleslaw + grilled corn
is already a complete and balanced plate.
Why Coleslaw Works So Well
BBQ chicken is rich, smoky, sweet, and savory.
Coleslaw provides contrast.
The cool cabbage and acidity of the dressing cut through the richness of the chicken and BBQ sauce.
This is a useful principle in cooking generally:
Rich foods become more enjoyable when served with something fresh, crisp, acidic, or bitter.
That is why pickles work so well with barbecue too.
Homemade BBQ Sauce Option
If you want to make your own sauce, a simple classic base can be built from:
- 1 cup ketchup
- ¼ cup apple cider vinegar
- ¼ cup brown sugar
- 2 tablespoons molasses
- 1 tablespoon Worcestershire sauce
- 1 teaspoon smoked paprika
- ½ teaspoon garlic powder
- ½ teaspoon onion powder
- ½ teaspoon black pepper
- ¼ teaspoon cayenne
- 1–2 tablespoons water as needed
Combine everything in a saucepan.
Simmer gently for approximately 10–15 minutes.
Stir occasionally.
The sauce should become slightly thicker and more cohesive.
Taste it.
If it is too sweet, add a little vinegar.
If it is too acidic, add a small amount of brown sugar.
If it tastes flat, it may need more salt.
If it lacks depth, a small amount of Worcestershire sauce can help.
Remember that the sauce will be concentrated as it cooks and even more intense after it caramelizes on the chicken.
Understanding BBQ Sauce Balance
A good BBQ sauce is rarely about one dominant flavor.
It should have several layers.
Sweetness
Brown sugar, honey, maple syrup, or molasses can provide sweetness.
Acidity
Apple cider vinegar balances sweetness.
Salt
Salt makes the other flavors more noticeable.
Smoke
Smoked paprika or actual grill smoke contributes smokiness.
Spice
Black pepper, chili powder, cayenne, or hot sauce can provide heat.
Savory depth
Worcestershire sauce, garlic, onion, and other seasonings add complexity.
The exact balance is personal.
There is no single correct BBQ sauce.
Should You Marinate BBQ Chicken?
You can, but you do not have to.
The dry-rub method in this recipe works very well on its own.
If you want a more deeply seasoned chicken, you can use a simple marinade.
For example:
- ½ cup buttermilk
- 1 tablespoon hot sauce
- 1 teaspoon salt
- 1 teaspoon paprika
- ½ teaspoon garlic powder
- ½ teaspoon black pepper
Marinate the chicken in the refrigerator for several hours.
Before grilling, remove excess marinade and pat the surface reasonably dry.
Do not put heavily wet chicken directly over a roaring grill.
Why Buttermilk Can Help
Buttermilk provides mild acidity and helps create a flavorful surface.
It also adds moisture.
However, you do not want thick wet marinade coating the outside when you are trying to create crisp, browned skin.
The goal is flavor inside and a relatively dry surface outside.
That is why patting the chicken dry before grilling remains important.
BBQ Chicken Without a Marinade
Many excellent BBQ chicken recipes use no marinade at all.
There is nothing wrong with that.
The combination of:
- salt
- dry rub
- rendered chicken fat
- smoke
- grill browning
- BBQ sauce
already creates plenty of flavor.
For a simple family dinner, the dry-rub method is often the easiest approach.
Should You Use Sugar in the Dry Rub?
A small amount can be useful.
Brown sugar helps the chicken brown and adds sweetness.
However, because the BBQ sauce already contains sugar, this recipe does not depend heavily on sugar in the rub.
Too much sugar increases the chance of burning during direct grilling.
If you prefer a sweeter, darker crust, you can add 1–2 tablespoons of brown sugar to the rub.
But monitor the chicken carefully during the final grilling stage.
What If the Skin Isn’t Crispy?
There are several possible reasons.
The chicken was too wet
Moisture prevents good browning.
Pat the chicken dry before seasoning.
The grill wasn’t hot enough
The skin needs sufficient heat to brown and render.
The chicken was covered with sauce too early
A thick layer of wet sauce can prevent the skin from developing properly.
The grill lid stayed closed too long during direct cooking
Closing the lid is useful for cooking, but the final browning stage requires some attention.
Too much fat caused flare-ups
Move the chicken to indirect heat and allow the flames to settle.
Then return it to direct heat.
What If the BBQ Sauce Burns?
This usually happens because the sauce was applied too early or the direct heat was too strong.
Move the chicken to indirect heat.
If the sauce is only slightly darkened, continue cooking carefully.
If it has become genuinely black and bitter, scraping it away and applying a fresh thin layer may be necessary.
The best prevention is simple:
Sauce late.
What If the Chicken Is Brown Outside but Raw Inside?
Move it to indirect heat immediately.
Close the lid.
Continue cooking until the thickest part reaches the safe internal temperature.
Do not keep it directly over high heat just to finish it faster.
That will only make the outside darker while the inside catches up slowly.
Indirect heat is your friend.
What If the Chicken Is Dry?
Dry chicken usually comes from one of three problems:
- Overcooking
- Cooking very lean pieces too aggressively
- Using too much direct heat for too long
Chicken breast is particularly vulnerable.
If you frequently struggle with dry BBQ chicken, try bone-in thighs instead.
They are considerably more forgiving.
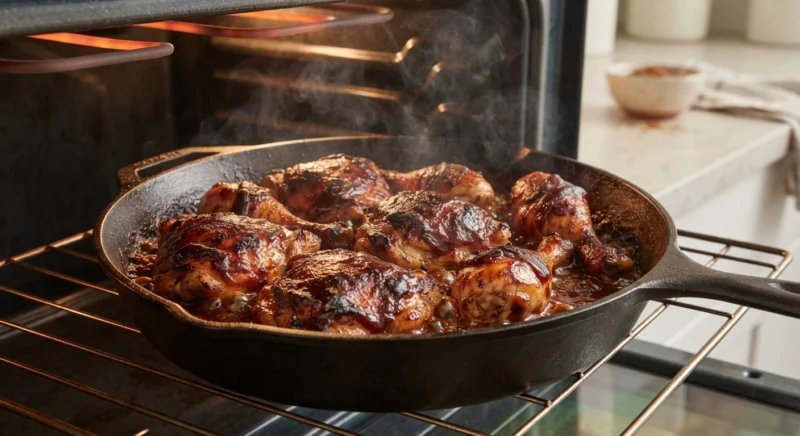
Can You Make BBQ Chicken in the Oven?
Yes.
The oven will not reproduce the exact smoky flavor of a charcoal grill, but you can make excellent BBQ chicken.
Heat the oven to approximately 400°F (205°C).
Arrange seasoned chicken pieces skin-side up on a foil-lined baking tray or rack.
Bake until the chicken is nearly cooked.
Then brush with BBQ sauce.
Return the chicken to the oven for several minutes.
Brush with another layer of sauce.
Continue until the sauce is glossy and caramelized.
For an even darker finish, use the broiler briefly at the end.
Watch constantly.
The sauce can burn quickly under a broiler.
Oven BBQ Chicken: A Better Two-Stage Method
For particularly thick chicken pieces, you can use a slightly gentler first stage.
Bake at approximately 375°F (190°C) until the chicken is mostly cooked.
Then increase the heat or use the broiler for the final glazing stage.
The important concept remains the same:
Cook first. Glaze second.
Can You Make BBQ Chicken on a Gas Grill?
Absolutely.
Gas grills are actually excellent for learning temperature control.
Set one side to medium heat and leave the other side off.
Place the chicken over the cooler side.
Once the chicken is mostly cooked, move it over the lit burners.
Brush with sauce.
Turn frequently.
Return to the cooler side if the sauce begins to burn.
The ability to instantly adjust burner temperature makes gas grilling very convenient.
Can You Make BBQ Chicken on a Charcoal Grill?
Yes, and charcoal gives the chicken an especially appealing smoky flavor.
Build a two-zone fire.
Place the hot coals on one side of the grill.
Leave the other side relatively free of charcoal.
Cook the chicken primarily over the cooler side.
Then finish it over the coals.
Be especially careful about flare-ups because chicken fat can produce substantial flames.
Adding Wood Smoke
If you use a charcoal grill, you can add a small amount of smoking wood.
Fruit woods such as apple or cherry can pair nicely with chicken.
A little smoke goes a long way.
You do not want the chicken to taste like an ashtray.
The goal is subtle smoke that supports the seasoning and BBQ sauce.
When Should You Add Wood?
Add the wood when the chicken is beginning its indirect cooking stage.
You want smoke exposure while the chicken is cooking rather than after the sauce has already been applied heavily.
Smoke can also make the skin darker.
This means you need to pay attention to appearance and not confuse smoke-darkened skin with burnt skin.
How to Prevent Rubber Skin
Rubbery skin is one of the most common BBQ chicken problems.
The skin needs enough heat to render its fat.
Indirect cooking alone can cook the chicken safely while leaving the skin soft.
That is why the final direct-heat stage matters.
The chicken should finish with enough heat to:
- render remaining fat
- brown the skin
- caramelize the sauce
But again, you do not want uncontrolled high heat.
Should You Flip Chicken Skin-Side Down?
Yes, but timing matters.
You can place the chicken skin-side down over direct heat during the final browning stage.
This can create excellent grill marks.
However, stay nearby.
Skin-side-down chicken over hot charcoal can produce flare-ups quickly.
If the flames become excessive, move the chicken immediately.
The Importance of Grill Marks
Grill marks are attractive, but they are not the goal by themselves.
A chicken piece with perfect black stripes but undercooked meat is not successful cooking.
Flavor and texture come first.
Good grill marks are a bonus.
If the entire surface becomes dark and evenly browned, that is perfectly acceptable too.
Don’t Chase the Perfect Grill Marks
Many home cooks move chicken repeatedly in an attempt to create restaurant-style marks.
This can actually make the cooking harder.
Put the chicken down.
Allow the surface to brown.
Turn when necessary.
If you want crosshatch marks, you can rotate the chicken approximately 45 degrees after the first set of marks develops.
But this is optional.
Classic BBQ chicken does not require perfect geometry.
It requires good heat control.
Common Mistakes When Making BBQ Chicken
Mistake 1: Starting over extreme heat
This burns the outside before the center is cooked.
Better: Begin with indirect heat.
Mistake 2: Saucing raw chicken heavily
The sauce burns before the chicken cooks.
Better: Add sauce during the final stage.
Mistake 3: Never using a thermometer
Appearance is not a reliable safety test.
Better: Check the thickest part with a food thermometer.
Mistake 4: Cooking everything at exactly the same time
Chicken pieces vary in size.
Better: Remove smaller pieces when ready and continue cooking larger pieces.
Mistake 5: Pressing the chicken
This can squeeze out juices.
Better: Leave the chicken alone while it browns.
Mistake 6: Ignoring flare-ups
Flames can burn the sauce.
Better: Move chicken to the indirect zone.
Mistake 7: Applying one huge layer of sauce
The outside burns before the glaze develops properly.
Better: Build several thin layers.
Beginner’s Timing Guide
Here is a useful general sequence.
0 minutes
Prepare the grill and chicken.
5 minutes
Place chicken on the indirect side.
15 minutes
Check and rotate if necessary.
25 minutes
Begin checking internal temperature.
30–40 minutes
Move appropriate pieces toward direct heat as they approach the finishing stage.
Final 10 minutes
Brush with BBQ sauce in thin layers.
Final few minutes
Develop the caramelized glaze.
5–10 minutes after cooking
Rest before serving.
These times are only a framework.
Chicken size, grill temperature, weather, grill design, and fuel type all influence cooking time.
How Weather Changes Grilling
Outdoor cooking is affected by weather more than many people realize.
Cold weather can make a grill lose heat more quickly.
Wind can dramatically increase or decrease the heat depending on grill design.
Humidity can affect how quickly surfaces dry.
This is another reason to use temperature and visual cues instead of following a timer blindly.
BBQ Chicken for a Crowd
If you are cooking for a large group, avoid filling the grill so completely that air cannot circulate.
Crowding makes temperature control harder.
It also increases the chance that some pieces will sit directly over flare-ups.
A better approach is to cook in batches if necessary.
Keep finished chicken warm in a covered dish while the remaining pieces finish.
Making BBQ Chicken Ahead of Time
BBQ chicken can be partially prepared in advance.
You can:
- Season the chicken several hours ahead.
- Prepare the BBQ sauce.
- Set up the grill before guests arrive.
- Cook the chicken during the gathering.
- Finish the glaze just before serving.
This is much better than fully cooking the chicken hours in advance and reheating it aggressively.
Freshly grilled chicken has better skin and a more attractive glaze.
Reheating Leftover BBQ Chicken
The microwave is convenient, but it tends to soften the skin.
For better results, reheat the chicken in an oven or air fryer.
Heat gently until the center is hot.
You can brush on a small amount of fresh BBQ sauce before reheating.
Avoid overheating.
The chicken is already cooked, so you are reheating rather than cooking it from scratch.
Storing Leftovers
Place leftover chicken in a covered container and refrigerate it promptly.
Keep cooked chicken refrigerated and use it within a few days.
When reheating, make sure the chicken is heated thoroughly.
If the chicken has been sitting out for an extended period, especially in warm weather, it is safer not to take chances with leftovers.
Outdoor barbecue meals often involve warm temperatures, open-air serving, and people eating gradually.
Food safety matters just as much as the recipe itself.
Leftover BBQ Chicken Ideas
If you have leftover BBQ chicken, don’t simply reheat the same plate every night.
You can remove the meat from the bones and use it in:
- BBQ chicken sandwiches
- chicken wraps
- quesadillas
- loaded baked potatoes
- salads
- tacos
- pizza
- rice bowls
- pasta
- grilled cheese sandwiches
- BBQ chicken nachos
The smoky flavor works especially well in sandwiches and wraps.
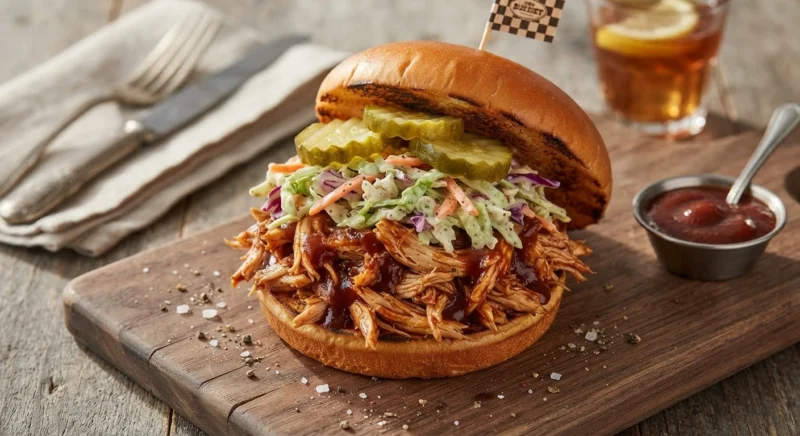
Classic BBQ Chicken Sandwich
Remove the chicken from the bones.
Chop or shred the meat.
Mix with a small amount of BBQ sauce.
Pile onto a toasted bun.
Add crunchy coleslaw.
Finish with pickles.
That combination gives you:
- smoky chicken
- sweet sauce
- acidity
- crunch
- creamy texture
It is a completely different meal from the original grilled chicken.
BBQ Chicken and Corn
One of the simplest summer combinations is grilled BBQ chicken with grilled corn.
Brush the corn lightly with oil.
Grill until several sides develop browned spots.
Serve alongside the chicken.
A little butter and salt is enough.
You do not need complicated sides when the main dish is already flavorful.
A Fresh Side for Rich BBQ Chicken
Try a simple tomato and cucumber salad.
Cut:
- ripe tomatoes
- cucumber
- red onion
Add:
- olive oil
- lemon juice or vinegar
- salt
- black pepper
- fresh herbs
The acidity and freshness make a very good contrast to the sweet BBQ sauce.
Making the Recipe Less Sweet
If you prefer savory BBQ chicken, choose a sauce with lower sugar content.
You can also thin a sweet sauce with apple cider vinegar.
Another option is to add more black pepper, smoked paprika, or chili.
The goal is not to eliminate sweetness completely.
A small amount of sweetness is part of the classic BBQ profile.
You simply want it balanced.
Making It Spicier
For spicy BBQ chicken, add one or more of:
- cayenne
- chili powder
- crushed red pepper
- hot sauce
- chipotle
- spicy BBQ sauce
If you want heat without making the chicken aggressively spicy, add a small amount of cayenne to the dry rub and keep the sauce relatively mild.
This distributes the heat more evenly.
Making It Smokier
There are several ways.
Use charcoal.
Add a small amount of suitable smoking wood.
Use smoked paprika in the rub.
Choose a BBQ sauce with a natural smoky flavor.
Do not use all of these aggressively at the same time.
Smokiness is powerful.
A good barbecue dish should still taste like chicken.
Making the Chicken More Savory
Reduce the sweetness of the sauce and increase the savory elements.
A sauce containing Worcestershire sauce, mustard, garlic, onion, and black pepper will have a more savory character.
You can also serve the chicken with pickles or a vinegar-based slaw.
Acidity can make a savory BBQ profile feel more pronounced.
A Mustard-Forward BBQ Variation
For a tangier version, mix:
- ½ cup yellow mustard
- ¼ cup honey
- 2 tablespoons apple cider vinegar
- 1 teaspoon smoked paprika
- ½ teaspoon black pepper
Brush a thin layer onto the chicken during the final cooking stage.
This creates a different style of BBQ flavor while retaining the same grilling technique.
A Honey BBQ Variation
For a sweeter glaze, mix your BBQ sauce with a small amount of honey.
Use approximately:
- 1 cup BBQ sauce
- 2 tablespoons honey
- 1 tablespoon apple cider vinegar
Because honey contains a lot of sugar, apply this glaze particularly late in the cooking process.
It can burn quickly.
Why the Final Glaze Matters
Think about the chicken in three layers.
Layer 1: The meat
This is where salt and basic seasoning matter.
Layer 2: The browned skin
This creates roasted, grilled, and savory flavors.
Layer 3: The BBQ glaze
This contributes sweetness, acidity, smoke, and caramelization.
When these three layers work together, the chicken tastes much more complex than chicken simply coated in sauce.
The Science of Browning
When the chicken browns on the grill, many chemical reactions contribute to the flavor and aroma.
The Maillard reaction creates deep roasted flavors as proteins and sugars react under heat.
Caramelization contributes additional browned sweetness, particularly where the BBQ sauce contains sugar.
You do not need to understand the chemistry to cook good chicken.
But understanding one principle helps:
Browned food has flavor.
That is why simply boiling or steaming chicken cannot produce the same result as grilling it.
Why You Should Dry the Chicken
Water on the surface of chicken must evaporate before the surface temperature can rise enough to brown efficiently.
If the chicken is wet, heat is spent evaporating moisture.
Once the surface dries, browning becomes easier.
This is why patting chicken dry before grilling is such a small step with such a noticeable effect.
The Role of Salt
Salt does more than make food taste salty.
It enhances the natural flavor of chicken and helps the other spices become more noticeable.
When salt is applied in advance, it can also penetrate the surface of the meat over time.
That is one reason seasoning the chicken several hours ahead can produce a more integrated flavor.
Should You Use Fresh Garlic?
You can, but garlic powder is often more convenient for grilled chicken.
Fresh garlic contains moisture and can burn easily on a very hot grill.
Garlic powder distributes evenly through a dry rub.
If you want fresh garlic flavor, you can incorporate it into the BBQ sauce rather than putting large pieces directly on the chicken.
What About Fresh Herbs?
Fresh thyme, rosemary, or oregano can be added to a marinade or sauce.
However, dried herbs are often more practical in the dry rub because they distribute evenly and tolerate grilling heat.
Fresh herbs are excellent as a finishing garnish after cooking.
A Simple Professional Check Before Serving
Before putting the chicken on the table, ask yourself five questions:
Is it safely cooked?
Check with a thermometer.
Is the skin properly browned?
Look for golden-brown to deep-brown coloration.
Is the sauce caramelized?
It should be glossy and sticky.
Is there any burnt bitterness?
A few dark edges are fine; large areas of burned sauce are not.
Does the chicken look juicy?
When cut or bitten, the meat should not appear dry and fibrous.
If those five things are right, you are in very good shape.
Frequently Asked Questions
Can I use boneless chicken breasts?
Yes.
However, they cook faster and are easier to dry out.
Use moderate heat and check them frequently with a thermometer.
Can I use chicken thighs?
Yes. They are one of the best choices for BBQ chicken because they are flavorful and forgiving.
Can I use drumsticks?
Absolutely.
Drumsticks are excellent for grilling and particularly good for casual gatherings.
Can I use skinless chicken?
Yes, but the finished result will be different.
You will lose some of the rendered skin and crisp surface.
Brush sauce carefully because the meat will have less protection from direct heat.
Do I have to marinate the chicken?
No.
The dry rub and BBQ sauce provide plenty of flavor.
Can I use store-bought BBQ sauce?
Yes.
Choose a sauce you genuinely enjoy.
The recipe works with commercial or homemade sauce.
Why does my BBQ sauce burn?
Usually because it was applied too early or the grill was too hot.
Apply thin layers near the end.
Should BBQ chicken be cooked with the lid open or closed?
Use both.
Closed-lid cooking is useful for indirect cooking and maintaining grill temperature.
During the final direct stage, keep a closer eye on the chicken and open the lid when necessary to control browning and flare-ups.
How do I know chicken is safe?
Use a food thermometer.
USDA recommends a minimum internal temperature of 165°F (73.9°C) for poultry.
Can I cook chicken entirely over direct heat?
You can, but it is less forgiving.
Two-zone grilling gives you much better control.
Can I make this recipe in the oven?
Yes.
Cook the chicken in the oven first and apply the BBQ sauce toward the end.
Can I finish the chicken under the broiler?
Yes.
Watch it very carefully because BBQ sauce can burn quickly.
Can I use charcoal?
Yes.
Charcoal adds excellent smoky flavor.
Just make sure you have an indirect zone available.
Can I smoke the chicken?
Yes.
Low-and-slow smoking can produce excellent results, although it becomes a somewhat different cooking style from classic grilled BBQ chicken.
The Most Important Lessons
If you remember only a few things from this recipe, remember these:
Dry the chicken before seasoning.
Use a two-zone grill.
Start with indirect heat.
Use a thermometer rather than relying only on time.
Cook poultry to at least 165°F (73.9°C) internally for food safety.
Move the chicken to direct heat for browning.
Add BBQ sauce near the end.
Use several thin layers rather than one thick layer.
Control flare-ups instead of fighting them.
Let the chicken rest briefly before serving.
These principles are more important than any particular brand of sauce, type of grill, or exact spice mixture.
Classic BBQ Chicken Recipe
Ingredients
- 3½–4½ pounds bone-in, skin-on chicken pieces
- 1 tablespoon olive oil
- 2 teaspoons kosher salt
- 1½ teaspoons smoked paprika
- 1 teaspoon sweet paprika
- 1 teaspoon garlic powder
- 1 teaspoon onion powder
- 1 teaspoon black pepper
- ½ teaspoon chili powder
- ½ teaspoon dried oregano
- ¼ teaspoon cayenne pepper, optional
- 1½–2 cups BBQ sauce
- 1 tablespoon apple cider vinegar, optional
- 1 tablespoon honey or maple syrup, optional
Instructions
1. Prepare the chicken
Pat the chicken pieces thoroughly dry with paper towels.
Trim away any loose excess fat or skin while keeping the main skin intact.
2. Make the rub
Combine the salt, smoked paprika, sweet paprika, garlic powder, onion powder, black pepper, chili powder, oregano, and cayenne.
Mix thoroughly.
3. Season the chicken
Lightly coat the chicken with olive oil.
Season all sides evenly with the dry rub.
For the best flavor, refrigerate the seasoned chicken for several hours or overnight.
4. Prepare the grill
Create a two-zone fire.
You want a moderate indirect cooking zone and a hotter direct zone.
Preheat the grill to approximately 375–425°F (190–220°C).
Clean the grates.
5. Start cooking
Place the chicken skin-side up over indirect heat.
Close the lid.
Cook for approximately 20–30 minutes, turning once or twice if necessary.
6. Check the temperature
Begin checking the thickest pieces with a food thermometer.
Insert the thermometer into the thickest part without touching bone.
Poultry should reach at least 165°F (73.9°C) for food safety.
7. Move to direct heat
Once the chicken is substantially cooked, move it toward the direct-heat side.
Brown the skin carefully.
Watch for flare-ups.
8. Add BBQ sauce
Brush on a thin layer of BBQ sauce.
Close the lid briefly.
Turn the chicken and brush the other side.
Continue adding thin layers until the sauce becomes glossy and caramelized.
9. Control the heat
If the sauce begins to burn, immediately move the chicken to indirect heat.
Do not try to finish the chicken over uncontrolled flames.
10. Finish cooking
Continue grilling until the chicken is safely cooked and the glaze is deeply caramelized.
Larger pieces may need additional indirect cooking.
11. Rest
Transfer the chicken to a clean platter.
Rest for approximately 5–10 minutes.
12. Serve
Serve hot with coleslaw, grilled corn, baked beans, potato salad, pickles, or your favorite BBQ sides.
Final Thoughts
Classic BBQ chicken does not require complicated ingredients.
What it requires is control.
Control the heat.
Control the sauce.
Control the timing.
And most importantly, control the final temperature.
The best BBQ chicken is not produced by turning the grill as hot as possible and covering the chicken in sauce.
It comes from allowing the chicken to cook gently first, developing color gradually, and then finishing it with thin layers of barbecue sauce over controlled heat.
That approach gives you juicy chicken instead of dry meat, browned skin instead of burned skin, and a sticky caramelized glaze instead of a thick layer of scorched sauce.
Once you understand that basic method, you can adapt it to thighs, drumsticks, leg quarters, breasts, gas grills, charcoal grills, and even the oven.
And that is what makes this recipe worth learning.
You are not simply learning one BBQ chicken recipe.
You are learning a reliable way to cook chicken over fire.