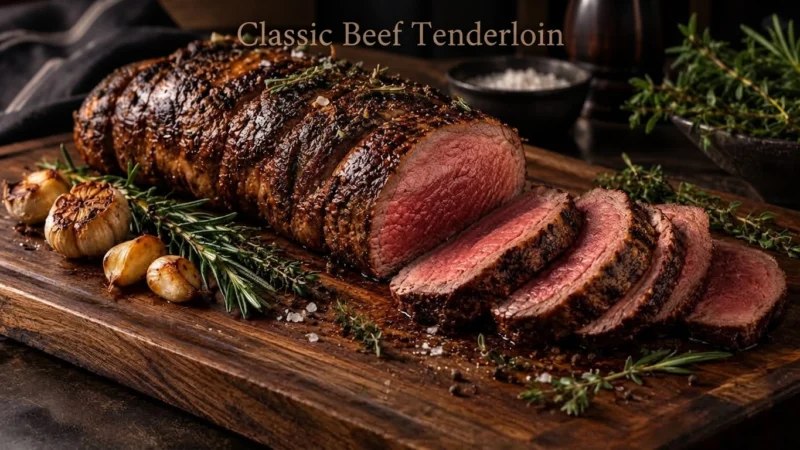
Classic Beef Tenderloin
Beef tenderloin has a reputation for being difficult to cook.
It is expensive, extremely tender, and often served at special occasions, so many home cooks become nervous the moment they put it in the oven. The good news is that beef tenderloin is actually one of the easiest large cuts of beef to cook well—if you understand what you are trying to accomplish at each stage.
The goal is simple:
- a beautifully browned exterior
- a tender, juicy center
- even cooking from end to end
- enough seasoning to bring out the beef’s natural flavor
- clean slices that stay juicy on the plate
This guide will show you exactly how to prepare and cook a classic beef tenderloin, even if you have never cooked one before.
We will cover everything from choosing and trimming the tenderloin to seasoning, searing, roasting, checking the internal temperature, resting, slicing, and serving.
You will also learn why each step matters, what beginners commonly do wrong, how to recognize problems while cooking, and which knife is best for preparing and slicing the meat.
What Is Beef Tenderloin?
Beef tenderloin is a long, relatively narrow muscle located along the inside of the loin.
Because this muscle does very little work compared with muscles involved in walking and supporting the animal, it contains very little connective tissue. That is the main reason tenderloin is so tender.
It is also relatively lean.
That combination creates both its greatest advantage and its greatest challenge:
Tenderloin becomes incredibly soft when cooked correctly, but because it contains less fat than cuts such as ribeye, it can become dry if overcooked.
This is why temperature control matters so much.
You are not trying to cook tenderloin until it becomes “fall-apart tender.” It is already tender.
Instead, you are trying to cook it gently enough that the center remains juicy while developing a flavorful browned exterior.
Why Beef Tenderloin Is So Tender
To understand how to cook tenderloin, it helps to understand what makes meat tough or tender.
Muscles contain bundles of protein fibers and connective tissue.
Cuts that perform a lot of work generally contain more connective tissue. Long, slow cooking can eventually break much of that connective tissue down.
Tenderloin is different.
It naturally contains very little connective tissue, so it does not need hours of braising or slow cooking.
Instead, tenderloin benefits from controlled roasting and careful temperature management.
This is one reason you should not treat tenderloin like brisket, chuck roast, or short ribs.
Those cuts are transformed by long cooking.
Tenderloin is best when you preserve the tenderness it already has.
Classic Beef Tenderloin Recipe at a Glance
Servings
Approximately 6–8 servings, depending on portion size.
Preparation time
About 20–30 minutes, depending on trimming.
Cooking time
Approximately 30–50 minutes, depending on the size and shape of the tenderloin and your desired level of doneness.
Do not rely on cooking time alone.
The thermometer is much more important than the clock.
Resting time
At least 3 minutes for food safety; a longer rest is commonly used for a roast of this size to improve slicing and serving quality.
Difficulty
Beginner-friendly, once you understand the temperature.
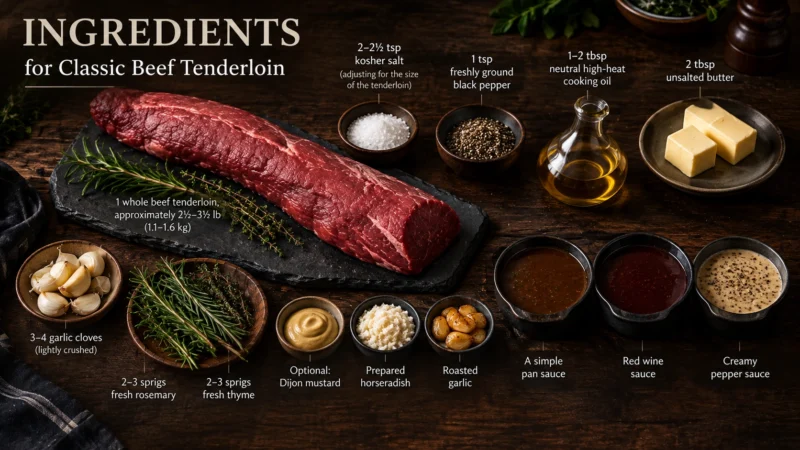
Ingredients
For a classic beef tenderloin:
- 1 whole beef tenderloin, approximately 2½–3½ lb (1.1–1.6 kg)
- 2–2½ teaspoons kosher salt, adjusting for the size of the tenderloin
- 1 teaspoon freshly ground black pepper
- 1–2 tablespoons neutral high-heat cooking oil
- 2 tablespoons unsalted butter
- 3–4 garlic cloves, lightly crushed
- 2–3 sprigs fresh rosemary
- 2–3 sprigs fresh thyme
Optional:
- Dijon mustard
- prepared horseradish
- roasted garlic
- a simple pan sauce
- red wine sauce
- creamy pepper sauce
The classic version, however, does not need a complicated marinade.
The beef itself should remain the star.
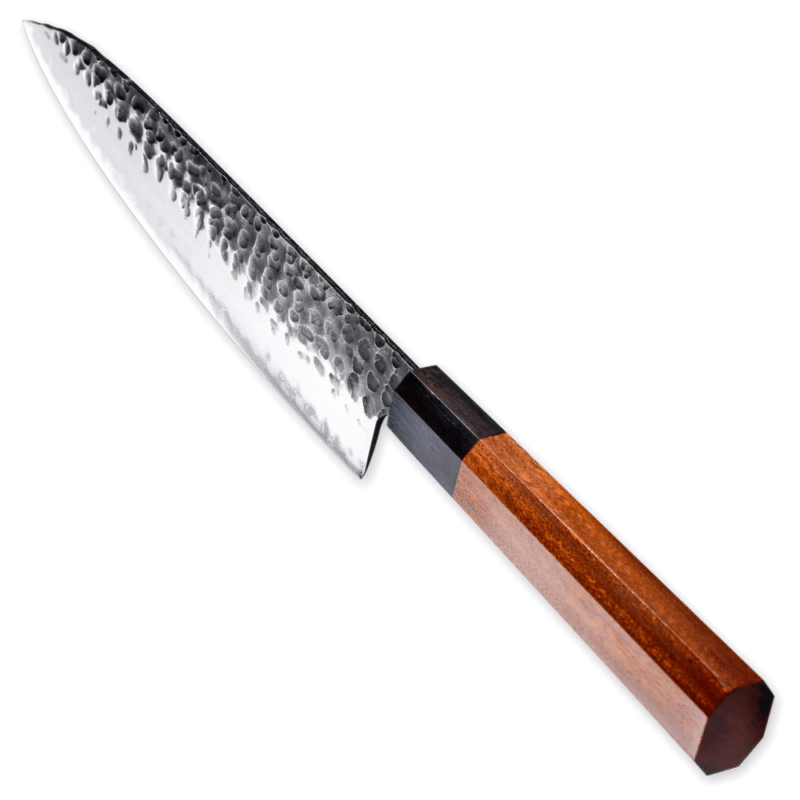
https://yashkadesigns.com/hand-forged-chef-knife-8-inch
Equipment You Need
You do not need professional restaurant equipment.
A basic home kitchen is enough.
Essential equipment
- large cutting board
- sharp chef knife or boning knife
- heavy oven-safe skillet or roasting pan
- kitchen tongs
- instant-read thermometer or leave-in probe thermometer
- paper towels
- aluminum foil
A thermometer is especially important.
Color is not a reliable way to determine whether meat has reached a safe temperature. A food thermometer provides a much more dependable measurement. USDA guidance recommends that whole beef roasts reach a minimum internal temperature of 145°F (62.8°C), measured with a food thermometer, followed by at least three minutes of rest.
Choosing a Beef Tenderloin
Before you cook anything, start with the meat itself.
Look for a tenderloin that has:
- a relatively even thickness
- a clean surface
- minimal excessive connective tissue
- a fresh appearance
- no strong unpleasant odor
Why does thickness matter?
Imagine two tenderloins with the same weight.
One is short and thick.
The other is long and thin.
They will not cook at the same speed.
The thinner one will reach the target internal temperature much sooner.
This is why cooking instructions that say “cook for exactly 35 minutes” are only approximate.
The thickness of the meat and the actual internal temperature matter much more.
Should You Buy a Whole Tenderloin or a Center-Cut Tenderloin?
For a classic roast, either can work.
A whole tenderloin is long and naturally tapers toward one end.
That creates a problem:
The thin end cooks faster than the thick center.
If you roast the entire tenderloin without preparation, you may end up with a beautifully cooked center and a more-done end.
That isn’t necessarily wrong, but it is less consistent.
For a special dinner where you want relatively uniform slices, trimming and tying the tenderloin is worthwhile.
Step 1: Trim the Tenderloin
Place the tenderloin on a clean, stable cutting board.
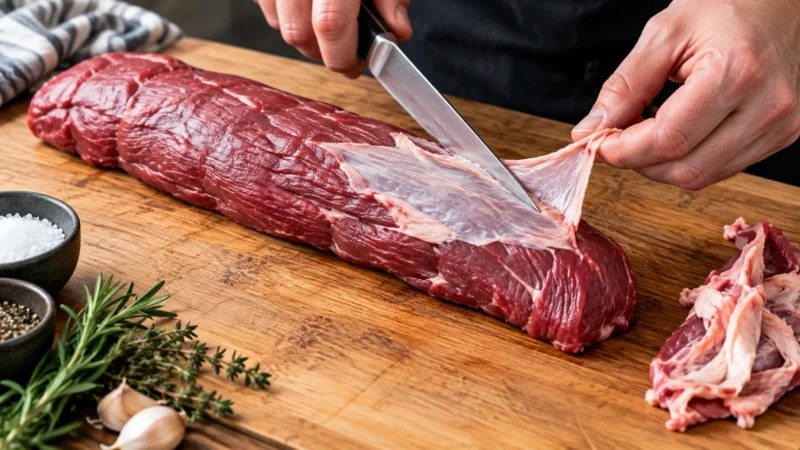
Use a sharp knife to remove the obvious silver skin.
What is silver skin?
Silver skin is a tough, shiny connective-tissue membrane found on the surface of some cuts of meat.
Unlike fat, it does not melt away pleasantly during cooking.
If you leave a large amount of silver skin on the tenderloin, it can become chewy and can also cause the meat to contract during cooking.
How to remove it
Slide the tip of your knife underneath the membrane.
Lift the membrane slightly.
Then angle the blade upward, keeping it almost parallel to the meat.
Use controlled strokes to separate the membrane from the meat.
Do not try to remove a huge section with one aggressive cut.
Small, controlled cuts waste less meat.
The Knife Technique Matters
This is one of those situations where a sharp knife is actually safer than a dull knife.
A dull blade tends to require more force.
More force means less control.
When trimming meat, the blade should do the work.
You should not need to hack, saw, or repeatedly push hard through the tenderloin.
A narrow boning or utility knife is excellent for detailed trimming because you can control the tip precisely.
A sharp chef knife also works well if that is what you have.
For general meat preparation, a properly maintained chef knife can handle a surprising amount of work. For more detailed trimming, however, a narrow blade provides greater control.
Check Our Guide Best Handmade Knives for BBQ Season
Step 2: Remove Excess Fat Without Over-Trimming
Tenderloin is naturally lean, so do not treat it like a heavily fatty cut.
Remove obvious unwanted fat and connective tissue.
But don’t obsess over removing every tiny piece.
Beginner mistake: trimming too aggressively
A common beginner reaction is:
“I need to make this perfectly clean.”
Then they remove layer after layer of meat.
That is unnecessary.
The objective is not to create a laboratory specimen.
The objective is to remove tough connective tissue and anything that will interfere with cooking while preserving as much good meat as possible.
Step 3: Even Out the Shape
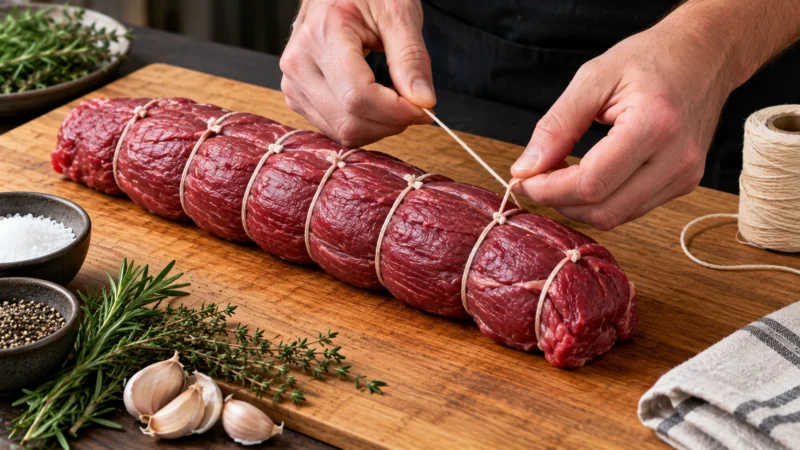
If the tenderloin has a very thin tail, fold that thinner section underneath itself.
Tie it with kitchen twine.
You can also tie the tenderloin at several points along its length.
This creates a more consistent cylinder.
Why does this matter?
Uniform thickness means more uniform cooking.
If one section is twice as thin as another, the thin section will naturally reach the target temperature first.
Tying helps reduce that difference.
You don’t need complicated butcher’s knots.
Simple loops of kitchen twine around the tenderloin are sufficient for home cooking.
Tie firmly enough to hold the shape, but don’t compress the meat excessively.
Step 4: Dry the Surface
This step looks insignificant.
It isn’t.
Use paper towels to pat the entire tenderloin dry.
The surface should feel dry rather than wet.
Why?
Because browning requires the surface to become hot.
If the exterior is covered with moisture, some of the heat initially goes into evaporating that water.
The surface can then spend more time steaming instead of browning.
A dry surface makes it easier to develop a flavorful crust.
This is the same basic principle behind getting good browning on steaks, chicken skin, and roasted vegetables.
Step 5: Season the Beef
Season the tenderloin generously but sensibly.
For the classic version, salt and black pepper are enough.
Apply salt evenly over all sides.
Then add freshly ground black pepper.
If you want to use garlic, rosemary, or thyme, they can be introduced during the searing stage rather than covering the meat with a thick paste.
Why keep the seasoning simple?
Tenderloin is expensive and naturally delicate in flavor.
A complicated marinade can overwhelm the beef.
This is one of those recipes where restraint is a cooking skill.
You don’t need ten ingredients to make the meat taste impressive.
Should You Salt Beef Tenderloin in Advance?
Yes, if you have time.
Seasoning the meat in advance gives the salt time to distribute more evenly.
You can season the tenderloin several hours ahead and keep it refrigerated.
If you are cooking immediately, seasoning immediately is still completely workable.
The important thing is to season consistently.
Step 6: Let the Tenderloin Lose Some Chill
Take the seasoned tenderloin out of the refrigerator while you prepare the cooking equipment.
You do not need to leave it sitting at room temperature for hours.
The purpose is simply to avoid putting an extremely cold piece of meat into the pan while you are still organizing everything else.
More importantly, make sure your oven and pan are ready before the meat goes in.
Step 7: Preheat the Oven
Preheat your oven to approximately:
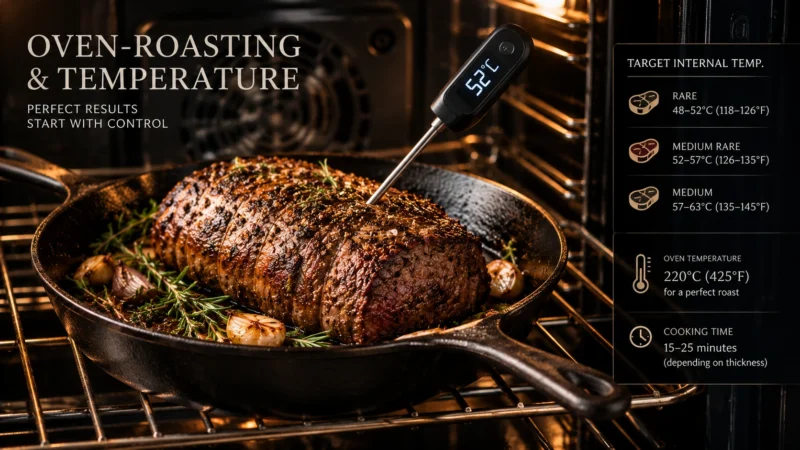
425°F / 220°C
This gives you enough heat to roast the tenderloin efficiently after the exterior has been browned.
Different ovens behave differently.
Some run hotter than the displayed temperature.
Some have cold spots.
This is another reason the internal thermometer is more important than following an exact time.
Step 8: Sear the Tenderloin
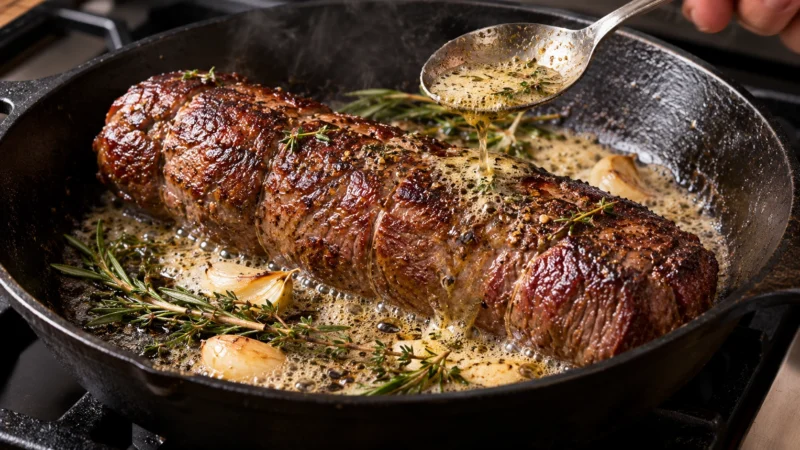
Heat a heavy oven-safe skillet over medium-high to high heat.
Add a small amount of high-heat oil.
When the oil is hot, place the tenderloin into the pan.
You should hear a strong but controlled sizzling sound.
Do not immediately start moving the meat.
Let the surface brown.
Rotate the tenderloin gradually so you brown several sides.
You are not trying to cook the center completely in the skillet.
You are building the exterior.
What Does “Searing” Actually Mean?
Searing simply means using relatively high heat to develop browning on the surface.
The brown color comes from complex chemical reactions that occur when the surface becomes hot and dry enough.
You don’t need to memorize the chemistry.
Just remember:
Dry surface + sufficient heat + time = better browning.
How Dark Should the Crust Be?
Aim for a deep golden-brown to brown exterior.
Do not burn it.
There is a difference between:
deep browning
and
blackened burning.
If the pan is smoking violently and the surface is turning black almost immediately, reduce the heat.
If the meat is sitting in a pan with little or no browning after several minutes, the pan may not be hot enough.
Step 9: Add Butter, Garlic and Herbs
Once the exterior is browned, add:
- butter
- crushed garlic
- rosemary
- thyme
Tilt the pan slightly and spoon the foaming butter over the tenderloin.
This is sometimes called basting.
What does basting mean?
Basting simply means repeatedly spooning hot cooking fat or liquid over food while it cooks.
Here, the butter carries the aromas of garlic and herbs across the surface.
It also gives you a richer exterior flavor.
Do not burn the butter.
If the butter begins turning very dark and smelling bitter, reduce the heat.
Step 10: Transfer the Tenderloin to the Oven
Once the exterior is properly browned, transfer the entire oven-safe skillet to the preheated oven.
Now the goal changes.
The pan was used primarily to develop the crust.
The oven will gently bring the center toward the desired internal temperature.
This is why the combination of searing + roasting works so well.
You get the best of both methods:
- high-heat browning on the outside
- controlled cooking of the center
How Long Should Beef Tenderloin Cook?
This is where many recipes make beginners uncomfortable because there is no single perfect cooking time.
A 2½-pound tenderloin and a 4-pound tenderloin do not cook identically.
Neither will a thick center-cut tenderloin and a long thin tenderloin.
As a general starting point, begin checking the internal temperature after approximately 20–25 minutes in the oven.
Continue checking every few minutes.
The thermometer determines when you are finished.
Not the clock.
Where Should You Put the Thermometer?
Insert the thermometer into the thickest part of the tenderloin.
Avoid touching the pan.
Avoid pushing the probe all the way through the meat.
The center is what you want to measure.
If your tenderloin has a very irregular shape, check more than one location.
The lowest reading in the thickest area is usually the one that deserves the most attention.
Beef Tenderloin Doneness
People have different preferences for beef.
However, because food safety matters, USDA guidance recommends cooking whole beef roasts to at least 145°F / 62.8°C, measured with a food thermometer, and allowing at least three minutes of rest.
If you prefer a particular level of doneness, use the thermometer to manage the cooking rather than relying on color alone.
Why not judge by color?
Because meat color is not a sufficiently reliable indicator of food safety.
Two pieces of beef can have similar colors at different internal temperatures.
Likewise, meat can remain pink after reaching a safe temperature.
The thermometer tells you what is actually happening inside the roast.
Step 11: Remove the Tenderloin From the Oven
Once the center reaches your target temperature, remove the pan from the oven.
Remember that cooking does not stop instantly.
The center can continue changing temperature after the meat leaves the oven.
This is one reason you should not wait until the meat is dramatically above your target temperature.
Step 12: Rest the Beef Tenderloin
Place the tenderloin on a cutting board or serving platter.
Loosely cover it with foil if desired.
Do not wrap it tightly.
Allow the meat to rest before slicing.
At minimum, follow the USDA recommendation of at least three minutes for food safety.
For a larger roast, a longer resting period is often useful for practical cooking reasons as well.
Why rest the meat?
During cooking, heat moves through the meat and its juices are redistributed.
If you immediately cut into a hot roast, you can lose more liquid onto the cutting board.
Resting gives the meat time to settle.
This does not mean the meat somehow “locks all the juice inside” permanently.
It simply gives the roast time to become easier to slice cleanly and serve.
Step 13: Remove the Twine
Before slicing, carefully remove the kitchen twine.
Do not drag the knife deeply into the meat while cutting the string.
Snip each loop with kitchen scissors or a small knife and remove it.
Step 14: How to Slice Beef Tenderloin
This is where your knife becomes extremely important.
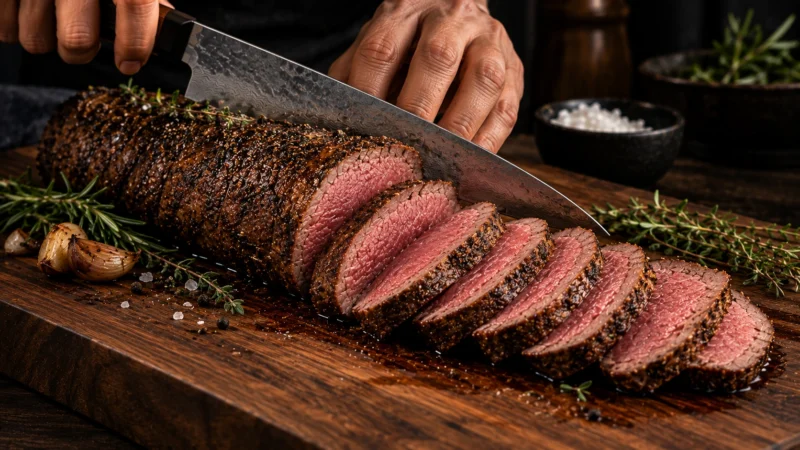
Use a sharp slicing knife or long chef knife.
The blade should glide through the tenderloin rather than saw aggressively back and forth.
Make clean slices of approximately ½–1 inch, depending on how you want to serve it.
Why a Long Knife Is Better for Slicing
A longer blade lets you make longer strokes.
That matters because repeated short sawing motions can tear the surface of cooked meat.
A long, sharp blade can pass through a tenderloin with fewer movements.
The result is cleaner slices and a better presentation.
Should You Slice Beef Tenderloin Against the Grain?
Yes.
Whenever the grain is visible, identify the direction of the muscle fibers and cut across them rather than parallel to them.
This shortens the muscle fibers in each bite and generally makes the meat easier to chew.
Tenderloin is already extremely tender, so this is less dramatic than with tougher cuts such as flank steak.
Nevertheless, it is still good knife technique.
The Best Knife for Beef Tenderloin
You don’t need a specialized knife collection.
For this recipe, three options are particularly useful.
1. Chef Knife
A sharp chef knife can:
- trim the tenderloin
- prepare garlic and herbs
- cut vegetables
- slice the cooked meat
For a home cook who wants one versatile knife, this is probably the most useful option.
Yashka Designs has a selection of chef knives suitable for general kitchen preparation, meat slicing, vegetables, and other cooking tasks.
2. Narrow Utility or Petty Knife
A smaller narrow knife is excellent for:
- trimming silver skin
- removing small pieces of connective tissue
- precision preparation
The important characteristic is control rather than sheer size.
3. Long Slicing Knife
For a large tenderloin, a long slicing blade is excellent.
It lets you make clean, smooth cuts through the cooked roast.
A Knife Does Not Have to Be Huge to Be Good
Beginners sometimes think that a larger knife automatically means a better knife.
It doesn’t.
Knife selection should match the task.
For trimming, control matters.
For slicing a roast, blade length matters.
For chopping vegetables, balance and versatility matter.
The best knife is the one that gives you the most control over the particular job.
A Practical Knife Setup for This Recipe
If you were preparing this dinner in a professional-style home kitchen, a very practical setup would be:
Chef knife: vegetables, garlic and general preparation.
Narrow utility/boning knife: trimming silver skin.
Long slicing knife: slicing the cooked tenderloin.
You can accomplish the entire recipe with just one good chef knife, but the specialized knives make individual jobs easier.
Common Beginner Mistakes
Mistake 1: Not Drying the Meat
Wet meat tends to brown less efficiently.
Fix
Pat the tenderloin thoroughly dry before seasoning and searing.
Mistake 2: Over-Trimming
Removing every visible piece of fat and tissue can waste good meat.
Fix
Remove silver skin and obvious tough tissue, but don’t carve away perfectly good beef.
Mistake 3: Cooking by Time Alone
“Cook for 35 minutes” sounds convenient.
But ovens, roast sizes, thicknesses, and starting temperatures vary.
Fix
Use cooking time only as a guide.
Use internal temperature as your decision point.
Mistake 4: Cutting Immediately
You pull the tenderloin out of the oven and immediately start slicing.
Why it’s a problem
You can lose more juices onto the cutting board and make the roast harder to slice cleanly.
Fix
Let it rest.
Mistake 5: Using a Dull Knife
A dull knife can crush and tear rather than slice.
Fix
Sharpen or hone your knife before starting.
Mistake 6: Burning the Butter
Butter contains milk solids that can brown quickly.
Fix
Add the butter after the initial searing stage and watch it carefully.
You want nutty, aromatic butter—not burnt butter.
Mistake 7: Covering the Tenderloin Too Tightly During Resting
A tightly wrapped roast can trap a lot of steam.
Fix
If you use foil, loosely tent it.
Mistake 8: Slicing With a Short Blade
Short blades encourage repeated sawing motions.
Fix
Use a long slicing knife when available.
What If the Tenderloin Is Cooking Too Quickly?
Don’t panic.
This happens.
If the internal temperature is climbing faster than expected, reduce the oven temperature or remove the tenderloin slightly earlier and monitor it closely.
The important thing is not to blindly follow the original cooking time.
The thermometer gives you the information you need to adjust.
What If the Exterior Is Too Dark?
Remove the tenderloin from the high heat.
If the crust has browned sufficiently, stop searing.
You don’t need to keep adding color.
If the surface is already dark before the center is ready, reduce the oven temperature and continue cooking more gently.
What If the Tenderloin Looks Too Pale?
You can improve the exterior before roasting or finish the exterior briefly in the skillet after roasting.
But don’t sacrifice the interior just to make the crust darker.
The ideal tenderloin balances both:
beautiful exterior + properly cooked center.
What If the Center Is Undercooked?
Put the tenderloin back into the oven.
Continue cooking and monitor the internal temperature.
Do not rely on appearance alone.
A thermometer is particularly valuable here because it turns a guess into a measurement.
What If the Tenderloin Is Overcooked?
There is no way to reverse overcooking.
But you can still improve the eating experience.
Slice the meat thinly and serve it with a flavorful sauce.
A creamy horseradish sauce, pepper sauce, mushroom sauce, or red-wine-style pan sauce can add moisture and richness.
The lesson for next time is simple:
start checking the temperature earlier.
Why Tenderloin Does Not Need a Heavy Marinade
Tenderloin is already naturally tender.
A marinade is often used to improve flavor or tenderness in cuts that need additional help.
Tenderloin doesn’t need much tenderizing.
A simple combination of:
- salt
- pepper
- garlic
- herbs
- butter
is often enough.
This also makes the dish easier for beginners.
You don’t have to prepare a marinade the night before.
Classic Garlic-Herb Butter Variation
If you want a richer version, use:
- unsalted butter
- crushed garlic
- rosemary
- thyme
- black pepper
Add the butter after searing.
Tilt the skillet slightly.
Spoon the foaming butter over the tenderloin repeatedly.
This is particularly effective because the butter picks up the browned flavors from the pan.
Optional Mustard Crust
Another variation is a thin mustard coating.
After searing, brush a very thin layer of Dijon mustard over the exterior.
You can then add a light coating of cracked black pepper and herbs.
The important word is thin.
You don’t want to cover the beef with a thick layer of mustard.
The beef should remain the main flavor.
Simple Pan Sauce
A beautiful tenderloin doesn’t require a complicated sauce.
After removing the meat, place the skillet over medium heat.
Add a small amount of stock or wine if appropriate.
Scrape the browned bits from the bottom of the pan.
These browned pieces are full of concentrated flavor.
Allow the liquid to reduce until it becomes slightly more concentrated.
Finish with a little butter if desired.
What does “reduce” mean?
To reduce a sauce means to simmer it so some of its water evaporates.
The remaining liquid becomes more concentrated.
A sauce that initially tastes weak can become much richer after reduction.
What Should You Serve With Beef Tenderloin?
Tenderloin is rich but relatively delicate, so classic side dishes work very well.
Consider:
Roasted potatoes
Crisp potatoes provide contrast with the soft beef.
Mashed potatoes
Creamy potatoes create a classic steakhouse-style combination.
Roasted asparagus
The fresh, slightly bitter flavor balances the richness of the meat.
Green beans
Simple sautéed green beans keep the plate lighter.
Creamed spinach
For a classic steakhouse dinner, this is an excellent pairing.
Roasted carrots
Their natural sweetness works especially well with beef.
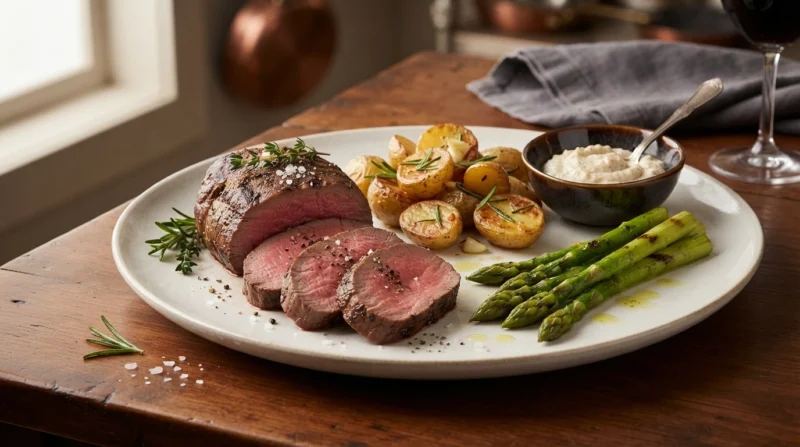
Classic Beef Tenderloin Dinner
For a complete dinner, try:
Main: Garlic-herb beef tenderloin
Side: Crispy roasted potatoes
Vegetable: Roasted asparagus
Sauce: Horseradish cream or simple pan sauce
Optional starter: Green salad with a sharp vinaigrette
The important principle is balance.
If the beef is rich and buttery, you don’t need every side dish to be rich and buttery too.
How to Make the Meal Feel Restaurant-Quality
Restaurant-quality presentation doesn’t require expensive plates or complicated decoration.
Focus on three things:
1. Clean slices
Use a sharp knife.
2. Controlled portions
Don’t pile the meat randomly onto the plate.
3. Contrast
Combine the tender beef with something crisp, fresh, creamy, or acidic.
For example:
Tenderloin + roasted potatoes + green vegetable + sharp horseradish sauce.
That is already a sophisticated plate.
Professional Tip: Prepare Everything Before the Meat Goes Into the Pan
One of the biggest differences between confident cooks and beginners is organization.
Before you turn on the stove, have ready:
- trimmed tenderloin
- seasoning
- oil
- butter
- garlic
- herbs
- tongs
- thermometer
- cutting board
- serving plate
Why?
Because once the pan becomes hot, you don’t want to discover that your garlic is still in the refrigerator.
Professional cooks often call this mise en place.
It simply means preparing and organizing ingredients before cooking.
What Does Mise en Place Mean?
The phrase comes from French and essentially means “everything in its place.”
For a beginner, this is one of the easiest professional habits to adopt.
Before cooking:
- Read the recipe completely.
- Prepare the ingredients.
- Measure what you need.
- Organize the equipment.
- Then start cooking.
This reduces stress and prevents mistakes.
Food Safety When Preparing Beef Tenderloin
Raw beef should be handled carefully.
Keep raw meat separate from ready-to-eat foods.
Wash your hands and clean surfaces and utensils that have contacted raw meat.
Do not use the same cutting board for raw beef and salad ingredients without properly cleaning it first.
Most importantly, use a food thermometer to verify the internal temperature.
USDA guidance recommends 145°F / 62.8°C as the minimum internal temperature for whole beef roasts, followed by at least three minutes of rest.
If the beef has been mechanically tenderized, extra attention to the cooking instructions is important because the process can move surface bacteria into the interior.
Why You Shouldn’t Trust Color Alone
A steak can look pink and still have reached a safe temperature.
Another piece can look brown while still not having reached the temperature you need.
This is why professional cooking relies on thermometers for temperature-sensitive foods.
Think of the thermometer as your measurement tool.
Your eyes tell you what the surface looks like.
The thermometer tells you what is happening inside.
You need both.
How to Store Leftover Beef Tenderloin
If you have leftovers, refrigerate them promptly in a suitable covered container.
Keep the slices together rather than cutting the entire tenderloin into very thin pieces if you know you will reheat them later.
Thicker pieces generally retain their texture better.
For cold leftovers, thin slices can also be excellent in:
- sandwiches
- salads
- wraps
- steak salads
- breakfast plates
How to Reheat Beef Tenderloin Without Drying It Out
The microwave can work, but high heat can quickly turn tenderloin dry.
A gentler method is preferable.
Place the slices in a covered oven-safe dish with a small amount of sauce or cooking liquid.
Warm gently.
The goal is to heat the meat—not cook it all over again.
This is especially important because tenderloin contains relatively little fat.
Can You Grill Beef Tenderloin Instead?
Yes.
The same principles apply.
You want:
- good browning
- controlled internal temperature
- proper resting
- clean slicing
A grill can provide excellent exterior flavor.
For a whole tenderloin, however, managing direct and indirect heat is important because the thin end can cook faster than the thick center.
Oven vs. Grill
Oven
Advantages:
- predictable
- easy to control
- excellent for beginners
- works well with a skillet
Grill
Advantages:
- smoky flavor
- excellent exterior browning
- ideal for outdoor cooking
For beginners
The oven method is generally easier to control.
Once you are comfortable with temperature management, the same tenderloin can become an excellent centerpiece for a barbecue dinner.
For more meat-preparation ideas, the [Ultimate American BBQ Meat Guide] can be used as a broader reference for meat preparation, cutting techniques, and BBQ knife selection.
Why Knife Quality Matters More Than Beginners Expect
Cooking begins before the pan gets hot.
If you cannot trim the tenderloin cleanly, you may remove too much meat.
If your knife slips, you lose control.
If the blade tears the cooked meat, the presentation suffers.
A good kitchen knife doesn’t make you a professional cook.
But a sharp, appropriate knife makes good technique much easier to perform.
For tenderloin preparation, prioritize:
- sharpness
- control
- comfortable grip
- appropriate blade length
- easy maintenance
https://yashkadesigns.com/chef-kitchen-knives
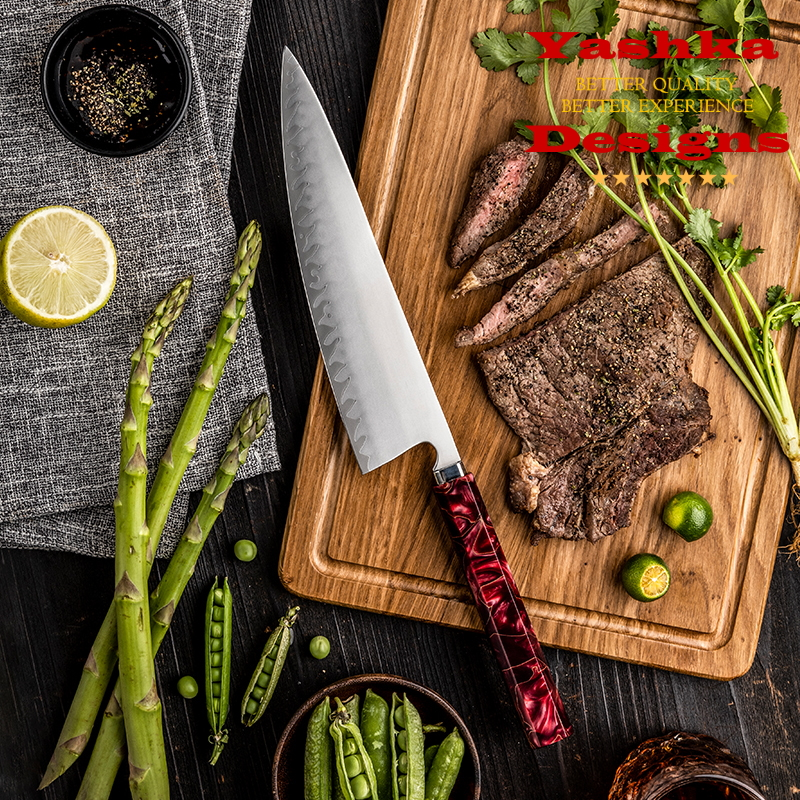
A Practical Yashka Designs Knife Choice
If you want one versatile knife for this recipe and many other meals, a chef knife is the most practical starting point.
Yashka Designs’ chef-knife collection includes different blade shapes and sizes intended for meat, vegetables, fish, and general kitchen preparation.
For detailed trimming, a small narrow knife can be especially useful. A compact petty-style knife gives you greater control for small precision cuts and trimming tasks.
The important thing is not to buy a knife simply because it looks impressive.
Choose a blade that matches the work you actually do.
The Complete Classic Beef Tenderloin Method
Let’s put everything together.
Step 1
Trim the tenderloin.
Remove silver skin and excessive connective tissue.
Step 2
Fold the thin end underneath itself if necessary.
Tie the tenderloin to create a more even shape.
Step 3
Pat the entire surface dry.
Step 4
Season generously with salt and black pepper.
Step 5
Preheat the oven to approximately 425°F / 220°C.
Step 6
Heat an oven-safe skillet over medium-high to high heat.
Step 7
Add a small amount of high-heat oil.
Step 8
Sear the tenderloin on several sides until deeply browned.
Step 9
Add butter, garlic, rosemary and thyme.
Step 10
Baste the tenderloin briefly with the aromatic butter.
Step 11
Transfer the skillet to the oven.
Step 12
Begin checking the internal temperature after approximately 20–25 minutes.
Step 13
Continue cooking until the center reaches the temperature appropriate for your chosen level of doneness, while respecting the USDA minimum of 145°F / 62.8°C for whole beef roasts.
Step 14
Remove the tenderloin from the oven.
Step 15
Rest the meat.
Step 16
Remove the twine.
Step 17
Slice across the grain using a sharp knife.
Step 18
Serve immediately with your chosen sides and sauce.
The Five Rules That Make Beef Tenderloin Easy
If you remember nothing else from this recipe, remember these five rules.
Rule 1: Dry the surface
Dry meat browns better.
Rule 2: Don’t over-trim
Remove tough tissue without wasting good meat.
Rule 3: Use the thermometer
The clock is only a guide.
Rule 4: Let it rest
Don’t rush directly from oven to slicing board.
Rule 5: Use a sharp knife
Clean slices begin with a clean edge.
Frequently Asked Questions
What is the best way to cook beef tenderloin?
A combination of high-heat searing followed by controlled oven roasting is an excellent method for a whole beef tenderloin. It creates a browned exterior while allowing the center to cook gradually.
How long does beef tenderloin take to cook?
There is no single exact time. The cooking time depends on the tenderloin’s weight, thickness, starting temperature, oven temperature, and desired doneness. Use time as a guide and internal temperature as the primary measurement.
What temperature should beef tenderloin be cooked to?
For food safety, USDA recommends that whole beef roasts reach a minimum internal temperature of 145°F (62.8°C), measured with a food thermometer, followed by at least three minutes of rest.
Should I sear beef tenderloin before roasting?
Yes. Searing develops a flavorful browned exterior before the roast finishes cooking in the oven.
Should beef tenderloin be covered while roasting?
Generally, no. Leaving the exterior exposed helps maintain the browned surface developed during searing.
Do you need to tie beef tenderloin?
Not always, but tying is helpful when the tenderloin has a thin tapered end. It creates a more consistent shape and can help the roast cook more evenly.
Should you remove silver skin from beef tenderloin?
Yes. Large amounts of silver skin are tough and do not become pleasantly tender during roasting.
Should you marinate beef tenderloin?
You can, but you generally don’t need to. Tenderloin is already naturally tender. Simple seasoning with salt, pepper, garlic and herbs is often enough.
What knife should I use to cut beef tenderloin?
A sharp chef knife works well. A long slicing knife is excellent for producing clean slices, while a narrow utility or boning knife is useful for trimming silver skin.
Should beef tenderloin be sliced against the grain?
Yes. Identify the direction of the muscle fibers and slice across them rather than parallel to them.
How thick should beef tenderloin slices be?
About ½–1 inch is a practical range. Thinner slices work well for sandwiches and salads; thicker slices create a more substantial dinner presentation.
Why is my beef tenderloin dry?
The most common reason is overcooking. Tenderloin is lean, so it can lose moisture as its internal temperature rises. Using a thermometer helps prevent accidental overcooking.
Why didn’t my tenderloin brown properly?
The surface may have been too wet, the pan may not have been hot enough, or the pan may have been overcrowded. Pat the meat dry and use sufficient heat to develop the crust.
Can I cook beef tenderloin on the grill?
Yes. Use a combination of direct and indirect heat and monitor the internal temperature carefully.
Can I prepare beef tenderloin ahead of time?
You can trim, tie and season it ahead of time. Keep the raw beef refrigerated until you are ready to cook it.
What goes well with beef tenderloin?
Roasted potatoes, mashed potatoes, asparagus, green beans, roasted carrots, creamed spinach, horseradish sauce and simple pan sauces are all excellent choices.
Final Thoughts
Classic beef tenderloin does not require complicated culinary tricks.
The secret is control.
Control the shape.
Control the surface moisture.
Control the heat.
Control the internal temperature.
And finally, control the knife when you slice it.
Once you understand those principles, tenderloin becomes much less intimidating.
The meat is already naturally tender. Your job is simply to protect that tenderness while developing a flavorful exterior.
For a beginner, that is the most important lesson:
Don’t try to make beef tenderloin complicated.
Use good meat, season it simply, brown it properly, monitor the temperature, let it rest, and slice it cleanly.
Do those things consistently and you can produce a beautiful centerpiece for a family dinner, holiday meal, anniversary dinner, or weekend steakhouse-style meal at home.
Check Our Guide Best Steak and Beef Recipes: 15 Easy & Delicious Beef Recipes
Recipe Card
Classic Beef Tenderloin
Prep: 20–30 minutes
Cook: approximately 30–50 minutes, depending on size
Rest: at least 3 minutes; longer resting can be useful for a larger roast
Servings: 6–8
Ingredients
- 1 beef tenderloin, approximately 2½–3½ lb
- 2–2½ teaspoons kosher salt
- 1 teaspoon freshly ground black pepper
- 1–2 tablespoons neutral high-heat oil
- 2 tablespoons unsalted butter
- 3–4 garlic cloves
- 2–3 rosemary sprigs
- 2–3 thyme sprigs
Method
- Trim silver skin and excess connective tissue.
- Tie the tenderloin into an even shape.
- Pat completely dry.
- Season with salt and pepper.
- Preheat oven to 425°F / 220°C.
- Heat an oven-safe skillet.
- Sear the tenderloin on all sides.
- Add butter, garlic and herbs.
- Baste briefly.
- Transfer to the oven.
- Monitor internal temperature with a thermometer.
- Cook to at least 145°F / 62.8°C for food safety.
- Rest for at least 3 minutes.
- Remove the twine.
- Slice across the grain.
- Serve with your favorite sides and sauce.
https://ask.fsis.usda.gov/article/What-is-a-safe-internal-temperature-for-cooking-meat-and-poultry