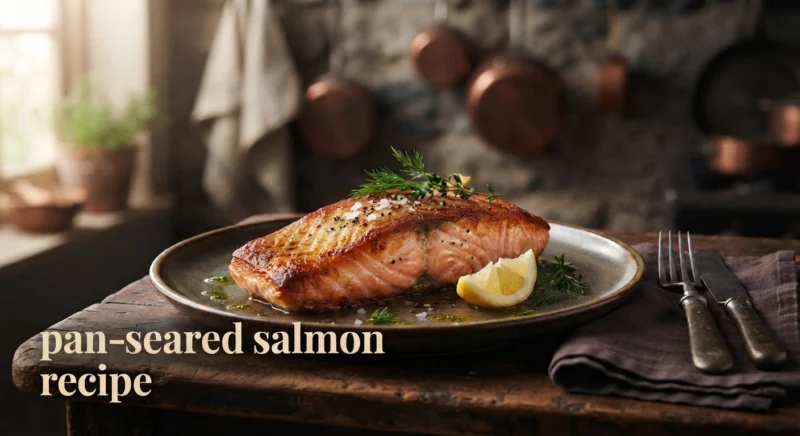
Pan-Seared Salmon
Pan-seared salmon is one of those dishes that looks simple but can be surprisingly easy to get wrong. The ingredient list is short, the cooking time is quick, and there is no complicated sauce or elaborate preparation. Yet a few small mistakes can leave you with pale, soggy skin, dry fish, or salmon that is raw in the center.
The good news is that excellent pan-seared salmon does not require restaurant equipment or advanced cooking skills. Once you understand what is happening in the pan, the process becomes straightforward and repeatable.
The goal is simple: crispy, deeply browned skin, a moist and tender center, and a clean salmon flavor.
This classic pan-seared salmon recipe uses salmon fillets, oil, salt, black pepper, and a little butter for finishing. Garlic, lemon, and herbs are optional, but they are not necessary to make the salmon taste excellent.
The most important part of the recipe is not the seasoning. It is controlling moisture, heat, and timing.
If the salmon skin is wet, it will steam instead of crisping. If the pan is too cool, the fish may stick and the skin can become greasy rather than crisp. If the heat is too high for too long, the outside can become overcooked before the center is ready.
This recipe explains each step carefully so even a beginner can understand not only what to do, but also why you are doing it.
Check Our Guide 15 Most Popular Seafood Recipes: Easy Fish, Shrimp, Shellfish & More
What Makes Great Pan-Seared Salmon?
Before cooking, it helps to know what you are trying to achieve.
A properly pan-seared salmon fillet should have several distinct characteristics:
- The skin should be crisp and browned.
- The flesh should remain moist and tender.
- The surface should have enough browning to develop a rich flavor.
- The salmon should be seasoned but not overwhelmed.
- The center should be cooked to the desired level without becoming dry.
- The fillet should remain intact rather than breaking apart in the pan.
The biggest mistake beginners make is treating salmon like a piece of meat that needs aggressive high heat from beginning to end.
It does not.
Salmon cooks relatively quickly. You need enough heat to brown the skin and create a flavorful crust, but you also need enough control to prevent the flesh from becoming dry.
The skin is particularly important because it acts as a natural barrier between the hot pan and the delicate flesh.
When you begin cooking skin-side down, you can gradually render some of the fat from the skin while allowing the heat to travel through the fillet.
That is why skin-side-down cooking is the foundation of this recipe.
Why Cook Salmon Skin-Side Down First?
If you have never cooked salmon before, this may seem like a minor detail.
It is not.
Starting with the skin side down gives you several advantages.
First, the skin has direct contact with the hot pan, allowing it to brown and become crisp.
Second, the skin protects the flesh from the strongest direct heat.
Third, you can leave the salmon mostly undisturbed while the skin develops color.
Fourth, the rendered fat from the salmon skin contributes flavor to the pan.
When you start with the flesh side down, you lose many of these advantages. The delicate surface of the fish can stick to the pan, break apart, or become overcooked before you have developed good browning.
For this reason, the basic sequence is:
Dry the salmon → season it → heat the pan → cook skin-side down → flip briefly → finish gently.
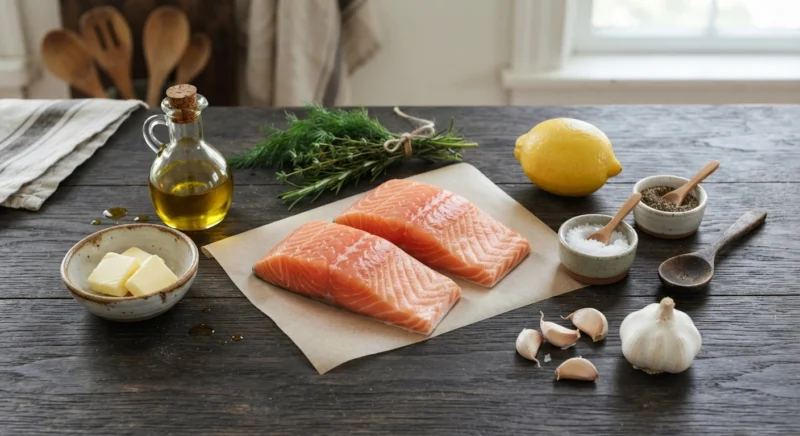
Ingredients
For 4 servings
- 4 salmon fillets, about 5–7 ounces (140–200 g) each
- 1 tablespoon neutral cooking oil
- 1 tablespoon unsalted butter
- 1 teaspoon kosher salt, or to taste
- ½ teaspoon freshly ground black pepper, or to taste
- 1 lemon, cut into wedges
Optional finishing ingredients
- 1–2 garlic cloves, lightly crushed
- 1–2 sprigs fresh thyme
- 1–2 sprigs fresh parsley
- A small amount of finely grated lemon zest
- Additional black pepper
The optional ingredients are there for finishing and aroma. They are not required for a classic pan-seared salmon.
Choosing the Salmon
The quality of the salmon matters, but you do not need the most expensive fish available.
Look for fillets that have:
- Firm flesh
- A fresh, clean smell
- Even thickness
- Intact skin
- No excessive liquid in the packaging
- No obvious discoloration
Fresh salmon should smell clean and mild. A strong unpleasant fishy smell is a warning sign.
Frozen salmon can also work very well.
In fact, high-quality frozen salmon is often an excellent choice because it can be frozen shortly after processing, preserving its quality during transportation and storage.
If using frozen salmon, the most important thing is to thaw it properly.
Fresh or Frozen Salmon?
Both can produce excellent results.
Fresh salmon is convenient when you have access to good-quality fish.
Frozen salmon is useful because you can keep it available without worrying about using it immediately.
If using frozen salmon:
- Thaw it in the refrigerator.
- Keep it cold while thawing.
- Remove it from its packaging according to the package instructions.
- Pat it thoroughly dry before cooking.
Do not put a wet or partially frozen fillet directly into a hot skillet.
The excess moisture makes browning much more difficult.
Choosing the Right Salmon Fillet
For pan-searing, fillets with the skin attached are ideal.
The skin gives you something to crisp and also helps protect the flesh.
Try to choose pieces with relatively even thickness.
A very thick fillet may need longer cooking than a thin tail piece.
If you are cooking several pieces at once, try to use fillets of similar thickness. This makes timing much easier.
If one fillet is much thinner than the others, it may be finished before the thicker pieces.
That is not a problem. Simply remove thinner pieces from the pan earlier.
Preparing the Salmon
Proper preparation is one of the most important steps in this entire recipe.
Take the salmon out of the refrigerator shortly before cooking.
Do not leave raw fish sitting at room temperature for an extended period.
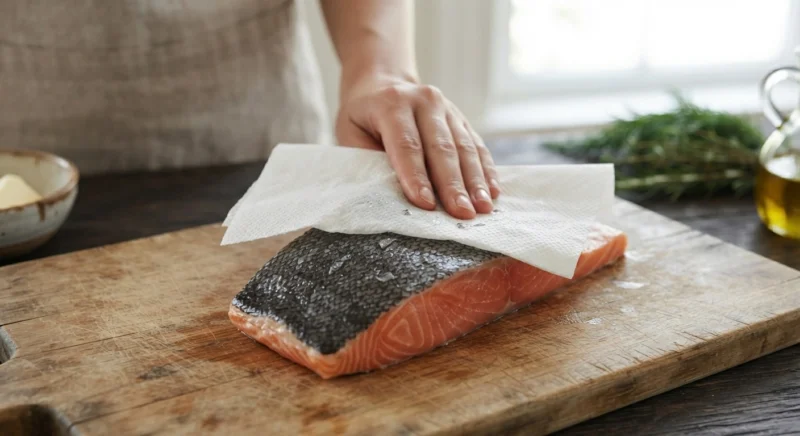
Place the fillets skin-side up or down on a clean plate or cutting board.
Use paper towels to pat both sides thoroughly dry.
Pay special attention to the skin.
Why does the skin need to be dry?
Because water and hot oil do not cooperate.
When wet salmon hits the pan, the water rapidly turns to steam. Instead of immediately browning, the surface spends energy releasing moisture.
That makes it harder to develop crisp skin.
Dry skin makes contact with the hot pan much more effectively.
This is one of the simplest improvements you can make to your salmon.
Should You Remove the Pin Bones?
Many salmon fillets are sold with the pin bones already removed.
However, it is worth checking.
Run your clean fingers gently along the center of the flesh.
If you feel small, firm bones sticking out, remove them with clean kitchen tweezers or fish-bone pliers.
Pull them in the direction they are pointing rather than twisting aggressively.
This is not strictly necessary for cooking, but nobody enjoys finding a small bone while eating.
Seasoning the Salmon
Keep the seasoning simple.
Pat the salmon dry first.
Then season both sides with salt and freshly ground black pepper.
You do not need to cover the salmon with a thick layer of seasoning.
Salmon has a naturally rich flavor, and too much seasoning can hide it.
For the best results, season shortly before cooking.
Salt draws moisture toward the surface over time, so if you salt the fish and leave it sitting for a long time, the surface can become wetter.
That is the opposite of what we want when trying to crisp the skin.
The Best Pan for Salmon
A heavy skillet is ideal.
Good options include:
- Cast iron
- Stainless steel
- A good-quality heavy nonstick skillet
Each behaves slightly differently.
Cast iron
Cast iron holds heat extremely well and is excellent for browning.
The disadvantage is that it can become very hot and retain that heat for a long time. Beginners need to be careful not to overheat it.
Stainless steel
Stainless steel can produce excellent browning.
It requires slightly more attention to heat and timing, especially if you are inexperienced with cooking delicate fish.
Nonstick
A quality nonstick pan makes releasing the salmon easy.
It is particularly useful for beginners.
The important thing is not the brand of pan. It is your ability to control the temperature.
How Much Oil Do You Need?
You do not need a large amount of oil.
About 1 tablespoon is usually enough for four salmon fillets, depending on the size of your skillet.
The oil provides a thin layer between the fish and the pan while helping transfer heat efficiently.
Choose an oil suitable for medium-high cooking.
A neutral oil works particularly well because it does not compete with the flavor of the salmon.
Heating the Pan
Place the skillet over medium to medium-high heat.
Add the oil.
Allow the pan to heat before adding the salmon.
But do not let the oil smoke heavily.
You want the pan hot enough that the salmon immediately begins cooking when it touches the surface.
You do not want a pan that is violently smoking.
Beginner test
If you are unsure whether the pan is ready, watch the oil.
It should look fluid and slightly shimmering.
If it is smoking heavily, reduce the heat and let the pan cool slightly.
Placing the Salmon in the Pan
Place the salmon skin-side down.
If the fillets still contain surface moisture, be prepared for some sizzling.
Lower them into the pan carefully, placing the side closest to you first and then lowering the rest away from you.
This reduces the chance of hot oil splashing toward you.
Once the salmon is in the pan, do not immediately start moving it around.
Let the skin make firm contact with the skillet.
Why Does Salmon Stick to the Pan?
This is one of the most common beginner problems.
People often assume that if salmon sticks, they should immediately scrape it loose.
Usually, that makes things worse.
When the salmon first touches the pan, proteins on the surface can temporarily adhere to the cooking surface.
As the skin cooks and browns, it gradually becomes easier to release.
If you try to move the fish too early, you may tear the skin.
This leads to an important rule:
Do not force the salmon off the pan before the crust has developed.
If the fish is sticking badly, give it more time.
The First Few Minutes
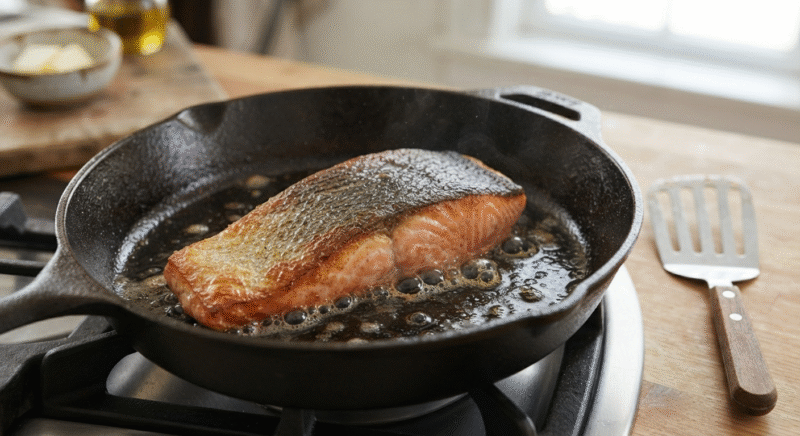
Once the salmon is skin-side down, allow it to cook without moving it unnecessarily.
You should hear a steady, moderate sizzling sound.
A violent, aggressive sizzle may indicate excessive heat.
Almost no sound may mean the pan is not hot enough.
The skin will gradually change from soft and pale to firmer, golden, and crisp.
You may notice the color of the cooked portion of the flesh moving upward from the bottom.
This is a useful visual indicator.
How Long Should You Cook Salmon Skin-Side Down?
Cooking time depends heavily on the thickness of the fillets.
As a general guide, a 5–7 ounce fillet may need approximately:
4–6 minutes skin-side down, followed by a shorter period on the other side.
But do not treat this as an exact rule.
Thickness matters more than weight.
A thin tail-end fillet can cook much faster than a thick center-cut fillet of similar weight.
Your eyes, touch, and an instant-read thermometer are more reliable than the clock.
The Most Important Visual Cue
Look at the side of the salmon.
As it cooks, the flesh changes from translucent to opaque.
You can see this change moving upward from the skin.
When roughly three-quarters of the thickness has become opaque, the salmon is approaching the point where it is ready to turn.
This is a much more useful visual cue than simply saying, “Cook it for five minutes.”
When Should You Flip the Salmon?
Once the skin is browned and the salmon has cooked most of the way through from the bottom, it is time to turn it.
Use a thin fish spatula if possible.
Slide the spatula gently underneath the fillet.
Do not jab down aggressively.
The goal is to support the entire fillet.
Then turn it carefully so the flesh side is now against the pan.
How Long Should the Flesh Side Cook?
Usually, the second side requires much less time.
Depending on thickness, approximately 1–3 minutes may be enough.
The purpose of this stage is to finish cooking the center and develop a little color on the flesh.
You do not need to cook the flesh side aggressively for several minutes.
Remember that the fish has already received significant heat from the skin side.
Overcooking at this stage is one of the easiest ways to turn moist salmon into dry salmon.
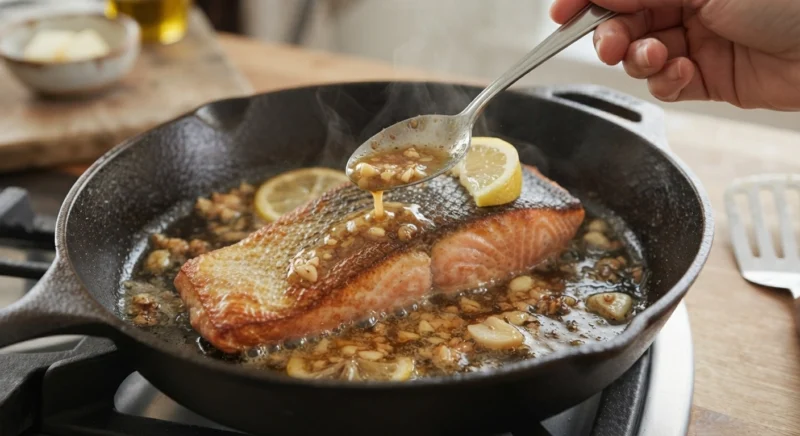
Adding Butter
Once the salmon has been turned, add the butter.
Allow it to melt around the fish.
If you are using garlic or herbs, add them now.
Tilt the pan slightly and use a spoon to baste the salmon with the foaming butter.
Spoon the butter repeatedly over the top of the fillets.
This adds flavor and helps finish the surface gently.
Do not burn the butter.
If it becomes very dark and smells bitter, the pan is too hot.
Garlic Butter Salmon Without Losing the Classic Style
Garlic and butter are excellent with salmon.
However, garlic should be treated as an optional flavor addition rather than the foundation of the recipe.
If you use it, lightly crush one or two cloves rather than finely chopping them.
Whole or lightly crushed garlic is easier to control because it is less likely to burn.
Add it during the final stage rather than at the beginning.
Garlic can burn quickly in a hot skillet.
Burned garlic tastes bitter and can ruin an otherwise excellent piece of salmon.
Adding Lemon
Lemon is another excellent finishing ingredient.
But there is a difference between adding lemon at the end and cooking the salmon in a large amount of lemon juice.
For this recipe, use lemon as a finishing element.
Squeeze a little fresh lemon juice over the salmon immediately before serving.
You can also serve lemon wedges at the table.
The acidity cuts through the natural richness of salmon and makes the dish taste lighter.
How to Know When Salmon Is Done
This is the question beginners ask most often.
There are three useful methods.
1. Use an instant-read thermometer
This is the most reliable method.
Insert the thermometer into the thickest part of the fillet from the side.
Avoid touching the pan.
The exact target depends on your preferred doneness and food-safety guidance.
For a fully cooked result, follow the food-safety temperature guidance applicable where you live.
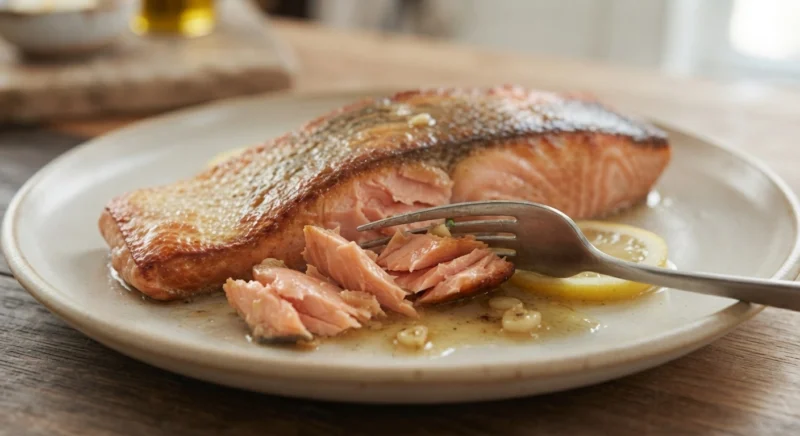
2. Look at the flesh
The salmon should transition from translucent to opaque.
The center may remain slightly more tender and moist than the outer portions.
3. Check the texture
Press the thickest part gently with a spatula or clean utensil.
The fish should feel firm but still have some spring.
If it feels extremely hard and dry, it has probably been cooked too far.
For beginners, a thermometer is the easiest way to remove uncertainty.
Why Overcooked Salmon Becomes Dry
Salmon contains fat, but that does not make it impossible to overcook.
As the fish becomes hotter, proteins tighten.
The tighter the proteins become, the more moisture is pushed out.
That is why a salmon fillet can go from beautifully moist to dry in a surprisingly short amount of time.
The difference may be only a couple of minutes.
This is why the final cooking stage should be controlled carefully.
Carryover Cooking
One reason beginners sometimes overcook salmon is that they forget that cooking continues after the fish leaves the pan.
The skillet may be removed from the heat, but the center of the salmon remains hot.
Heat continues moving inward.
This is called carryover cooking.
For that reason, it is better to remove the salmon when it has reached the appropriate stage rather than leaving it in the pan until it looks completely finished.
Should You Rest Salmon?
Yes, but salmon does not need a long rest like a large roast.
Let the cooked fillets sit for about 2–3 minutes before serving.
This allows the heat to settle and gives the juices a moment to redistribute.
Do not cover the salmon tightly with foil.
Steam trapped under foil can soften the crispy skin you worked to create.
The Crispy Skin Problem
If your salmon tastes good but the skin is soft, several things may have gone wrong.
The skin was wet
This is the most common reason.
Pat the salmon thoroughly dry before cooking.
The pan was too cool
A cool pan encourages steaming rather than browning.
You moved the salmon too much
Constant movement prevents the skin from developing a strong crust.
You flipped too early
The skin needs time to brown and firm up.
You overcrowded the pan
Too many fillets can reduce the temperature of the pan and increase moisture.
Cook in batches if necessary.
Should You Start With a Cold Pan?
Some salmon cooking methods begin with a cold pan.
That technique can work, particularly for gradually rendering the skin.
However, for this recipe, we are using a preheated skillet because it is easier to teach and repeat for beginners.
The important principle is consistent contact between the skin and the pan with controlled heat.
What If the Skin Is Sticking?
Do not panic.
Wait a little longer.
Then gently slide a thin spatula underneath the salmon.
If the skin has developed a good crust, it should gradually release.
If you are using stainless steel, this is particularly important.
Food often releases more easily after browning has occurred.
Trying to force it too early can tear the skin.
What If the Salmon Is Browning Too Quickly?
Lower the heat.
If the skin is becoming dark brown while the center is still almost completely translucent, the pan is too hot.
Reduce the heat and continue cooking more gently.
You can also move the pan away from the burner briefly if necessary.
Cooking should be controlled rather than aggressive.
What If the Salmon Is Not Browning?
Check three things:
- Is the salmon dry?
- Is the pan hot enough?
- Is there too much liquid in the pan?
If the fish is wet, browning will be difficult.
If the pan is too cool, the skin will remain pale.
If you added too much butter or liquid early, the salmon may effectively steam.
Dry fish and a properly heated skillet are the solution.
What If the Salmon Is Raw in the Center?
If the outside is already browned but the center needs more cooking, reduce the heat.
Continue cooking gently.
You do not need to increase the heat dramatically.
High heat will mostly make the outside darker while the center remains behind.
Lower, controlled heat gives the center time to catch up.
What If the Salmon Is Dry?
Unfortunately, once salmon is significantly overcooked, there is no way to reverse the texture.
But you can prevent it next time.
Use:
- Lower finishing heat
- Shorter final cooking time
- A thermometer
- Thicker, more evenly sized fillets
- Less aggressive cooking
Remember that salmon continues cooking after it leaves the pan.
Common Beginner Mistakes
Mistake 1: Not drying the salmon
Wet skin is one of the enemies of crispness.
Solution: Pat the fillets thoroughly dry.
Mistake 2: Starting with an insufficiently heated pan
The salmon sits in oil instead of immediately beginning to sear.
Solution: Preheat the skillet and oil before adding the fish.
Mistake 3: Using extremely high heat
High heat can burn the skin while leaving the center undercooked.
Solution: Use medium to medium-high heat and adjust as necessary.
Mistake 4: Moving the salmon constantly
This prevents proper browning.
Solution: Let the fish cook undisturbed.
Mistake 5: Flipping too early
The skin may tear and remain stuck to the pan.
Solution: Wait until the skin has browned and the fish releases more easily.
Mistake 6: Cooking the second side too long
The fish may already be almost finished.
Solution: Remember that the flesh side usually needs only a short finishing period.
Mistake 7: Adding garlic too early
Garlic can burn before the salmon is finished.
Solution: Add garlic during the final butter-basting stage.
Mistake 8: Adding lemon juice too early
Large amounts of liquid can interfere with browning.
Solution: Use lemon as a finishing ingredient.
Mistake 9: Covering the pan
Covering traps steam.
That can soften the skin.
Solution: Keep the pan uncovered during the searing process.
Knife Technique for Salmon Preparation
Although salmon does not require much cutting, a sharp kitchen knife is still useful.
You may need to trim uneven edges or divide a large fillet into individual portions.
Use a stable cutting board and keep your fingers away from the blade.
For clean portions, use a long, sharp knife and make smooth strokes rather than pressing aggressively downward.
A sharp knife is safer and gives you more control because it requires less force.
This is especially important when working with delicate fish.
If you are preparing a whole side of salmon, a long flexible fillet knife can be particularly useful.
How to Cut Salmon Into Portions
If you have a large salmon fillet rather than individual portions, decide how many servings you want before cutting.
Aim for pieces of similar thickness.
Cut perpendicular to the length of the fillet.
Do not saw aggressively back and forth.
Use long, controlled strokes.
The goal is to preserve the shape of the fish.
Can You Cook Salmon With the Skin Removed?
Yes.
The recipe still works.
However, skinless salmon behaves differently.
Without the skin, the flesh is more directly exposed to the pan.
It can also be more difficult to flip without breaking.
If using skinless salmon, reduce the cooking intensity and handle it gently.
The cooking time may also be shorter depending on thickness.
Can You Use Frozen Salmon Without Thawing?
For this particular method, thawing is strongly preferred.
A frozen center makes it difficult to brown the outside properly while cooking the middle evenly.
The surface may become overcooked before the center is ready.
Thaw the salmon in the refrigerator and dry it thoroughly before cooking.
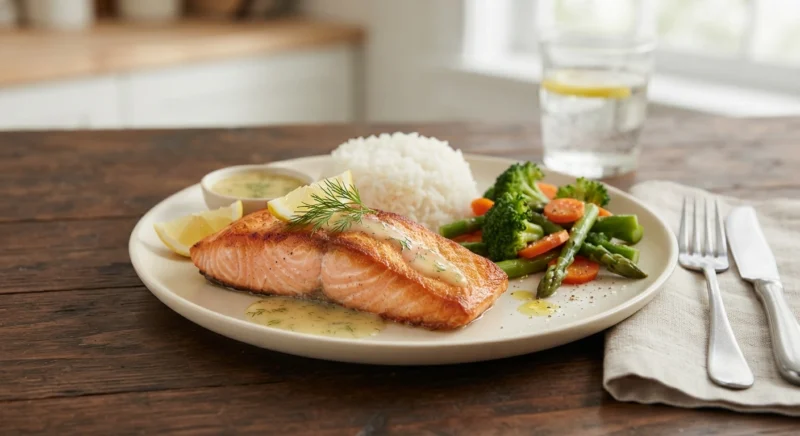
What to Serve With Pan-Seared Salmon
Salmon works with a huge variety of side dishes.
Good choices include:
- Roasted potatoes
- Mashed potatoes
- Rice
- Steamed vegetables
- Roasted asparagus
- Green beans
- Broccoli
- Simple salad
- Sautéed spinach
- Couscous
- Quinoa
Because salmon is rich, simple sides often work particularly well.
You do not need a complicated side dish.
A crisp green vegetable and roasted potatoes can be enough for a complete dinner.
Pan-Seared Salmon With Asparagus
One of the easiest combinations is salmon with asparagus.
The asparagus can be roasted or quickly sautéed.
Season it simply with salt, pepper, olive oil, and lemon.
The mild bitterness of asparagus works well with the richness of salmon.
If you are preparing both in the same meal, cook the asparagus first or use a separate pan.
Do not overcrowd the salmon skillet.
The goal is to keep the salmon skin in direct contact with the hot surface.
Pan-Seared Salmon With Potatoes
Potatoes provide a neutral, comforting side for salmon.
Roasted potatoes are particularly good because they provide a crisp contrast to the tender fish.
You can season them with:
- Salt
- Black pepper
- Olive oil
- Garlic
- Rosemary
- Thyme
Prepare the potatoes first because they usually require much longer cooking than salmon.
The salmon can then be cooked shortly before serving.
Pan-Seared Salmon With a Simple Salad
For a lighter meal, serve the salmon with a simple green salad.
Use:
- Lettuce
- Cucumber
- Tomato
- Fresh herbs
- Lemon
- Olive oil
Keep the dressing relatively light.
A heavy creamy dressing can overpower the fish.
Simple Lemon Butter Finish
If you want a quick sauce, you can make one directly in the skillet.
After removing the salmon:
- Lower the heat.
- Add a small amount of butter.
- Add a squeeze of fresh lemon juice.
- Add a little black pepper.
- Stir briefly.
- Spoon the sauce over the salmon.
Do not boil the lemon butter aggressively.
The goal is a light finishing sauce rather than a thick reduction.
A Simple Herb Finish
Fresh herbs can make the dish feel more elegant without adding much work.
Good options include:
- Dill
- Parsley
- Chives
- Thyme
Dill is especially compatible with salmon.
Add delicate fresh herbs near the end rather than cooking them aggressively.
Why Salmon and Lemon Work So Well
Salmon contains a relatively rich, fatty flavor.
Acid provides contrast.
Lemon does not make salmon taste “more lemony” only. It can also make the natural flavor of the fish seem cleaner and brighter.
That is why a small amount of lemon can have a significant effect.
The key is moderation.
You want the salmon to remain the main flavor.
Should You Use Soy Sauce?
Soy sauce can be delicious with salmon, but it changes the character of the dish.
If you want a classic Western-style pan-seared salmon, salt and lemon are enough.
If you want an Asian-inspired variation, soy sauce, ginger, sesame oil, or miso can be excellent.
That would be a different recipe rather than a necessary part of this classic version.
Can You Add Honey?
Yes, but again, it changes the style.
Honey can create a sweet glaze, but it should be added near the end because sugars can burn quickly.
For this classic recipe, I recommend keeping the salmon savory and using lemon for brightness.
Scaling the Recipe
This recipe is easy to scale.
For two servings, use two salmon fillets.
For six servings, use six fillets.
The important limitation is the size of your pan.
Do not simply keep adding salmon until the skillet is packed.
There should be enough room around each fillet for proper heat circulation and evaporation.
If necessary, cook in batches.
Cooking Salmon for a Crowd
If you need to cook a large amount of salmon, pan-searing individual fillets can become difficult.
The biggest challenge is maintaining the correct pan temperature.
For a small dinner, pan-searing is excellent.
For a large gathering, oven roasting or another batch-friendly cooking method may be more practical.
However, if pan-searing is your preferred method, work in batches and keep the finished salmon warm rather than overcrowding the pan.
Food Safety
Salmon is a perishable food and should be handled carefully.
Keep raw salmon refrigerated until you are ready to prepare it.
Use clean utensils and cutting boards.
Wash your hands after handling raw fish.
Do not allow raw salmon or its juices to contact ready-to-eat foods.
Cook salmon according to appropriate food-safety guidance for your household and location.
An instant-read thermometer is particularly useful if you are uncertain about doneness.
What to Do With Leftover Salmon
Leftover salmon can be used in several ways.
You can:
- Add it to a salad
- Make a salmon sandwich
- Add it to rice
- Mix it into pasta
- Make salmon cakes
- Add it to scrambled eggs
- Serve it cold with a lemon dressing
Try not to repeatedly reheat salmon.
Repeated heating tends to dry it out.
How to Reheat Salmon
The microwave is convenient, but it can easily overcook fish.
A gentler approach is to reheat the salmon in a covered skillet over low heat with a small amount of moisture.
You can also warm it gently in the oven.
The goal is not to cook it again.
You are simply bringing it back to serving temperature.
Can You Eat Pan-Seared Salmon Cold?
Yes, provided it has been stored safely.
Cold leftover salmon can be excellent in salads.
Break it into large flakes and combine it with:
- Greens
- Cucumber
- Tomato
- Lemon
- Olive oil
- Fresh herbs
Cold salmon often has a slightly firmer texture than freshly cooked salmon, making it particularly suitable for salads and sandwiches.
Why This Recipe Uses Butter at the End
Oil is better suited to the initial searing stage because it can tolerate the cooking temperature better than butter.
Butter contains milk solids that can brown and eventually burn.
Adding butter later gives you the flavor of butter without forcing it to survive the entire high-heat cooking process.
This is a useful general cooking principle:
Use an appropriate fat for the cooking stage you are in.
Oil for searing.
Butter for finishing.
The Difference Between Searing and Frying
Pan-searing does not mean submerging the salmon in oil.
You only need a thin layer of fat.
The hot pan contacts the salmon directly.
That direct contact creates browning.
Too much oil is unnecessary and can make the dish feel greasy.
How to Get Restaurant-Style Skin
If you want especially crisp skin, focus on four things.
1. Dry the skin thoroughly.
This is essential.
2. Use enough heat.
The pan must be properly preheated.
3. Press gently at the beginning if needed.
Salmon skin can curl slightly when it first hits the hot pan.
If this happens, gently press the fillet down with a fish spatula for several seconds.
This helps create more even contact.
Do not press constantly.
4. Do not move the fish unnecessarily.
Let the crust develop.
Why Does Salmon Skin Curl?
The skin and flesh respond differently to heat.
As the skin contracts, the fillet can curl slightly.
This can reduce contact with the pan.
If the edges lift, gently press the fillet down for a few seconds using a spatula.
Once the skin begins to cook and firm up, the fillet should settle.
The Best Spatula for Salmon
A thin, flexible fish spatula is ideal.
Its thin edge can slide underneath the fish without tearing the skin.
A wide spatula is even better for larger fillets because it supports more of the fish.
Avoid using a fork to flip salmon.
Piercing the fish allows juices to escape and makes it easier for the fillet to break apart.
Why You Should Not Press Salmon While Cooking
Pressing salmon aggressively with a spatula may seem like a way to improve contact with the pan.
It is not.
Once the skin has settled, leave the fish alone.
Excessive pressure can squeeze moisture from the flesh.
The exception is the brief gentle pressure immediately after placing the fish in the pan if the skin is curling.
How to Tell If the Pan Is Too Hot
Warning signs include:
- Oil smoking heavily
- Butter turning dark immediately
- Skin becoming dark before the flesh begins cooking properly
- Strong burning smell
- Excessive splattering
If this happens, reduce the heat.
Cooking should produce steady sizzling rather than violent smoking.
How to Tell If the Pan Is Too Cool
Signs include:
- Almost no sizzling
- Salmon releasing lots of liquid
- Skin remaining pale
- Very slow browning
- Fish appearing to steam
Increase the heat gradually rather than suddenly turning the burner to maximum.
A Simple Cooking Timeline
For four average salmon fillets:
Before cooking
Pat salmon dry and season.
Minute 0
Heat skillet and oil.
Minute 1
Place salmon skin-side down.
Minutes 2–5
Allow the skin to brown while the flesh cooks upward.
Around minute 5
Check the color and thickness of the cooked portion.
Minutes 5–7
Flip the salmon when appropriate.
Final 1–2 minutes
Add butter and optional garlic or herbs.
Baste briefly.
Finish
Remove from heat and rest for a few minutes.
Remember that these times are approximate.
Thickness and temperature matter more than the clock.
A Beginner’s Mental Checklist
Before putting the salmon in the pan, ask:
Is the salmon dry?
If not, dry it.
Is the pan hot?
If not, wait.
Is the salmon skin-side down?
It should be.
Am I going to move it too soon?
Don’t.
Is the skin browning?
Good.
Has most of the flesh become opaque?
You are getting close.
Does the salmon need more time after flipping?
Usually only a little.
Have I added butter at the right time?
Near the end.
Am I checking doneness rather than blindly following the clock?
That’s the key.
Classic Pan-Seared Salmon Recipe
Ingredients
- 4 salmon fillets with skin, about 5–7 ounces each
- 1 tablespoon neutral cooking oil
- 1 tablespoon unsalted butter
- 1 teaspoon kosher salt, or to taste
- ½ teaspoon freshly ground black pepper
- 1 lemon, cut into wedges
Optional
- 1–2 garlic cloves, lightly crushed
- Fresh thyme, dill, or parsley
Instructions
1. Prepare the salmon
Pat the salmon fillets thoroughly dry with paper towels.
Check for pin bones and remove them if necessary.
Season both sides with salt and black pepper.
2. Heat the skillet
Place a heavy skillet over medium to medium-high heat.
Add the oil.
Allow the oil to become hot and lightly shimmering without smoking heavily.
3. Start skin-side down
Carefully place the salmon fillets into the pan skin-side down.
If the skin curls, gently press the fillets down with a fish spatula for several seconds.
Then leave them undisturbed.
4. Crisp the skin
Cook until the skin is deeply golden and crisp.
The exact time will depend on the thickness of the salmon, but approximately 4–6 minutes is a useful starting point.
Watch the flesh as it becomes opaque from the bottom upward.
5. Flip
Once the salmon is mostly cooked through and the skin is crisp, carefully slide a fish spatula underneath each fillet.
Turn the salmon.
6. Add butter
Add the butter to the skillet.
If using garlic and herbs, add them now.
Allow the butter to foam gently.
7. Baste
Tilt the skillet slightly and spoon the melted butter over the salmon.
Continue cooking for approximately 1–3 minutes, depending on thickness and desired doneness.
8. Check doneness
Use an instant-read thermometer if desired.
Otherwise, check the thickest part of the fish for the desired texture and appearance.
Follow appropriate food-safety guidance for the final internal temperature.
9. Finish
Remove the salmon from the pan.
Let it rest for 2–3 minutes.
Serve with fresh lemon wedges and your preferred side dishes.
Quick Troubleshooting Guide
The skin is not crispy.
Dry the salmon better, use a properly heated pan, and avoid moving the fish.
The salmon sticks.
It may need more time before turning. Slide a thin spatula underneath rather than forcing it.
The outside is burned but the center is raw.
The heat is too high. Lower it and cook more gently.
The salmon is dry.
It was probably cooked too long. Use a thermometer and remember about carryover cooking.
The skin is crisp but the flesh is undercooked.
After crisping the skin, lower the heat and allow the center to finish gently.
The butter burns.
Add it later and reduce the heat.
Garlic tastes bitter.
It was probably added too early or cooked at too high a temperature.
The salmon breaks apart.
Handle it gently and use a wide fish spatula.
Why Simple Salmon Is Often Better
There is a temptation to cover salmon with sauces, marinades, spices, and toppings.
Sometimes that is exactly what you want.
But a good salmon fillet does not need much help.
When the skin is properly crisped and the center remains moist, the fish already has a rich, satisfying flavor.
Salt brings out the natural flavor.
Black pepper adds warmth.
Butter adds richness.
Lemon adds brightness.
That is enough.
The real skill is not adding more ingredients.
It is cooking the salmon correctly.
Final Tips for Perfect Pan-Seared Salmon
If you remember only a few things from this recipe, remember these:
Dry the salmon thoroughly.
Moisture prevents crisping.
Preheat the pan.
A properly heated skillet gives you better browning.
Start skin-side down.
The skin protects the fish and gives you the opportunity to create a crisp crust.
Do not move the salmon too early.
Let the skin develop before trying to flip it.
Use moderate, controlled heat.
Extremely high heat is not the secret to better salmon.
Flip only once if possible.
The fewer times you manipulate the fish, the less likely it is to break.
Add butter near the end.
This gives you butter flavor without burning it.
Use lemon as a finishing touch.
A little acidity balances the richness of the salmon.
Check doneness carefully.
Thickness varies, so cooking time is never an exact number.
Do not overcook it.
Moist salmon is the goal.
Final Thoughts
A great pan-seared salmon dinner does not depend on complicated ingredients or advanced culinary techniques.
It depends on a few simple principles.
Dry the fish.
Heat the pan properly.
Start skin-side down.
Give the skin enough time to become crisp.
Finish the flesh gently.
And stop cooking before the salmon becomes dry.
Once you understand these principles, pan-seared salmon becomes one of the easiest high-quality dinners you can make at home.
The beauty of this recipe is that the finished dish feels much more sophisticated than the amount of work required.
A crisp piece of salmon, a little butter, fresh lemon, and a simple vegetable or potato side dish are enough to create a complete meal.
And once you become comfortable with the basic method, you can use it as a foundation for many variations—garlic butter salmon, lemon herb salmon, salmon with roasted vegetables, or more elaborate sauces.
But start with the classic version.
Good salmon does not need to be complicated. It needs to be cooked with control.