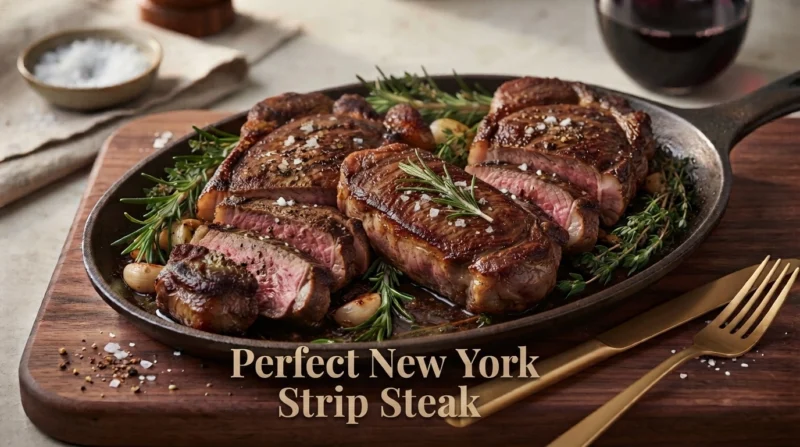
New York Strip Steak
A great New York Strip Steak does not require complicated ingredients, an expensive grill, or advanced cooking skills.
What it does require is good heat control, a properly prepared steak, and knowing what to look for at each stage of cooking.
New York Strip is one of the best steaks for learning how to cook beef properly. It has enough marbling to stay flavorful, but it is leaner than a ribeye, which means that overcooking it can make it noticeably firmer and drier. The goal is therefore simple:
Build a deeply browned crust while keeping the center juicy and tender.
In this guide, I will show you exactly how to do that in a skillet at home.
You will learn:
- how to choose a good New York Strip
- how thick the steak should be
- whether to bring it to room temperature
- how to dry and season it
- why the pan needs to be very hot
- how to create a proper crust without burning the steak
- when to add butter, garlic, and herbs
- how to use a meat thermometer
- how to avoid overcooking
- why resting matters
- how to slice the steak correctly
- which knife works best
- the most common beginner mistakes
- what to serve with New York Strip
The result is a steak with a deeply browned exterior, a juicy center, and concentrated beef flavor.
What Is a New York Strip Steak?
New York Strip comes from the short loin of the cow. It is also commonly called strip steak, NY strip, top loin steak, shell steak, or club steak. It is a relatively tender cut with a good balance between tenderness and beefy flavor.
Unlike tenderloin, New York Strip has more pronounced beef flavor and a firmer bite.
Unlike ribeye, it generally has less internal fat.
That combination makes it especially good for high-heat cooking.
A properly cooked New York Strip should have:
- a dark golden-brown crust
- a juicy interior
- noticeable beef flavor
- enough tenderness to cut easily
- some chew, but not toughness
The biggest mistake is treating it like a steak that can simply be left in a hot pan until it “looks done.”
The outside can look perfect while the center is already overcooked.
That is why temperature control is more reliable than appearance alone.
Check Our Guide Best Steak and Beef Recipes: 15 Easy & Delicious Beef Recipes
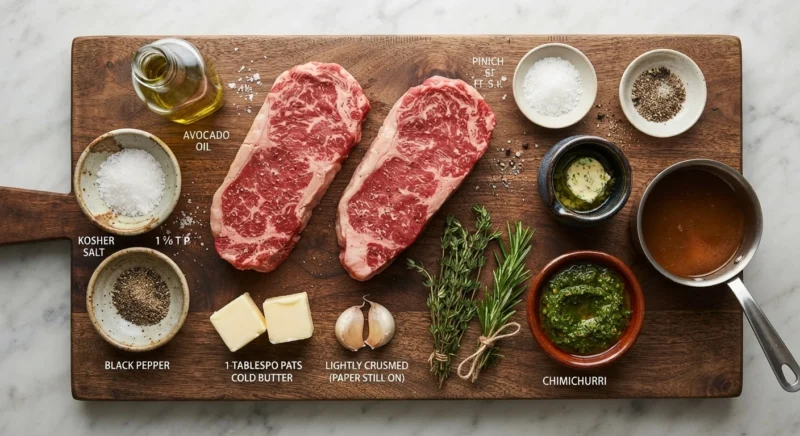
Ingredients
For 2 steaks:
- 2 New York Strip steaks, preferably about 1 to 1½ inches thick
- 1–1½ teaspoons kosher salt, or to taste
- ½–1 teaspoon freshly ground black pepper
- 1 tablespoon high-heat cooking oil
- 2 tablespoons unsalted butter
- 2 garlic cloves, lightly crushed
- 2–3 sprigs fresh thyme or rosemary
Optional:
- flaky finishing salt
- freshly cracked black pepper
- a small amount of compound butter
- chimichurri
- pan sauce
You do not need a complicated steak rub.
For a good strip steak, the beef itself should remain the star.
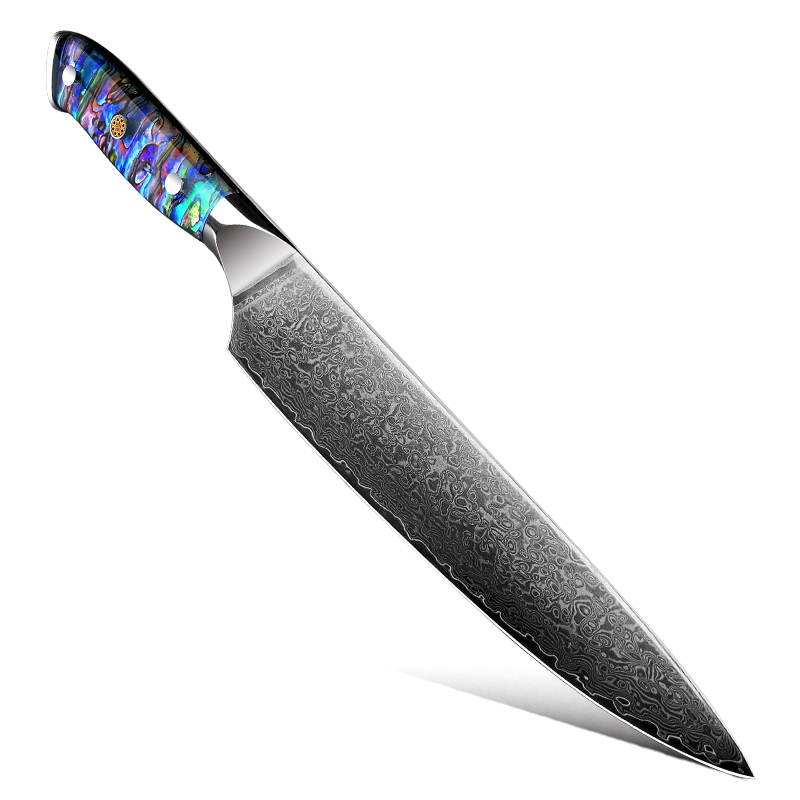
https://yashkadesigns.com/chef-knife-8-inch-abalone-shell-handle
Equipment
You will need:
- heavy cast-iron or thick-bottomed skillet
- tongs
- instant-read meat thermometer
- cutting board
- sharp chef’s knife or slicing knife
- paper towels
A heavy skillet is particularly useful because it retains heat when the cold steak is added.
That matters because you want the pan to recover its temperature quickly after the steak hits the surface.
Check Our Guide Best Knives for Steak: Slicing, Cutting & Serving
Step 1: Choose the Right New York Strip
If you have a choice, look for a steak that is:
- at least about 1 inch thick
- evenly shaped
- reasonably well marbled
- bright red or deep red when fresh
- not excessively thin
- without large amounts of surface moisture
Why thickness matters
A very thin steak cooks extremely quickly.
That creates a problem for beginners.
You want enough time to develop a crust before the center becomes overcooked.
A steak around 1–1½ inches thick gives you much more control.
A thick steak also makes it easier to create the contrast we want:
crusty outside + juicy center.
Step 2: Inspect the Fat
New York Strip often has a strip of external fat along one edge.
Do not automatically remove all of it.
That fat contributes flavor and can become beautifully browned during cooking.
However, if the fat layer is extremely thick, you can trim some of it.
You are not trying to make the steak fat-free.
You are simply removing unnecessary excess.
Beginner mistake
One common mistake is cutting away every visible piece of fat because it looks “unhealthy.”
That can remove an important source of flavor.
Another mistake is leaving a huge, thick strip of fat untouched.
That can make the finished steak difficult to eat.
Aim for balance.
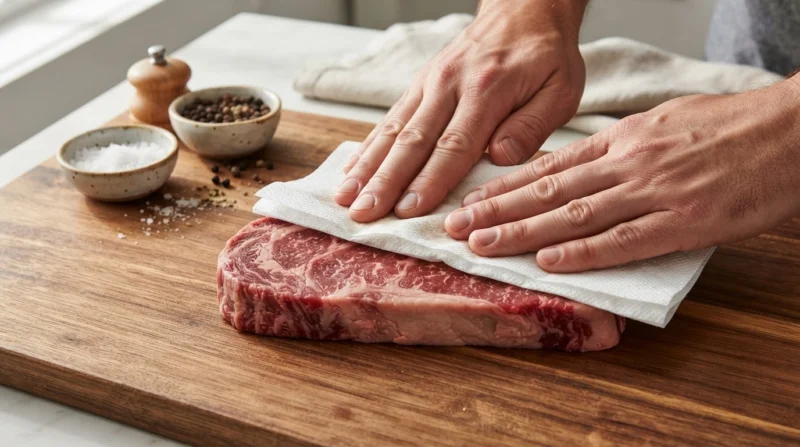
Step 3: Dry the Steak Very Well
Take the steak out of its packaging and pat the entire surface dry with paper towels.
Do not just dry the top.
Dry:
- top
- bottom
- sides
- fat edge
This step looks insignificant, but it is extremely important.
Why does the steak need to be dry?
A wet steak must first evaporate surface water before the exterior can brown efficiently.
Instead of immediately developing a deep crust, the pan spends energy turning water into steam.
You want the surface of the steak to brown as efficiently as possible.
Think of it this way:
Dry surface → better browning
Wet surface → steaming first
That is one reason restaurant steaks can develop such a strong crust.
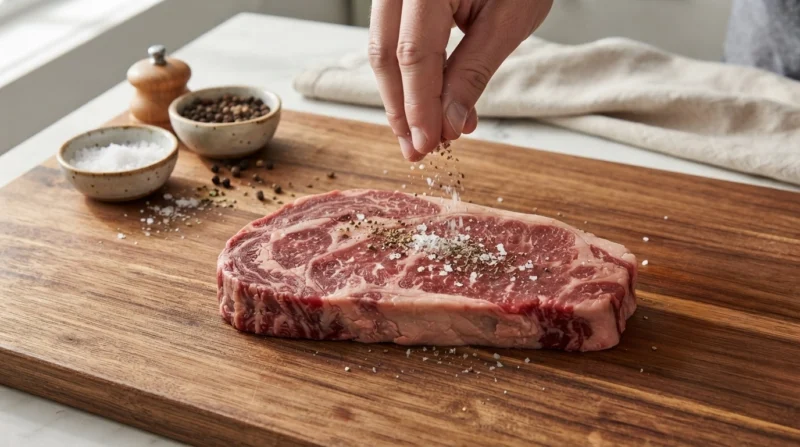
Step 4: Season the Steak
Season both sides generously with salt and freshly ground black pepper.
Make sure the seasoning reaches the entire surface.
Do not dump all the salt into one area.
Instead, distribute it evenly from a little distance above the steak.
This gives you more even coverage.
Should you salt the steak early?
There are several workable approaches.
For a beginner, you can salt the steak shortly before cooking, provided the surface is dry.
You can also salt it well in advance and allow the salt to work into the meat.
The important thing is consistency.
What you want to avoid is salting the steak and then leaving it sitting in a pool of moisture immediately before searing.
If the surface becomes wet, simply pat it dry again before cooking.
Step 5: Should You Bring the Steak to Room Temperature?
You will often hear that steak must sit on the counter for an hour or more before cooking.
That advice is frequently exaggerated.
A steak does not suddenly become room temperature throughout its center after a short period on the counter.
More importantly, leaving raw meat at room temperature for extended periods is unnecessary.
Instead:
- Remove the steak from the refrigerator.
- Prepare your pan and ingredients.
- Dry and season the steak.
- Cook it promptly.
Your goal is not to make the steak literally room temperature.
Your goal is to cook it correctly.
Step 6: Preheat the Pan Properly
Place a heavy skillet over medium-high to high heat.
Allow it to become thoroughly hot before adding the oil.
You want the pan hot enough that the steak immediately begins producing a strong sizzle.
A properly heated heavy skillet helps create the browned crust that defines a great pan-seared steak.
A beef-cooking reference similarly recommends heating a cast-iron pan until very hot before adding the steak and searing it until deeply browned.
But don’t chase extreme heat.
There is a difference between:
very hot
and
burning hot.
If the oil immediately produces a huge amount of smoke and the pan smells burnt before the steak goes in, reduce the heat slightly.
You want aggressive browning—not charcoal.
Step 7: Add the Oil
Add about 1 tablespoon of high-heat cooking oil.
Swirl the pan so the bottom is lightly coated.
Then immediately add the steak.
You should hear a strong, steady sizzle.
That sound is useful.
It tells you that the steak has made contact with a hot cooking surface.
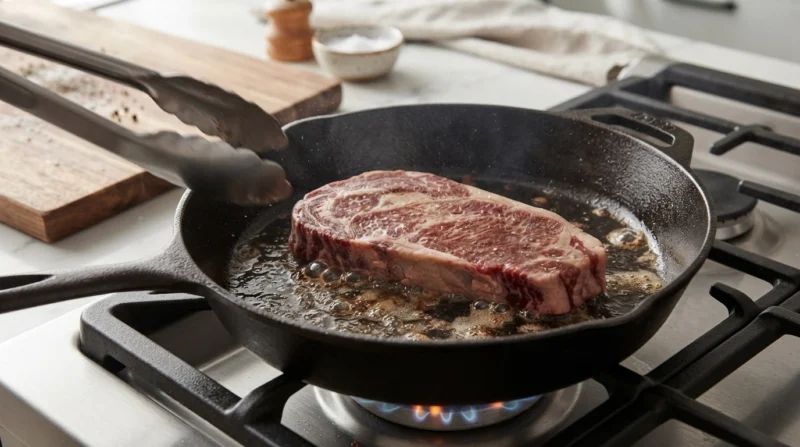
Step 8: Place the Steak Down and Leave It Alone
This is one of the most important lessons for beginners.
Once the steak is in the pan:
Do not immediately move it around.
Do not slide it back and forth.
Do not repeatedly lift it to inspect the bottom.
Do not press it down every 10 seconds.
Let the surface make stable contact with the skillet.
You are building a crust.
Constant movement interferes with that process.
How do you know when to turn it?
Look at the edges.
You should begin to see browning developing upward from the bottom.
When the first side has developed a strong golden-brown to deep-brown crust, turn the steak.
The exact time depends on:
- thickness
- pan temperature
- starting temperature
- type of pan
- amount of surface moisture
So use appearance and temperature, rather than blindly following one cooking time.
Step 9: Sear the Second Side
Flip the steak using tongs.
The second side should immediately begin sizzling.
Continue cooking until the second side develops a similarly attractive crust.
At this point, the steak may already be approaching your desired internal temperature.
This is why a thermometer becomes so useful.
Step 10: Sear the Fat Edge
If your New York Strip has a noticeable fat strip along the edge, use tongs to hold the steak upright.
Press the fat edge against the hot pan.
Allow it to brown and render slightly.
You do not need to completely melt the fat.
The goal is to turn the outside edge golden and flavorful.
This is an easy step to skip, but it makes the steak look and taste more finished.
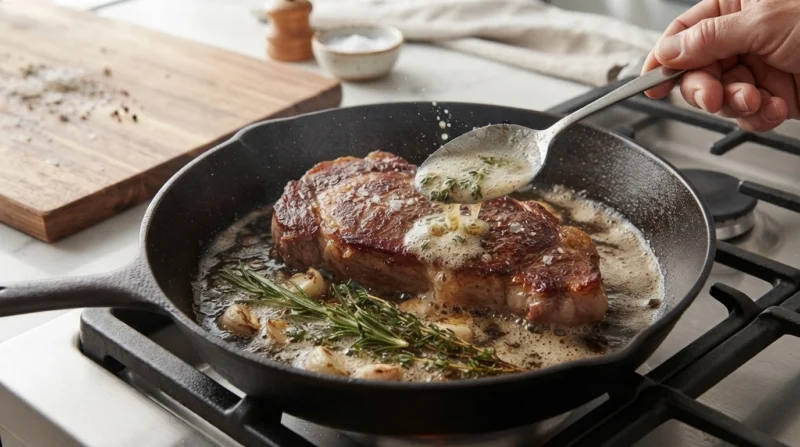
Step 11: Add Butter, Garlic, and Herbs
Once the steak has developed its crust, reduce the heat slightly.
Add:
- butter
- crushed garlic
- thyme or rosemary
The butter should foam rather than immediately burn.
Now tilt the pan slightly and use a spoon to repeatedly pour the foaming butter over the steak.
This is called basting.
The hot butter coats the surface and carries the aromas of garlic and herbs across the steak.
Why not add butter at the beginning?
Because butter contains milk solids that can burn at the very high temperatures used for initial searing.
Oil is better suited to the first stage.
Butter is especially useful later, once the steak has already developed its crust and you have reduced the heat.
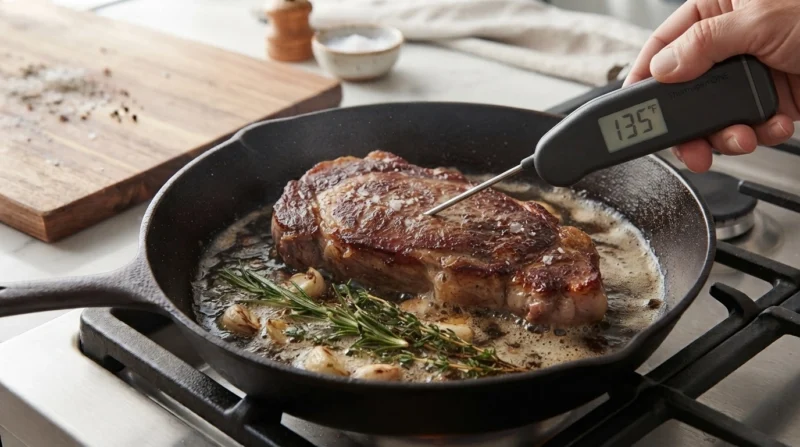
Step 12: Use a Thermometer
This is where you stop guessing.
Insert an instant-read thermometer into the thickest part of the steak.
Try to position the probe into the center rather than touching the pan.
The center is the part that matters.
USDA guidance states that whole beef steaks should reach a minimum internal temperature of 145°F (62.8°C) measured with a food thermometer, followed by at least a three-minute rest.
For the recipe, temperature should take priority over a fixed cooking time.
A one-inch steak and a one-and-a-half-inch steak can behave very differently in the same pan.
Understanding Steak Doneness
Many cooks use these approximate internal temperatures as cooking targets:
Rare
About 120–125°F / 49–52°C
Very red center and relatively soft texture.
Medium-rare
About 130–135°F / 54–57°C
Warm center with a pronounced pink-red interior.
Medium
About 140–145°F / 60–63°C
Pink center with a firmer texture.
Medium-well
About 150–155°F / 66–68°C
Only a small amount of pink remains.
Well-done
160°F+ / 71°C+
Very firm and substantially less juicy.
These are culinary doneness preferences, not substitutes for food-safety guidance.
For food safety, USDA recommends 145°F / 62.8°C for whole beef steaks with a minimum three-minute rest.
If you are serving anyone particularly vulnerable to foodborne illness, follow the food-safety recommendation rather than choosing a lower doneness temperature.
Step 13: Remove the Steak From the Pan
When the steak reaches your target temperature, transfer it to a clean cutting board or plate.
Do not immediately cut into it.
This is where patience becomes part of the recipe.
Step 14: Rest the Steak
Allow the steak to rest for at least three minutes for food safety, and many cooks prefer a somewhat longer rest for quality depending on thickness. USDA specifically recommends at least three minutes after reaching the minimum safe temperature.
Why rest?
During cooking, the interior of the steak becomes very hot.
If you cut into it immediately, hot juices can escape onto the cutting board.
Resting gives the meat time to settle.
Do not wrap it tightly in foil.
A tight foil covering traps steam.
That can soften the beautiful crust you worked hard to create.
A loose tent is acceptable if you need to keep it warm, but for a short rest, simply leaving the steak alone is often enough.
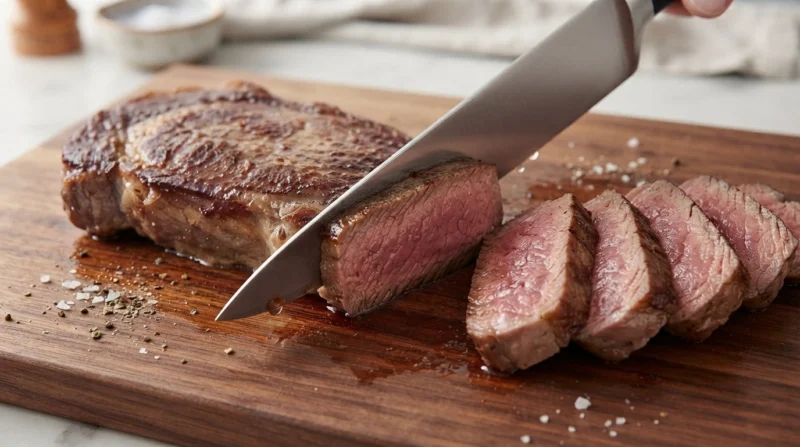
Step 15: Slice the New York Strip Correctly
Now comes the knife work.
First, look at the direction of the muscle fibers.
These long lines are called the grain.
Your goal is to cut across the grain, rather than parallel to it.
Why?
Because cutting across the muscle fibers shortens them.
Shorter fibers are easier to chew.
If you slice with the grain, the steak can feel much chewier even if you cooked it perfectly.
Which Knife Should You Use?
For serving a New York Strip, use a sharp chef’s knife or a long slicing knife.
The most important characteristic is not the brand.
It is sharpness.
A dull knife tends to:
- crush the crust
- drag through the meat
- tear the surface
- produce uneven slices
A sharp knife allows you to make a clean, controlled cut.
For a steak dinner, a good chef’s knife is also useful for preparing the vegetables, potatoes, herbs, and sauces that accompany the steak.
How Thick Should You Slice It?
There is no single correct thickness.
For a traditional steak presentation, you can serve the steak whole.
If slicing for a shared platter, cut slices approximately ½ inch thick.
For a steak salad or steak sandwich, thinner slices may be more appropriate.
The important thing is to keep the slices reasonably consistent.
That makes the steak easier to eat and gives the presentation a professional appearance.
Check Our Ultimate American BBQ Meat Guide: How to Cut Chicken, Steak & Ribs + 8 Easy BBQ Recipes
Common New York Strip Mistakes
Mistake 1: Starting with a wet steak
Moisture prevents efficient browning.
Solution: Pat the steak completely dry before seasoning and cooking.
Mistake 2: Using a cold pan
A cold pan cannot create a strong crust quickly.
Solution: Preheat the skillet thoroughly.
Mistake 3: Moving the steak constantly
Repeated movement prevents stable contact with the cooking surface.
Solution: Put the steak down and let the first side brown.
Mistake 4: Cooking by time alone
“Four minutes per side” is not a universal rule.
A steak’s thickness changes everything.
Solution: Use an instant-read thermometer.
Mistake 5: Adding butter too early
Butter can burn during aggressive high-heat searing.
Solution: Start with high-heat oil and add butter later for basting.
Mistake 6: Pressing the steak with a spatula
You may force some juices out and gain very little in return.
Solution: Leave the steak alone unless you need to turn it.
Mistake 7: Cutting immediately
You have spent all that time cooking the steak and then rush the final step.
Solution: Rest it before slicing.
Mistake 8: Slicing with the grain
This can make an otherwise perfectly cooked steak seem tough.
Solution: Identify the grain and cut across it.
What If the Steak Is Browning Too Quickly?
This happens frequently when beginners use very high heat.
If the outside is becoming dark before the center is ready:
- Reduce the heat.
- Continue cooking more gently.
- Check the internal temperature frequently.
- If necessary, move the steak to a lower-heat area of the pan.
You are looking for a deep brown crust, not a black one.
If the pan begins producing excessive smoke, the heat is probably too aggressive.
What If the Steak Is Not Browning?
If the steak remains pale:
Check the surface.
It may be too wet.
Pat it dry before cooking.
Check the pan.
It may not be hot enough.
Check how much steak is in the pan.
If you overcrowd the pan, the temperature can drop dramatically.
For two large steaks, use a sufficiently large skillet or cook them separately.
What If the Steak Is Too Tough?
Several things could be responsible.
It may be overcooked.
New York Strip is relatively lean, so excessive cooking can make it firm.
It may have been sliced with the grain.
This is one of the easiest mistakes to fix.
The steak itself may have been low quality.
Cooking technique cannot completely compensate for poor raw material.
It may have been cut too thin.
Thin steaks are much less forgiving.
The Best Pan for New York Strip
A heavy cast-iron skillet is an excellent choice.
It has two important advantages:
- It can become very hot.
- It retains heat well when cold meat is added.
A heavy stainless-steel skillet can also work extremely well.
A lightweight pan can work, but it may lose heat more quickly.
The important thing is not the material alone.
The pan needs to be:
hot + stable + large enough for the steak.
New York Strip on the Grill
The same basic principles apply when grilling.
You still want:
- a dry steak
- even seasoning
- strong initial heat
- good surface browning
- temperature control
- resting
- slicing across the grain
One advantage of grilling is the smoky flavor.
One advantage of a skillet is control.
You can easily add butter, garlic, herbs, and use the pan juices to build additional flavor.
For beginners, skillet cooking is often easier to control.
A Simple Garlic-Butter Version
Once you are comfortable with the basic technique, garlic butter is an easy upgrade.
For two steaks:
- 2 tablespoons unsalted butter
- 2 garlic cloves
- 2 sprigs thyme
- 1 sprig rosemary
After the initial sear:
- Reduce the heat.
- Add butter.
- Add garlic.
- Add herbs.
- Allow the butter to foam.
- Tilt the pan slightly.
- Spoon the butter over the steaks repeatedly.
- Continue until the steaks reach the desired internal temperature.
Do not burn the butter.
The butter should smell nutty and aromatic—not bitter and black.
What to Serve With New York Strip
A great steak does not need ten side dishes.
Choose one or two.
Classic choices
- roasted potatoes
- mashed potatoes
- crispy fries
- grilled asparagus
- roasted broccoli
- green beans
- sautéed mushrooms
- creamed spinach
- simple green salad
Sauces
You can also serve:
- chimichurri
- peppercorn sauce
- garlic butter
- red wine reduction
- horseradish cream
If the steak itself is high quality, keep the sauce relatively restrained.
You want to complement the beef rather than hide it.
A Simple Steak Dinner for Beginners
If this is your first time cooking New York Strip, don’t try to make five complicated dishes simultaneously.
Make this:
New York Strip + crispy potatoes + green vegetable
For example:
Steak
Pan-seared New York Strip with garlic butter.
Potatoes
Roasted potatoes with salt, pepper, and olive oil.
Vegetable
Asparagus or green beans finished with a little butter and lemon.
That is enough for a complete restaurant-quality dinner.
Food Safety
Raw beef should be handled carefully.
Keep raw meat refrigerated until you are ready to prepare it.
Use clean utensils and a clean cutting board.
Do not place cooked steak back onto a plate that held raw meat unless the plate has been washed first.
For whole beef steaks, USDA recommends reaching a minimum internal temperature of 145°F (62.8°C) as measured with a food thermometer, followed by at least three minutes of rest.
A thermometer is much more reliable than judging safety from the steak’s color.
For more detailed official guidance:
USDA FSIS — Safe Internal Temperature for Meat and Poultry
How Professionals Judge a Good Steak
When a chef looks at a finished New York Strip, there are several things they notice immediately.
1. The crust
It should be deeply browned rather than pale.
2. The surface
It should look relatively dry and crisp rather than wet.
3. The interior
The doneness should match the intended result.
4. The texture
The steak should have tenderness without becoming mushy.
5. The slicing
The grain should be cut correctly.
6. The seasoning
Salt should enhance the beef rather than dominate it.
The best steak cooking is not about doing more.
It is about controlling a few important variables correctly.
Why This Method Works
The entire recipe can be reduced to five principles:
1. Dry the steak
Less surface moisture means better browning.
2. Use strong initial heat
A hot pan helps develop the Maillard browning that gives the crust its deep flavor.
3. Do not constantly move the steak
Stable contact helps create an even crust.
4. Control the center with a thermometer
Thickness varies, so cooking time alone is unreliable.
5. Rest and slice correctly
Resting improves the eating experience, while cutting across the grain makes the meat easier to chew.
That is the foundation of a great New York Strip.
Frequently Asked Questions
What is the best way to cook New York Strip steak?
Pan-searing in a heavy skillet is one of the best methods because it gives you excellent control over browning and allows you to finish the steak with butter, garlic, and herbs.
How thick should a New York Strip be?
About 1–1½ inches is ideal for a forgiving home-cooking steak. Thicker steaks give you more time to develop a crust without overcooking the center.
Should I oil the steak or the pan?
For this method, lightly oil the pan. The goal is simply to provide enough fat to promote good contact and browning.
Should I use butter when cooking steak?
Yes, but preferably after the initial high-heat sear. Butter is excellent for finishing and basting but can burn during prolonged high-heat cooking.
How do I know when New York Strip is done?
The most reliable method is an instant-read thermometer inserted into the thickest part of the steak.
Should I cut steak immediately after cooking?
No. Let it rest before slicing. USDA recommends at least three minutes after reaching the minimum safe temperature.
Why is my New York Strip tough?
The steak may be overcooked, sliced with the grain, or simply started with a less tender piece of beef.
Should I slice New York Strip against the grain?
Yes. Cutting across the grain shortens the muscle fibers and generally makes each bite easier to chew.
Is New York Strip better than ribeye?
Neither is universally better. Ribeye is generally richer and more heavily marbled, while New York Strip offers a firmer texture and strong beef flavor with less internal fat.
Can I cook New York Strip without a cast-iron skillet?
Absolutely. A heavy stainless-steel or other thick-bottomed skillet can work very well.
Perfect New York Strip Steak Recipe Card
Ingredients
- 2 New York Strip steaks, 1–1½ inches thick
- 1–1½ teaspoons kosher salt
- ½–1 teaspoon black pepper
- 1 tablespoon high-heat cooking oil
- 2 tablespoons unsalted butter
- 2 garlic cloves
- 2–3 sprigs thyme or rosemary
Instructions
- Remove the steaks from their packaging.
- Pat them completely dry with paper towels.
- Season both sides evenly with salt and pepper.
- Heat a heavy skillet over medium-high to high heat.
- Add the oil.
- Place the steaks in the hot pan.
- Sear without moving until a deep brown crust develops.
- Flip and sear the second side.
- Brown the fat edge if necessary.
- Reduce the heat slightly.
- Add butter, garlic, and herbs.
- Baste the steaks with the foaming butter.
- Check the internal temperature with an instant-read thermometer.
- Remove when the steak reaches the appropriate target for your chosen doneness, while following the USDA minimum safety guidance.
- Rest for at least three minutes.
- Identify the direction of the grain.
- Slice across the grain if serving sliced.
- Serve immediately.
Final Thoughts
A perfect New York Strip is not about complicated seasoning or elaborate equipment.
It is about heat, timing, temperature, and restraint.
Dry the steak.
Season it properly.
Heat the pan.
Build the crust.
Finish with butter and herbs.
Use a thermometer.
Rest the steak.
Slice across the grain.
Once you understand those principles, you can apply the same technique to many other steaks.
And that is the real goal of learning to cook steak: not memorizing one recipe, but understanding why the method works.
For the right knife and cutting tools for steak preparation and serving, explore the Yashka Designs chef’s knife collection:
https://ask.fsis.usda.gov/article/What-is-a-safe-internal-temperature-for-cooking-meat-and-poultry